Nowadays, PayPal has become one of the most popular online payment methods thanks to its convenience for customers. For that reason, it is indispensable for online stores regardless of the platform they are using. And WooCommerce shops are not an exception.
Still, not everyone knows how to add Paypal to WooCommerce by themselves. Understanding the situation, we have researched on your behalf and provided a step-by-step guide in this article. Keep reading until you find something to take away!
- What is PayPal?
- Benefits of Integrating PayPal and WooCommerce
- Before Adding PayPal to WooCommerce
- How to Add PayPal to WooCommerce
What is PayPal?
PayPal is a digital payment platform whose primary function is allowing users to transfer money online with high-level protection.
The fee for each transaction will include a fixed fee and a 2.2% to 2.9% charge. The charge is determined by the total amount of your transaction.
You can also use PayPal to purchase services or goods in e-commerce stores. In this case, you must connect your bank account, credit, or debit cards with a PayPal account to withdraw and deposit money.
PayPal is accepted worldwide in more than 200 countries, with 25 different currencies available for online transactions. These functions and characteristics make it a great payment option for online purchases and transactions.
Benefits of Integrating PayPal and WooCommerce
PayPal has a great number of users. With nearly 450 million users worldwide, it is a perfect solution for your international payment issue. It is mostly accepted everywhere, and your visitors may know or currently use it.
That’s why PayPal is a great buddy for WooCommerce. It can be integrated well with your WooCommerce store. The WooCommerce PayPal integration only takes a few minutes, even though you’re new to WordPress.
The transaction speed of PayPal is remarkably fast. When the customers finish their payment process, the money will be immediately transferred into your PayPal account. So there will be no long waiting hours.
The fee for each transaction is crystal clear, as mentioned above. You don’t have to worry about paying any hidden fees.
Other services are ready to serve. You can utilize your PayPal account to send invoices, process refunds, create payments, or void transactions.
Before Adding PayPal to WooCommerce
Before jumping into the details of WooCommerce PayPal setup, there are some requirements you should care about.
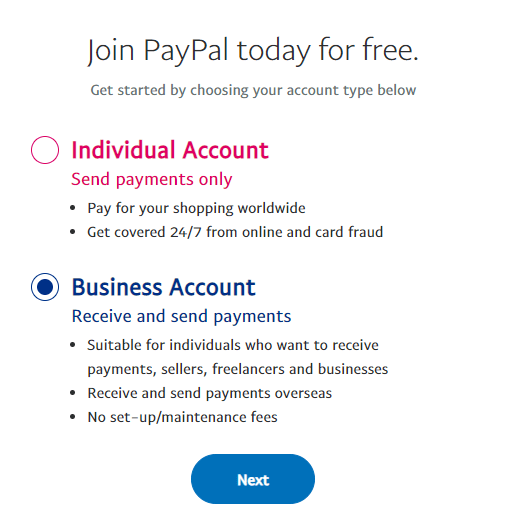
First, you must have a PayPal Business Account at hand. Access PayPal’s official website and create one if you are new to PayPal.
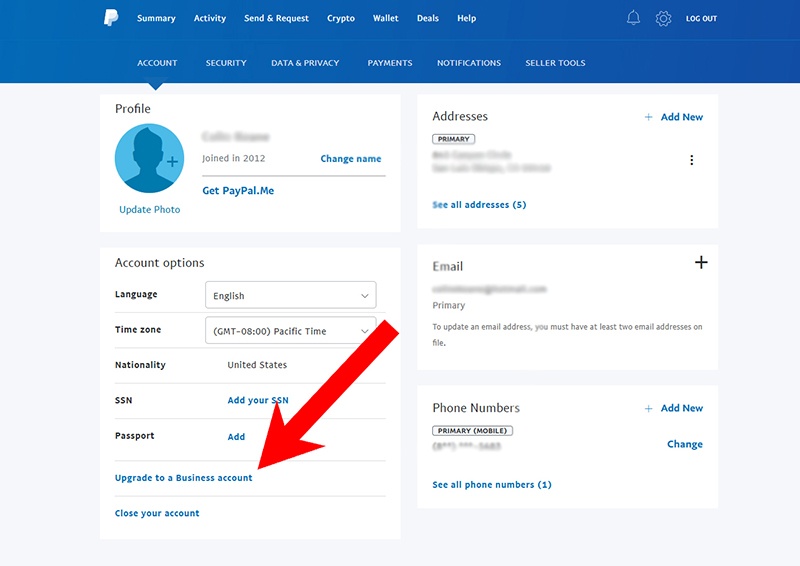
If you already have a PayPal Personal Account, you can convert it into a Business one for free. Login to your PayPal account, click Settings and scroll down to choose Upgrade to a Business account. Fill in all the required information and click on the Submit button at the end.
Second, make sure your WordPress is in version 5.3 or more. Also, PHP and WooCommerce should be at least in version 7.1 and 3.9, respectively.
How to Add PayPal to WooCommerce
When all the aforementioned criteria are fulfilled, you can start the process to add PayPal to WooCommerce shop.
Step 1: Install and Activate PayPal WooCommerce Plugin
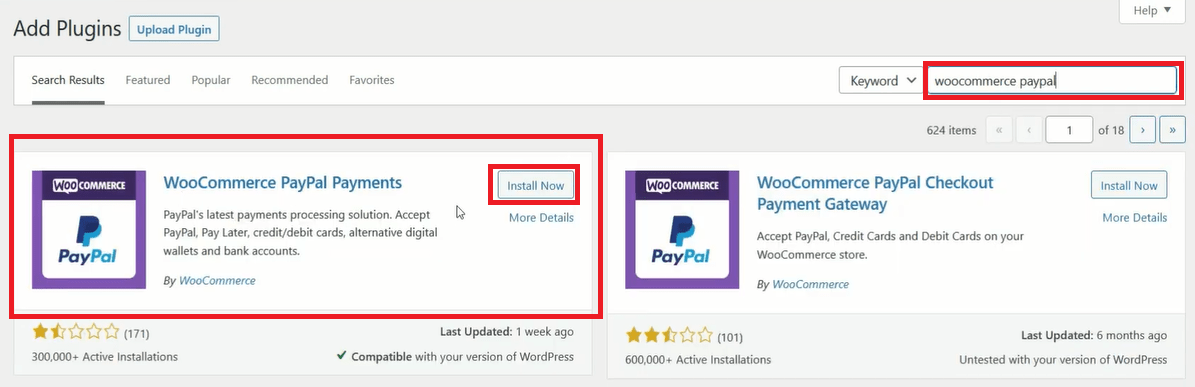
- In your WordPress dashboard, navigate to Plugins > Add New.
- Search for “woocommerce paypal” in the search box. WordPress will retrieve various results and we pick the WooCommerce PayPal Payments plugin by WooCommerce.
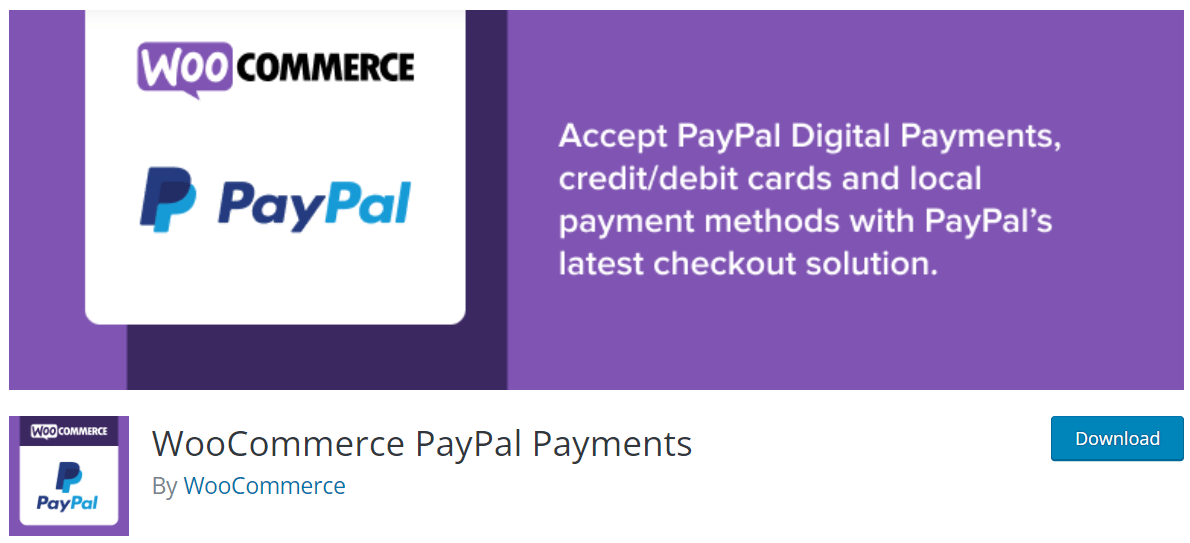
You might notice there is another plugin by WooCommerce named “WooCommerce PayPal Checkout Payment Gateway”. This plugin is the old version of “WooCommerce PayPal Payments” which is no longer updated by WooCommerce. Thus, you shouldn’t download this plugin.
3. Click on Install Now, wait for a few minutes for the installation to finish, and select Activate.
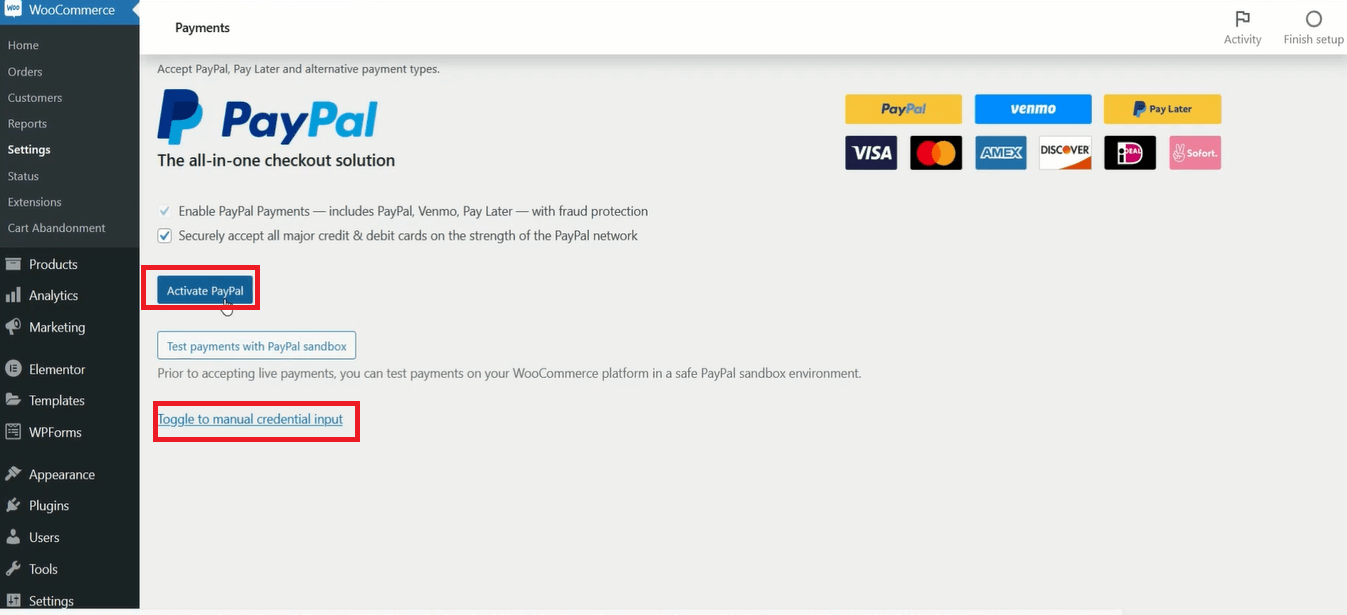
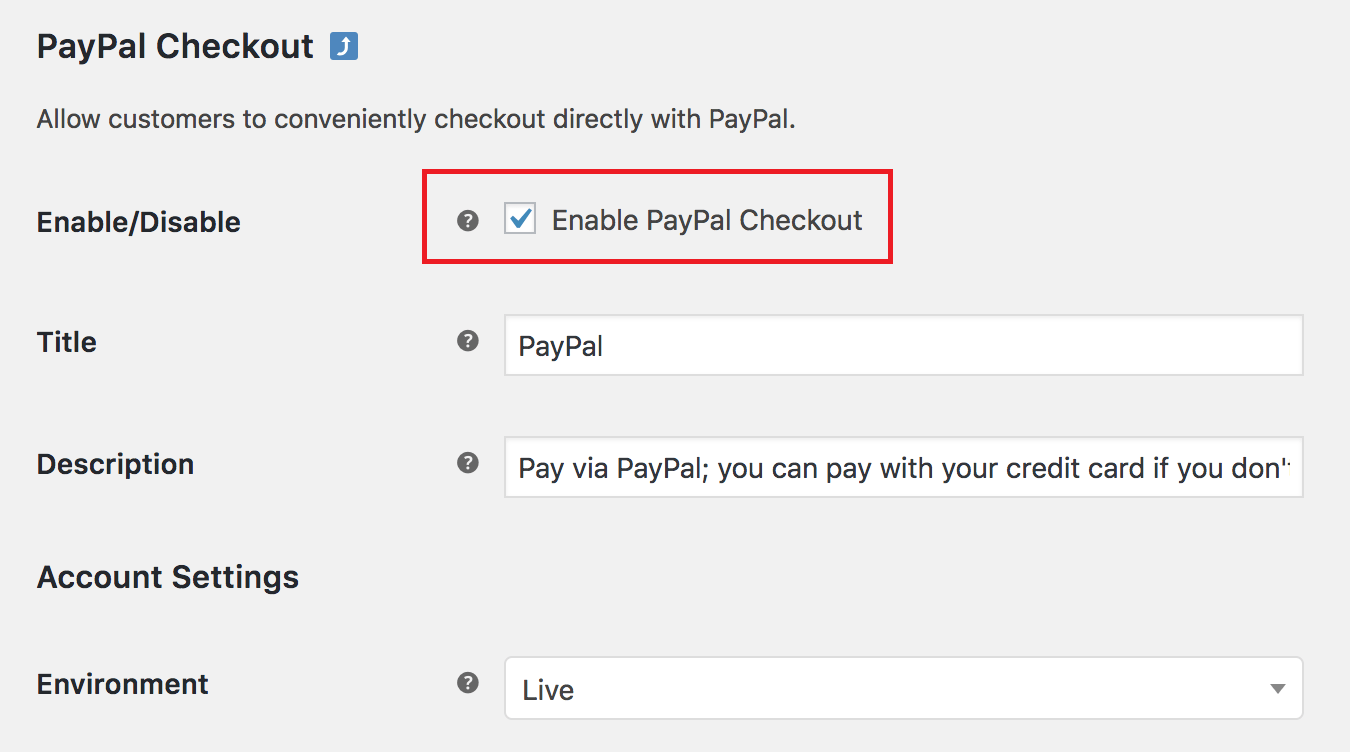
4. In the WooCommerce section, tap on Settings, and choose the Payments tab. You can notice the presence of PayPal in the list of payment methods.
5. Toggle on the PayPal option and click Save changes.

Step 2: Connect to PayPal
There are 2 choices for you to connect your WooCommerce stores to PayPal: Manual or Automatic.
Automatic
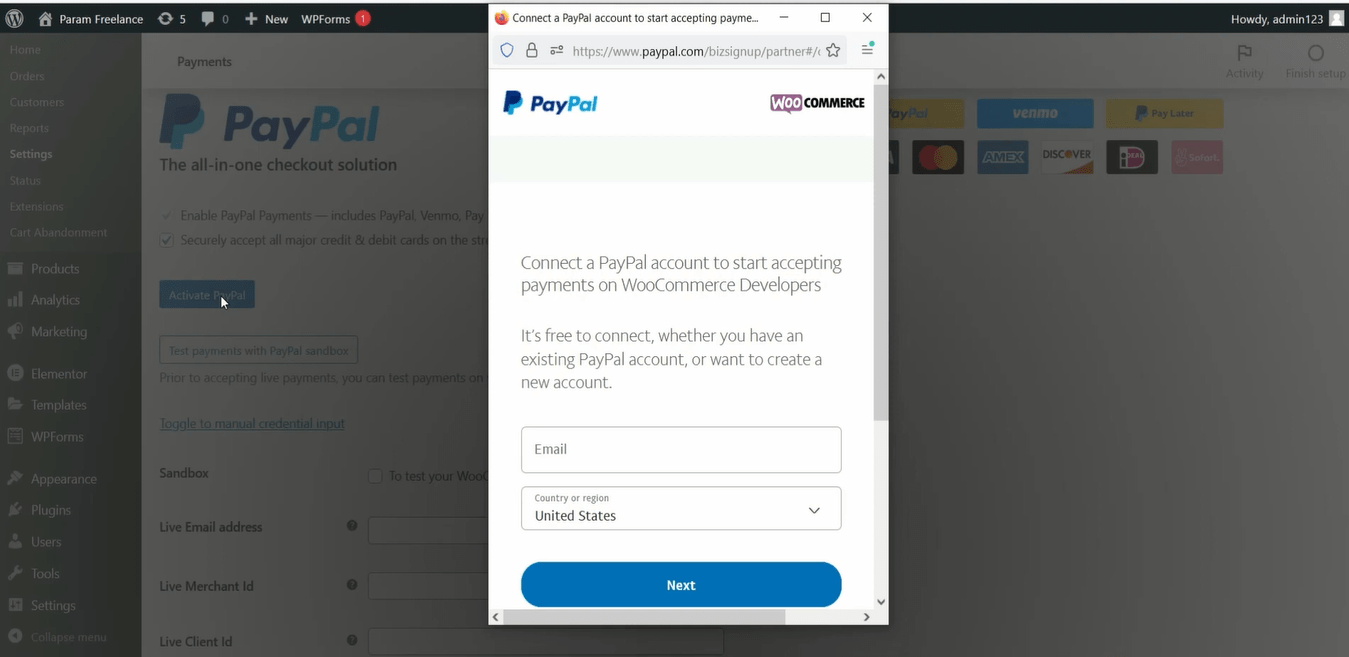
- Once you click Activate PayPal, a website will pop up and require you to login into your PayPal account. Then hit the Next button.
2. Click on Go back to WooCommerce Developers.
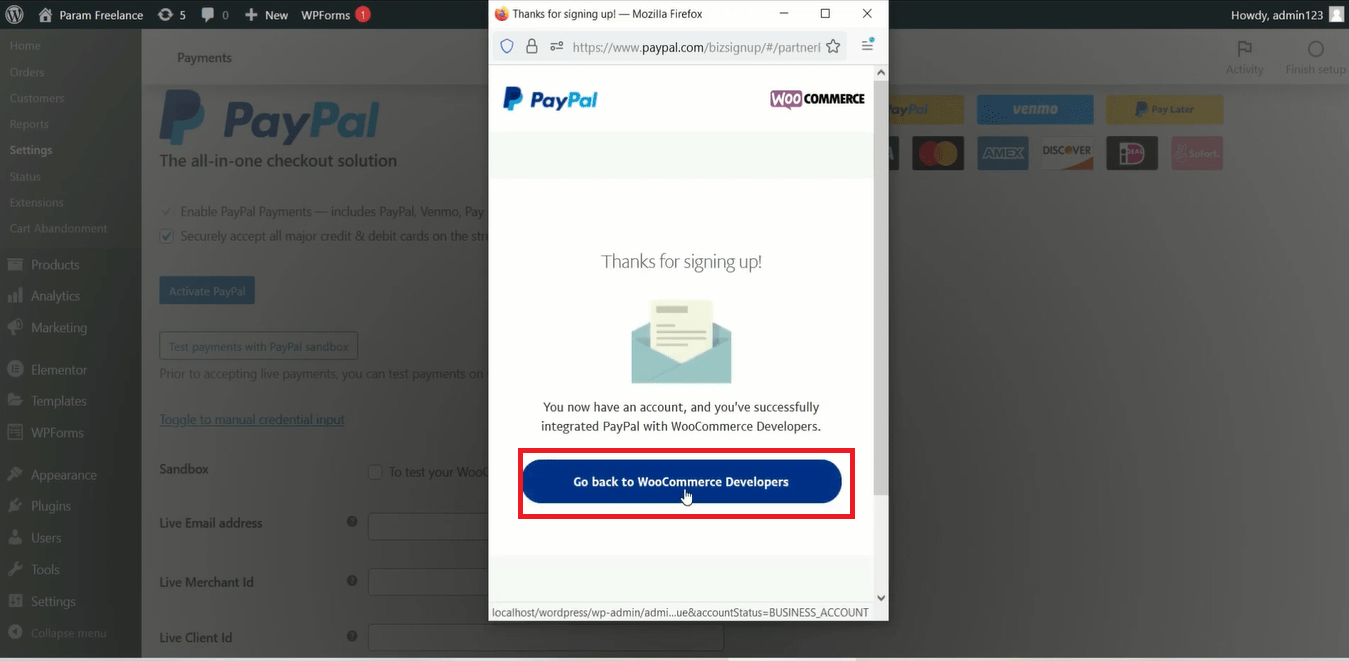
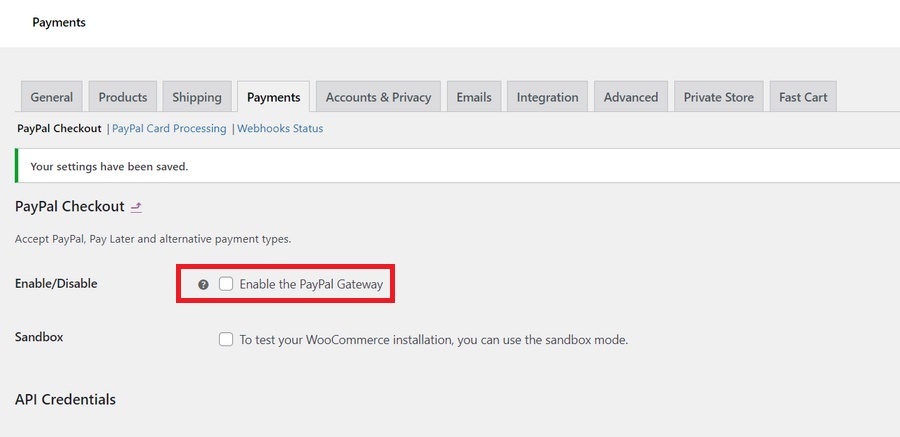
3. When you are sent to WooCommerce Developers, you can notice all the credentials have been added. Then tick on Enable the PayPal Gateway.
4. Tap on Save changes and PayPal is integrated into your online store.
Manual
- To start adding PayPal by yourself, tap on Toggle to manual credential input. A list of fields will appear and you have to fill them up.
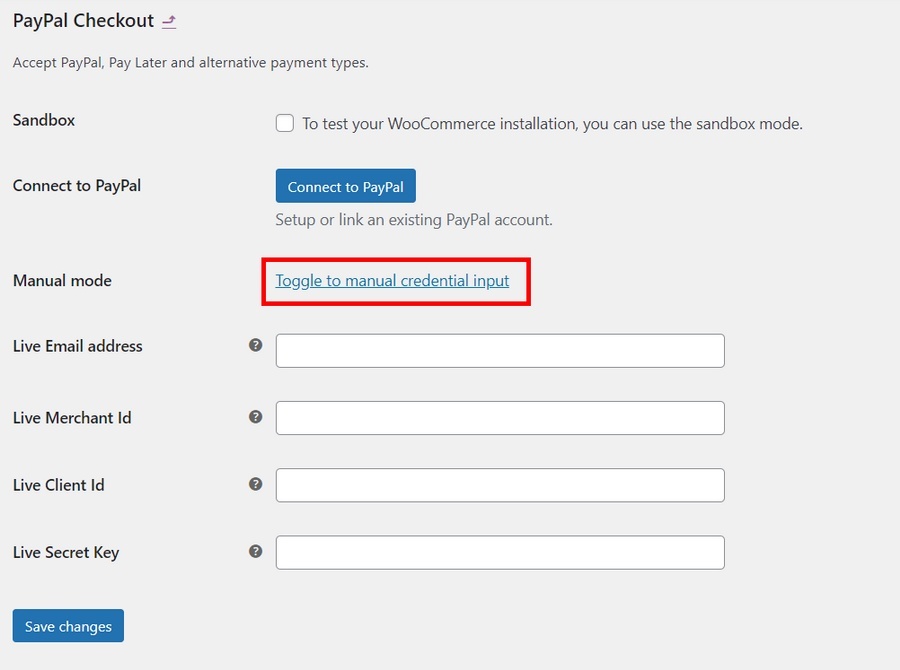
2. To find the information for all these boxes, you have to access PayPal and login your account.
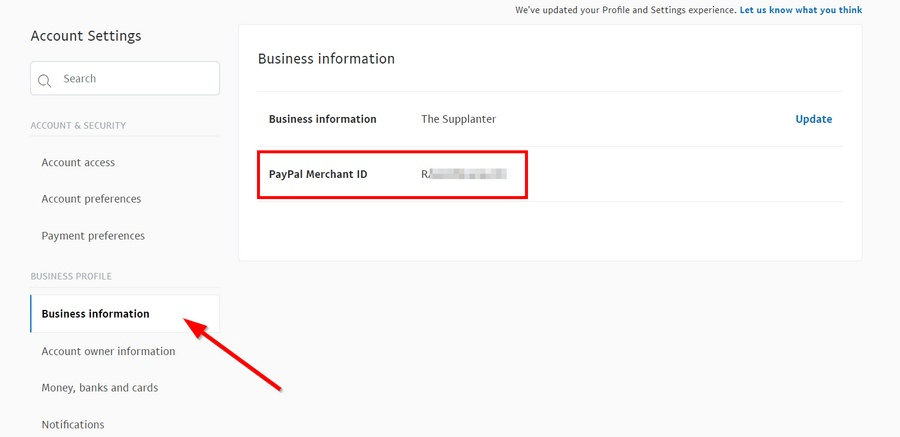
3. In the account dashboard, find your name on the top right, tap on it, and pick Account Settings. You can find the PayPal Merchant ID in the Business Information section.
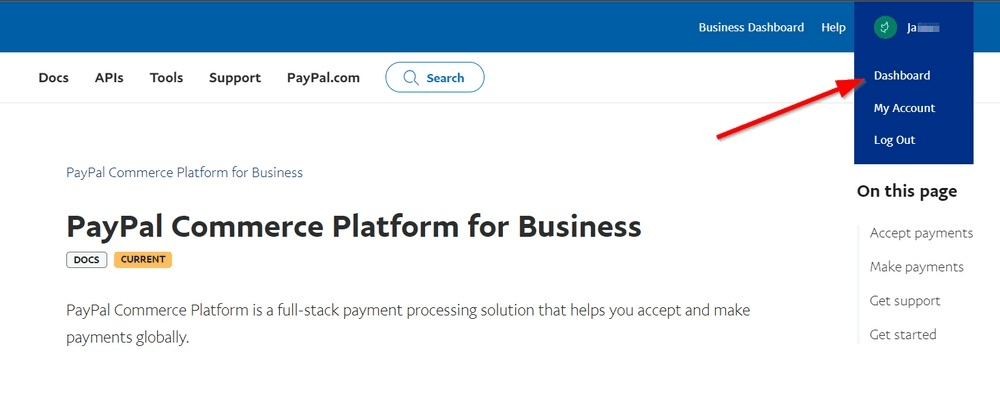
4. Back to the top right of your account dashboard, click on Developer and you are switched to developer account.
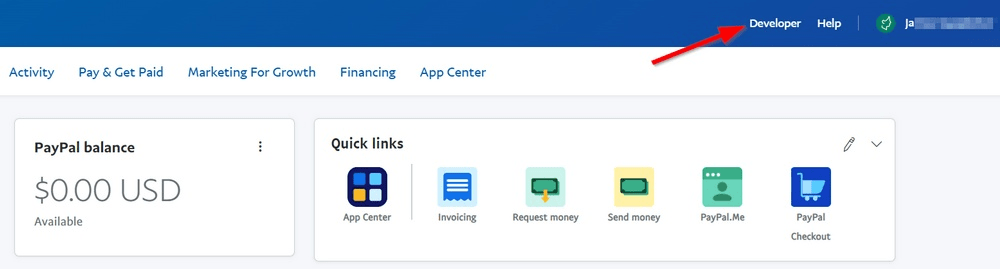
5. Access the developer dashboard by placing the mouse pointer on your name located upper right and selecting Dashboard.
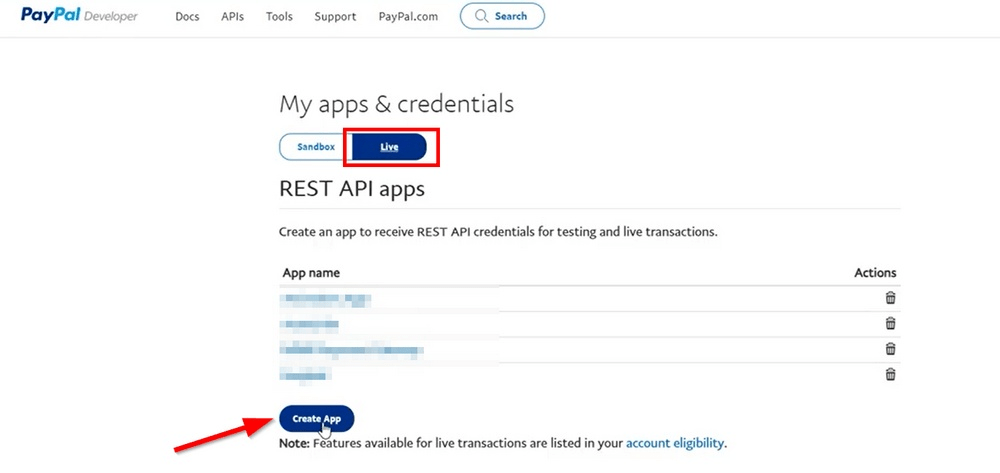
6. In the My apps & credentials field, choose the Live option, and click Create App to receive REST API credentials.
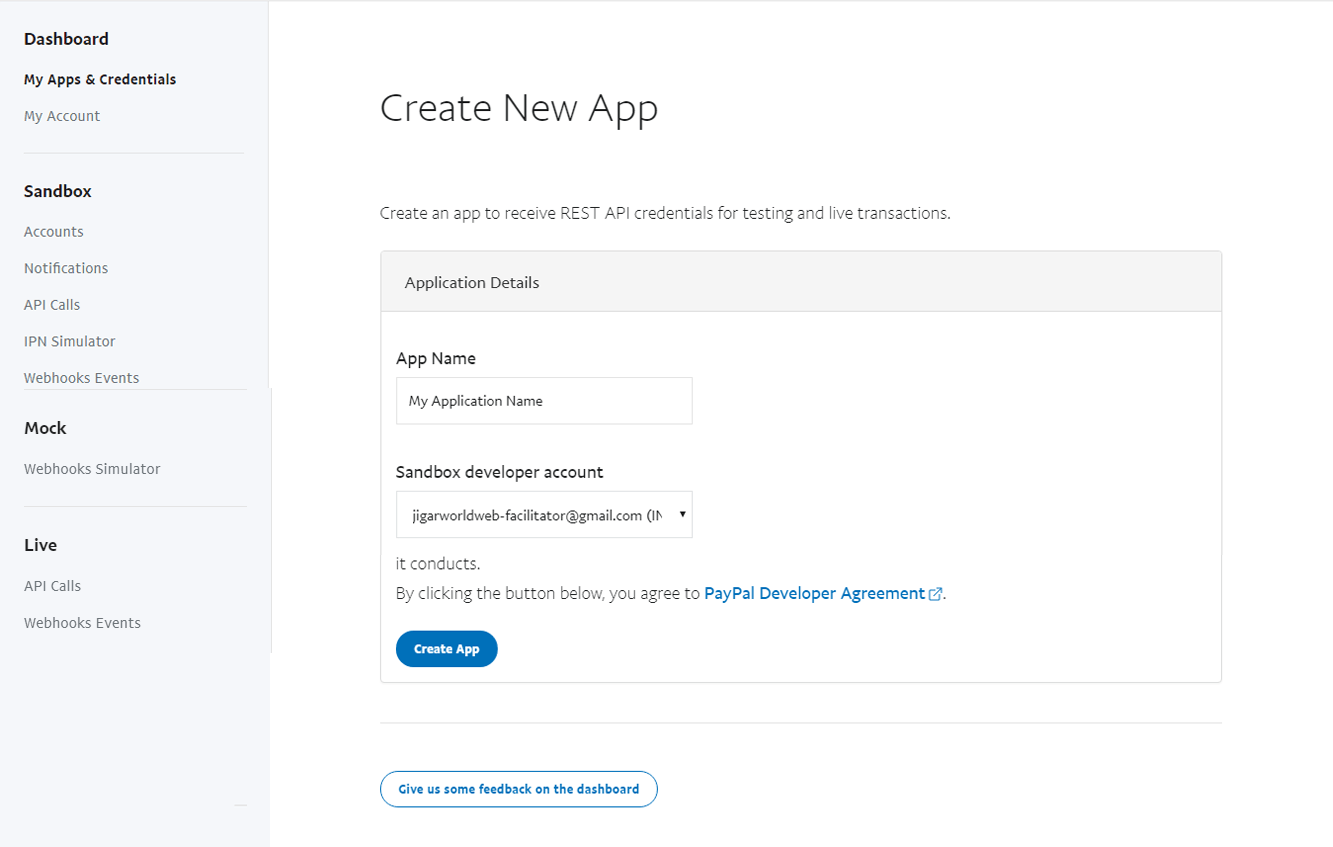
7. Fill in the App Name and select Create App.
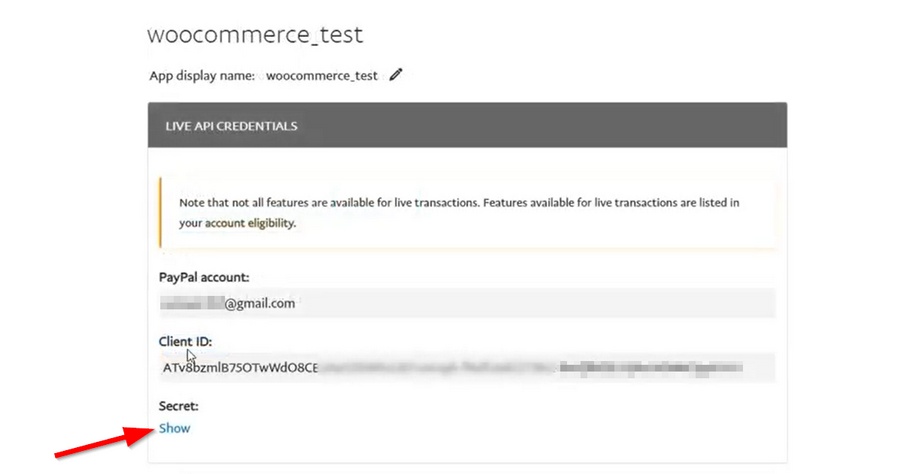
8. The Client ID will be available after you create the app in the LIVE API CREDENTIALS section. You can reveal it by clicking Show in the Secret area.
9. Copy all the credentials. Then go back to the PayPal Checkout on the WordPress control panel and paste them in the right spaces. Remember to save all the changes.
10. Scroll up to the top of this site, tick on Enable the PayPal Gateway, and PayPal are ready to use.
Step 3: Set up PayPal for WooCommerce
Instant Payment Notifications (IPN)
Turning on IPN is a good place to start. IPN is a feature that notifies the back end of your WooCommerce stores when the transactions are completed. If you want to start receiving these notifications, log into your PayPal Business account.
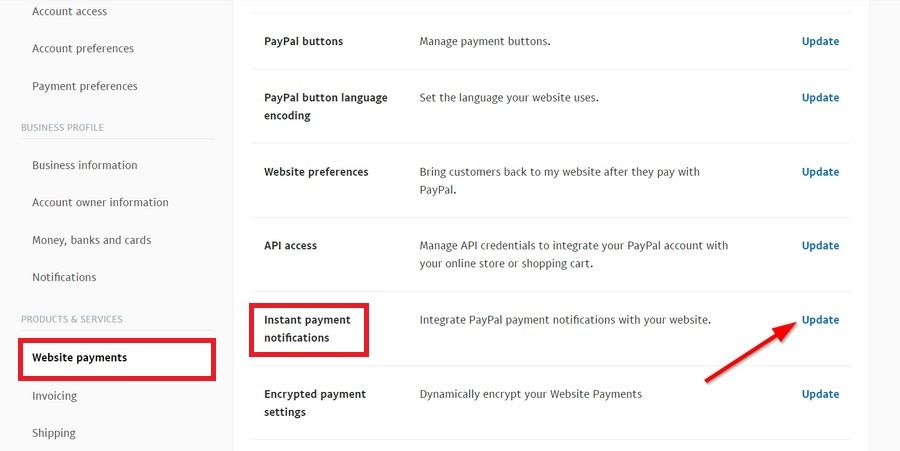
- In the Website payments field from the left menu bar, click on Update in the Instant payment notifications section.
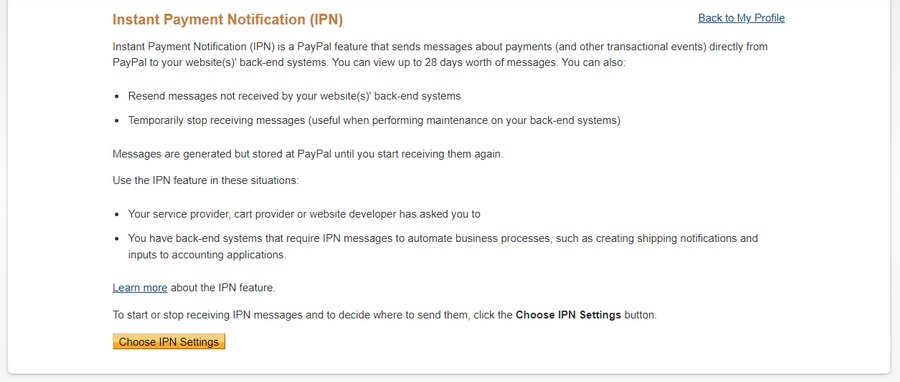
2. Tap on Choose IPN Settings.
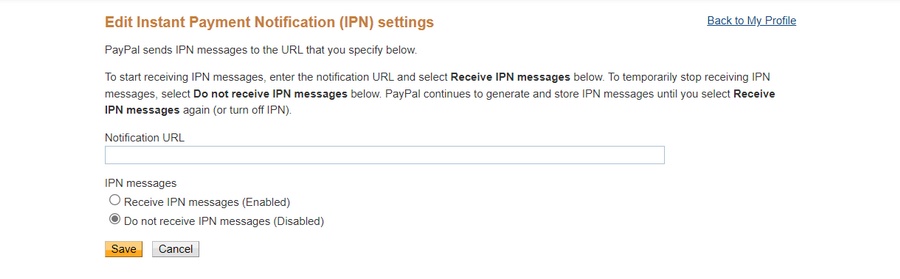
3. Insert the site’s URL as a destination for the IPN messages. The format of your URL should include two parts: a directory and domain name. For example, https://your-domain-name.com/?wc-api=WC_Gateway_Paypal.
4. Enable IPN messages and click Save.
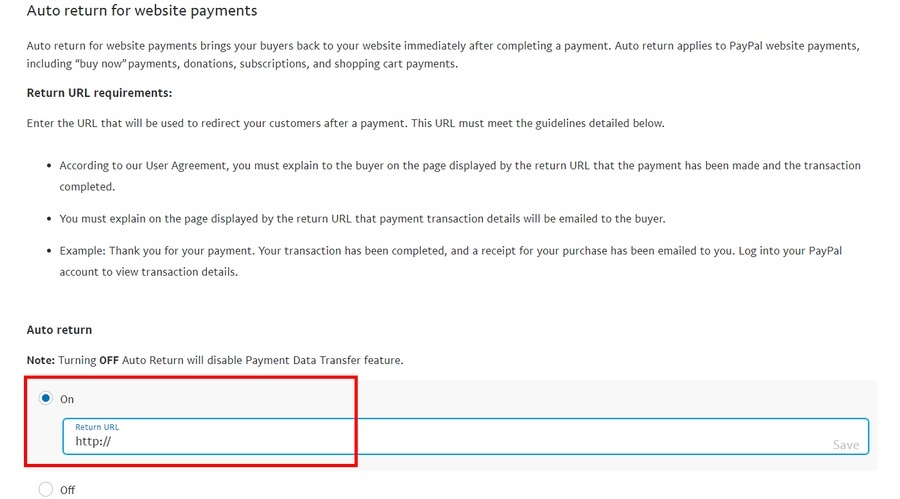
Auto-Return URL
When you enable this feature, your customers will be redirected to the Order Received site after paying. This is a great feature to keep customers staying longer in your online store, which ends up increasing revenue.
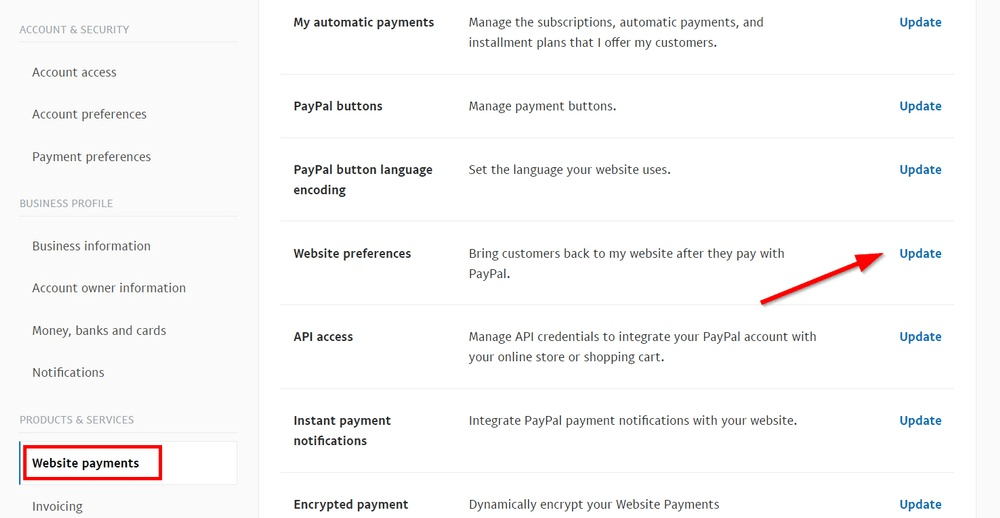
- To activate this feature, look for the Website payments section in the PayPal control panel. Then click on Update in the Website preferences area.
2. Turn on the Auto return and insert the URL with the format: https://your-domain-name.com/checkout/order-received/. Click the Save button.
Step 4: Test PayPal with Sandbox
We can now test our configurations to ensure they work well and seamlessly by using Sandbox. PayPal’s Sandbox lets you simulate live transactions and checkout processes without risking any of your own money or negatively affecting your customers.
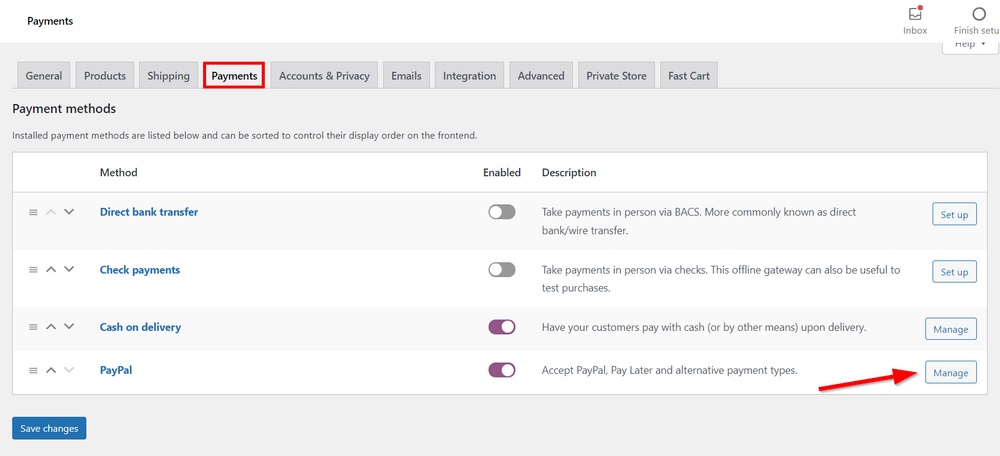
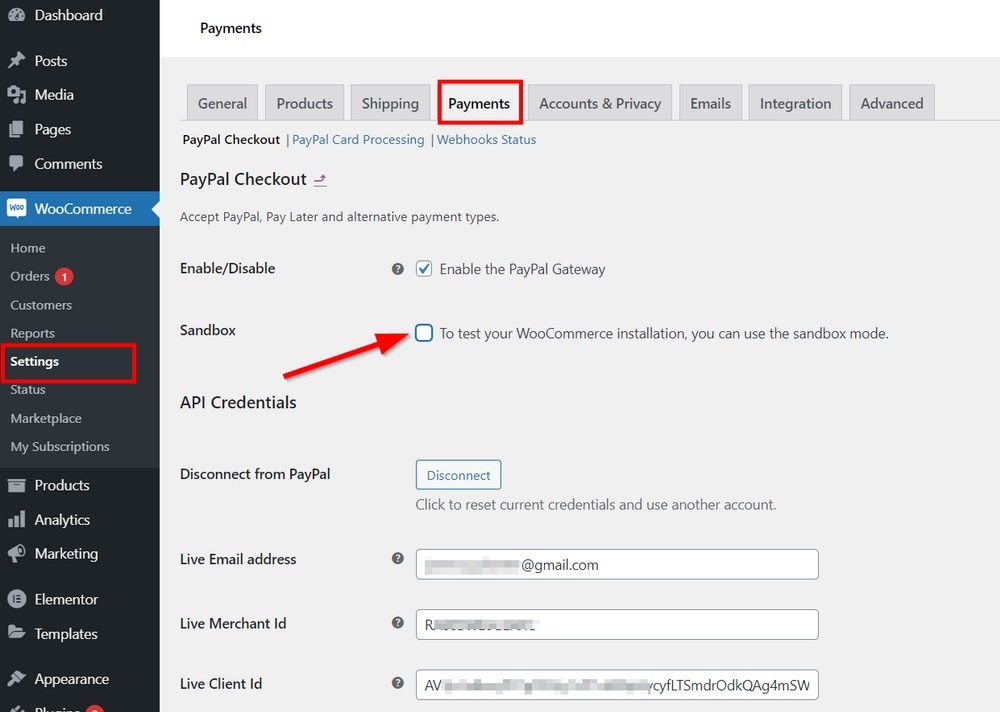
- Access your WordPress control panel and choose WooCommerce > Settings. In the Settings page, tap on the Payments area, find the PayPal payment method, and click Manage.
2. Tick the Sandbox option to test the PayPal payment in your online store.
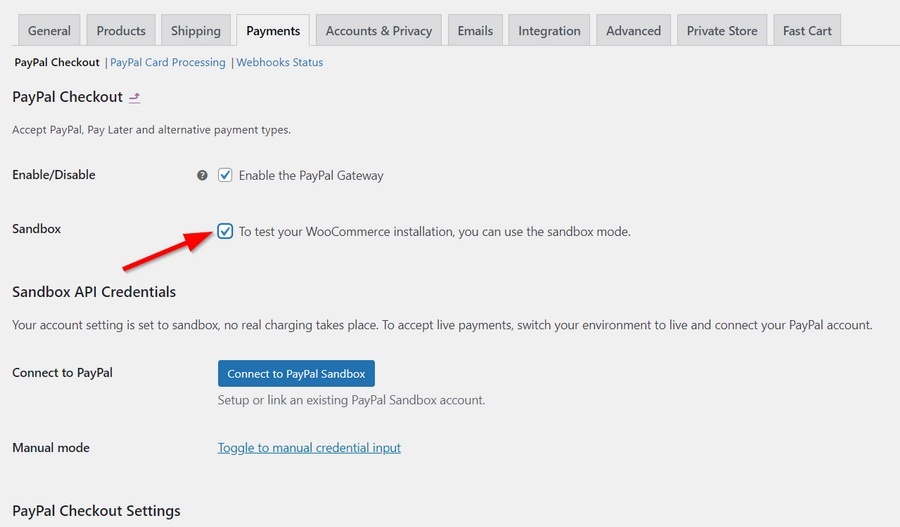
3. Sandbox will stimulate the genuine process when connecting your PayPal account with WooCommerce. Thus, all the steps you are about to do are familiar. Click on Toggle to manual credential input.
4. Gather all the API Credentials for Sandbox. Sign in your PayPal account in the Developer mode. This time, you need to choose the Sandbox section and click on Create App.
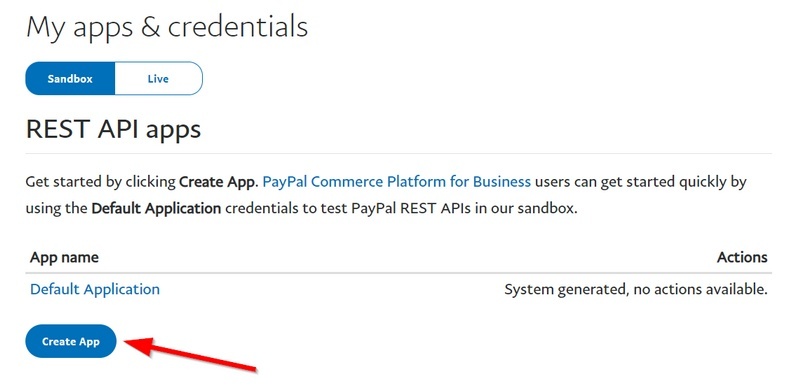
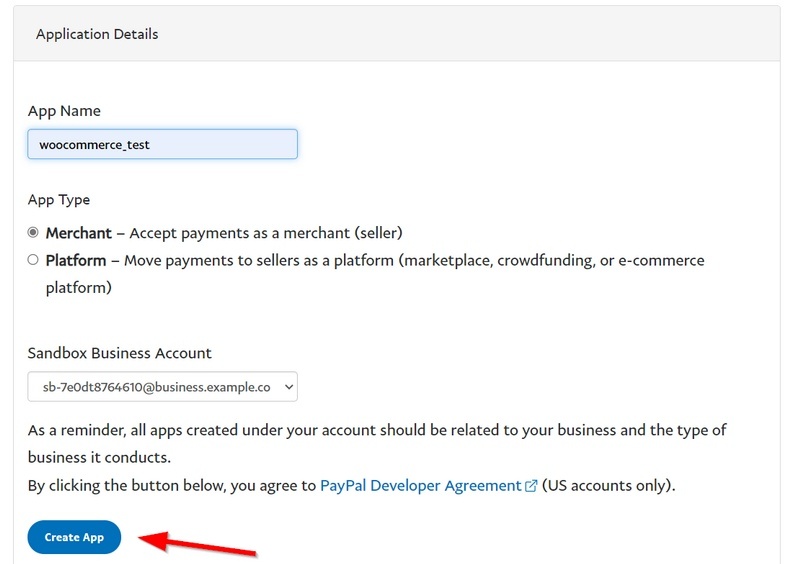
5. Name the app and click Create App.
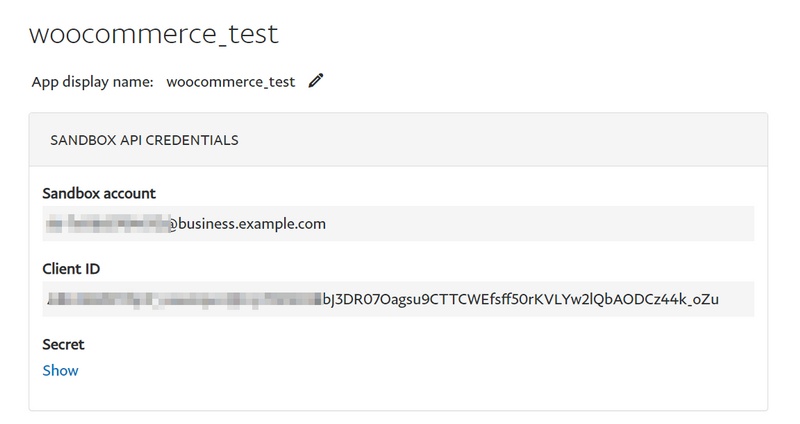
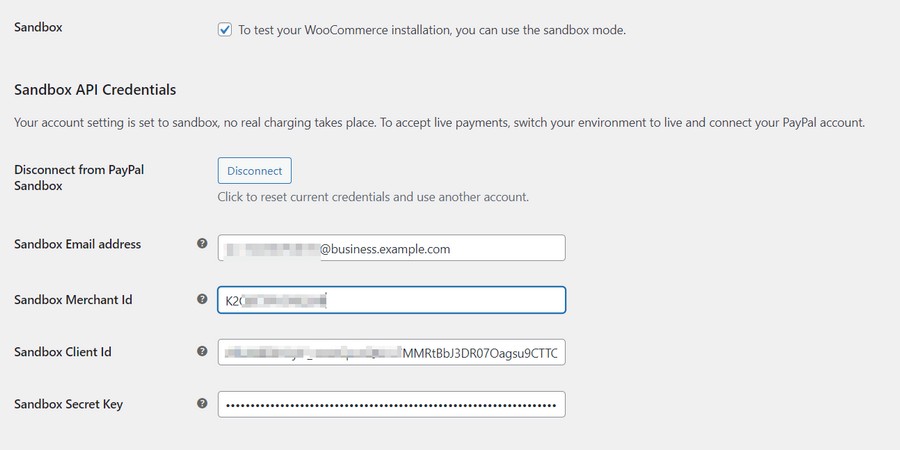
6. Get the secret key, sandbox email address, and Client ID.
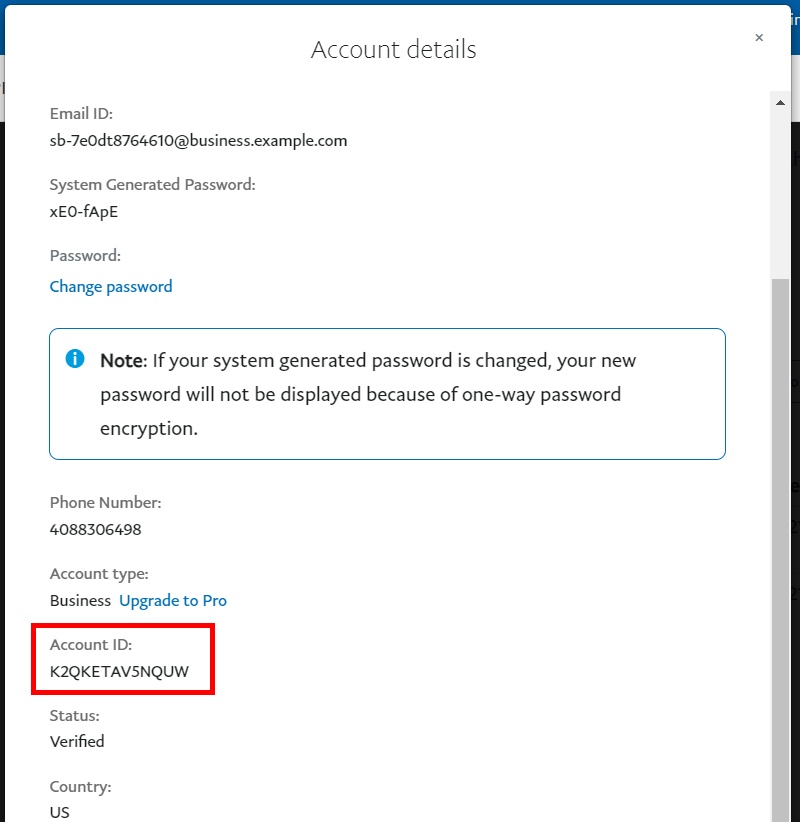
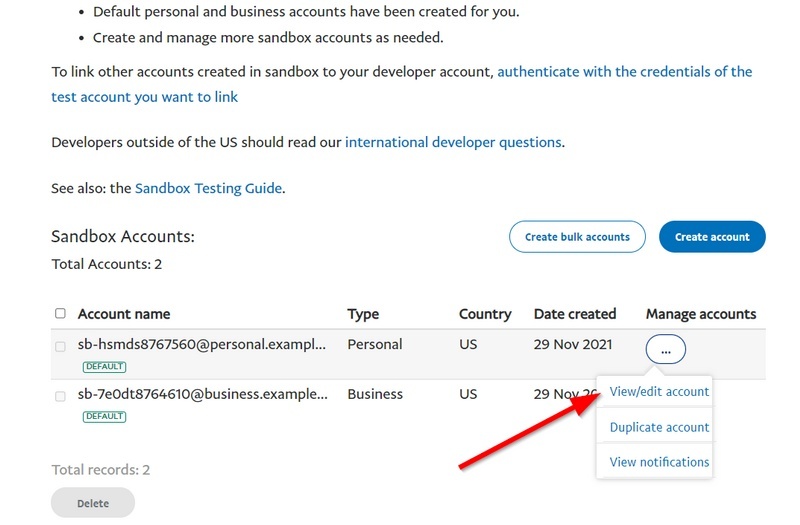
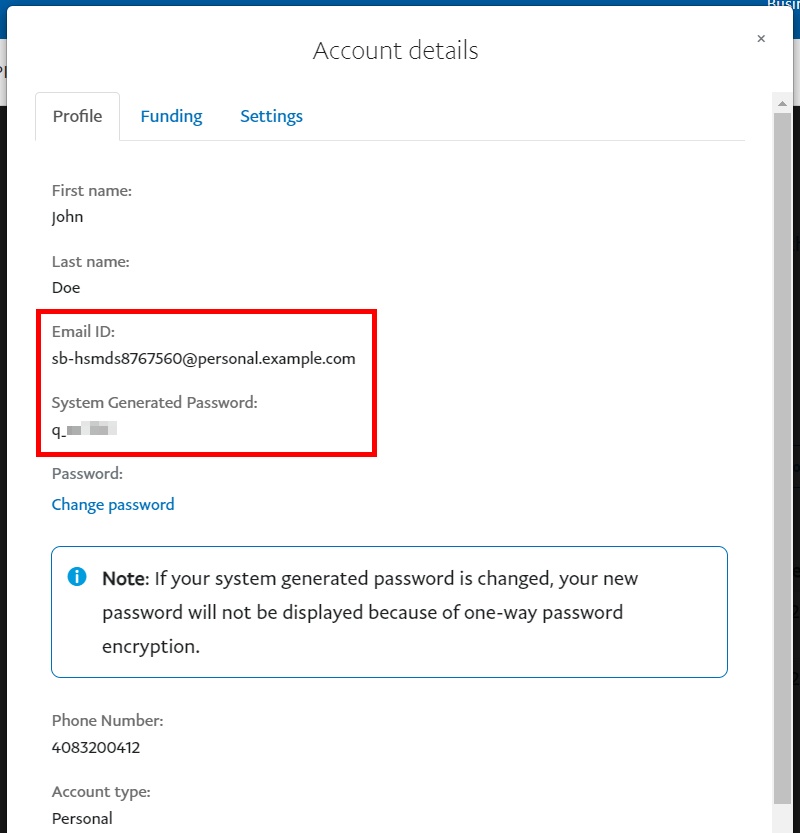
7. To get the Merchant ID, navigate to Sandbox > Accounts in the developer dashboard. In the Sandbox Accounts section, find Business Account, and choose View/edit account in the Manage accounts column.
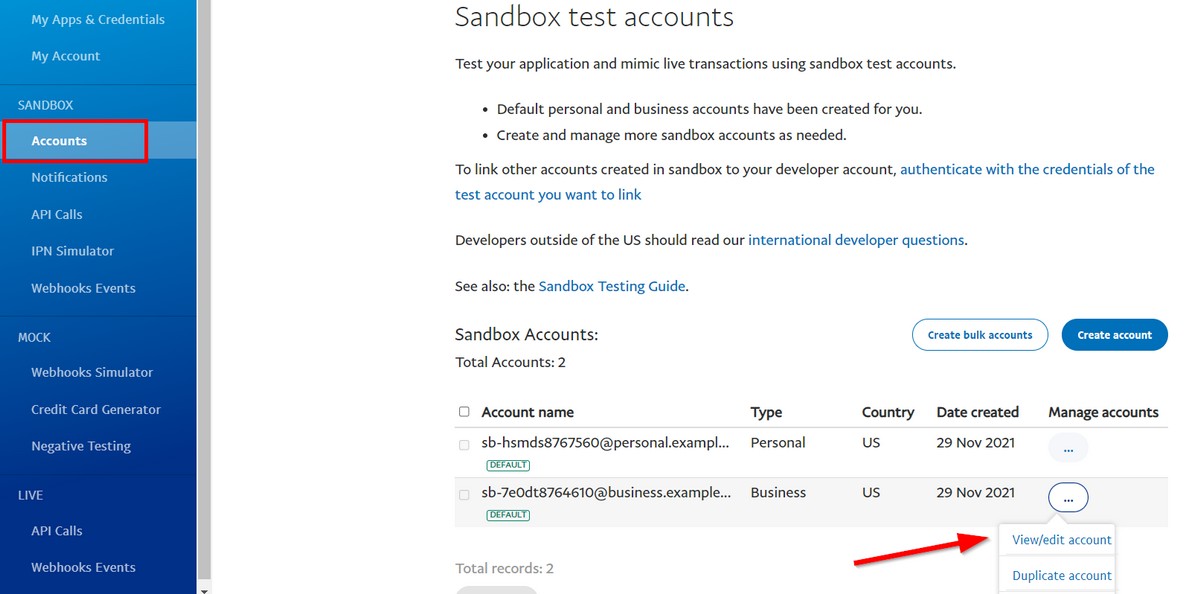
8. On the Account details site, the merchant ID you are looking for is Account ID.
9. Fill in all the blank spaces in the WordPress dashboard. Remember to click Save changes when you finish.
Now, it’s time to test a commercial transaction.
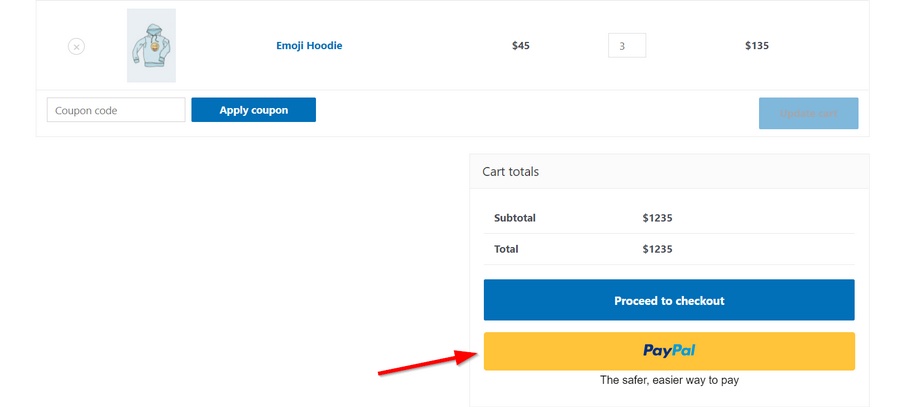
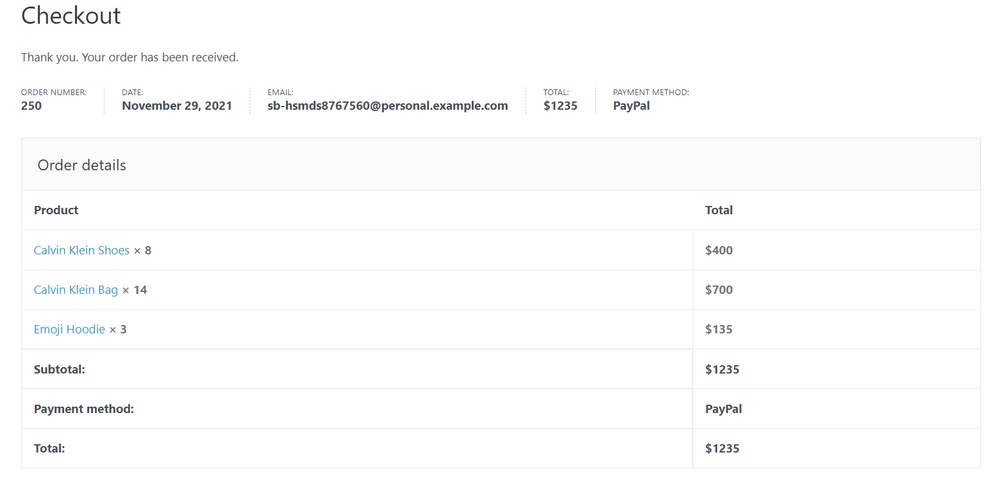
- Visit the front end of your WooCommerce store and add any item to the shopping cart. When you checkout the item, choose the PayPal payment method.
2. Sign in with a legitimate PayPal account to finish the transaction. The sandbox account is also an option.
3. Back to the PayPal’s Developer control panel, look for a personal account in the Sandbox Accounts, and click on View/edit account in the Manage accounts section.
4. Use the email ID and password to complete the payment.
When your payment is complete, PayPal will transfer you to the Order Received site in your store.
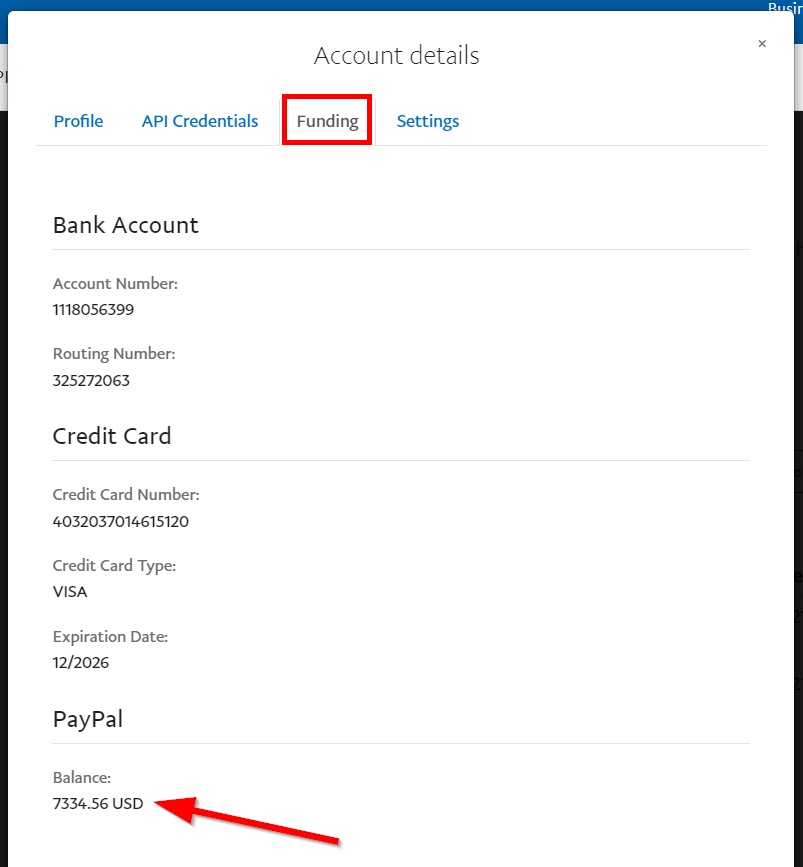
5. To check whether you actually receive the payment, find the Funding tab in your sandbox business account settings. By default, there is $5,000 in the test account.
6. If everything has gone well to this point, your mission has been completed and PayPal is ready to serve. Now you can disable the Sandbox by unchecking the Sandbox tab in the WordPress dashboard.
Add PayPal to WooCommerce Like a Pro!
That’s how you can add PayPal to WooCommerce and the benefits it can bring to your online store.
It’s not rocket science to integrate PayPal into your WooCommerce stores. What you have to do is follow the steps above carefully.
You can cut down half of your workload by integrating WooCommerce to PayPal automatically. However, it comes with some drawbacks. We recommend connecting your PayPal account manually. Finally, remember to test PayPal payment to ensure it works smoothly on your site.
Besides PayPal, you can accept WeChat Pay in your WooCommerce store. Check it out!
Thank you for reading, and don’t forget to subscribe to our website for more helpful information.