Navigation menu is an indispensable part of a website as it directly enhances the user experience. This menu allows visitors to access and explore your website quickly by listing the important pages.
You can easily create and edit navigation bar WordPress with the built-in functions. However, not everyone knows how to do that effectively due to the lack of a useful guide.
If you are struggling with adding and customizing your navigation bar, we are here to help. Let’s create and edit a brand-new navigation menu!
What is a Navigation Bar in WordPress?
A website’s navigation bar is a set of links that allows users to quickly access various parts of the site. These links often take the form of a horizontal menu and are usually located at the head of all WordPress pages.
Navigation bar shows your website’s structure to visitors, which aids users in finding specific information. Below is an example of a navigation menu.

You can easily create menus or submenus in WordPress. You can include links to your important posts, topics, categories, or pages and unique URLs like your social network profile.
The WordPress theme will decide the precise position of your navigation bar. Many themes enable you to choose different locations for your menu, so you can put the menu bar wherever you want.
For example, besides the default location of the navigation menu at the top of the website, some themes also let you put the menu on the side or at the bottom of your WordPress site.
How to Edit Navigation Bar WordPress
In this section, we’ll start to create a brand-new navigation menu from scratch and go through the steps to modify and make the navigation bar more useful and unique.
#1 Generate Navigation Bar
To create a menu bar for your website:
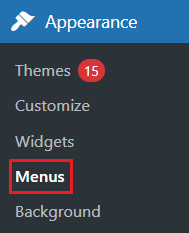
- Sign into your WordPress’s account and choose Appearance > Menus in the admin dashboard.
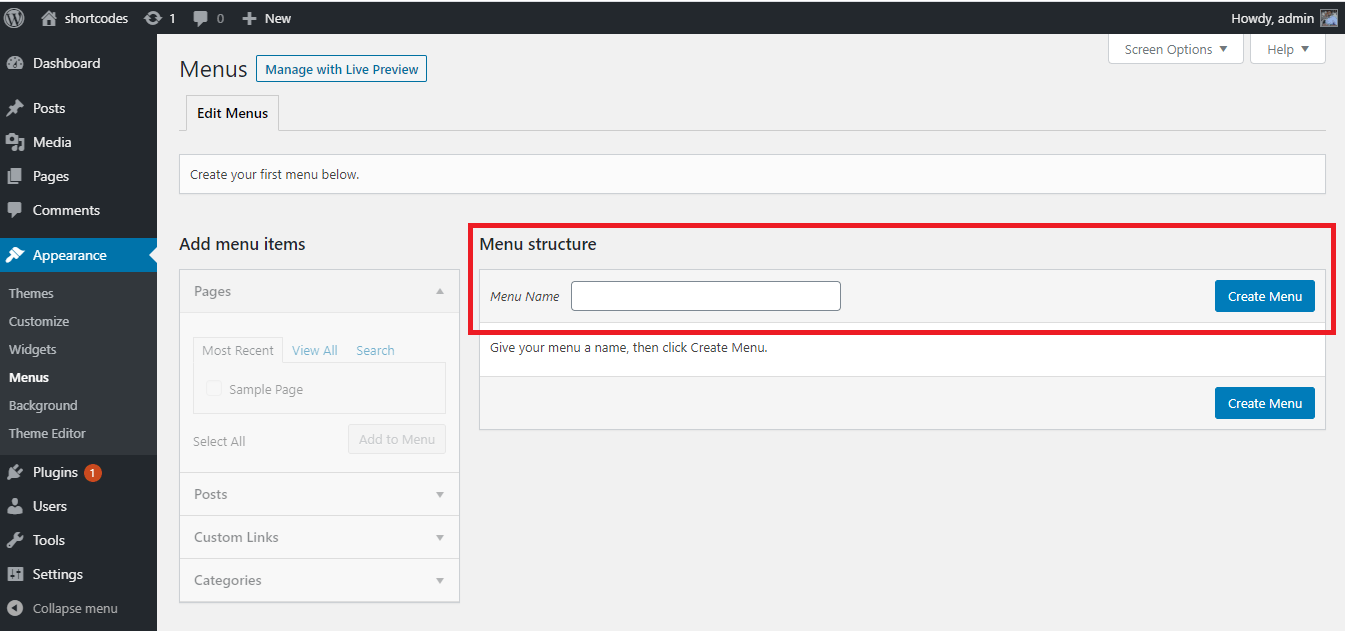
2. In the Menu structure panel, insert the name of your menu in the Menu Name box and tap Create Menu. Then the Add menu items section on the left will be enabled on the left.
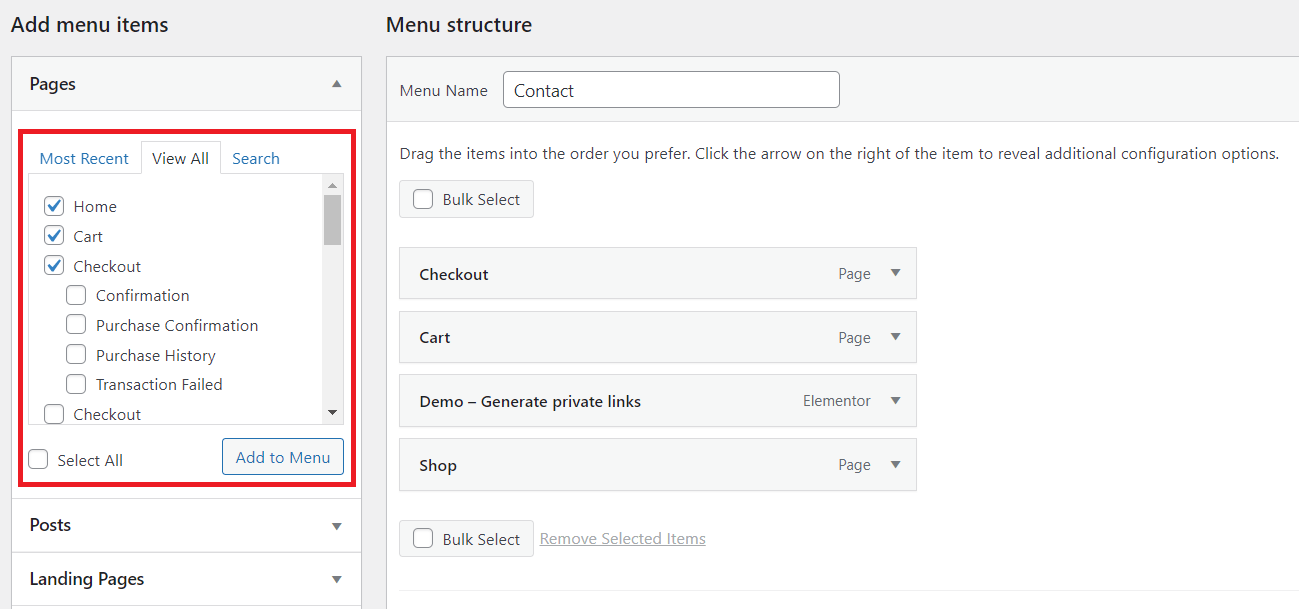
3. In the Pages area under the Add menu items panel, choose the View All tab to reveal all of the pages. Then decide which pages will appear on the navigation bar by checking the boxes. Tap the Add to Menu button to finish.
4. After you’ve added pages to your menu, rearrange them by dropping and dragging to the position you want.
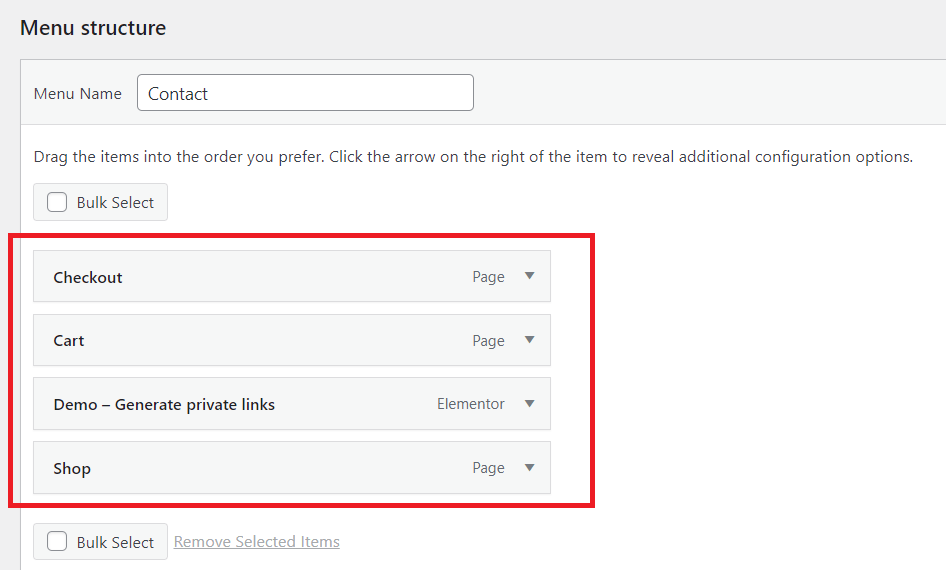
In the Menu structure field, all menu items will be listed vertically. When you make the menu public, it will appear either horizontally or vertically, according to where you set it.
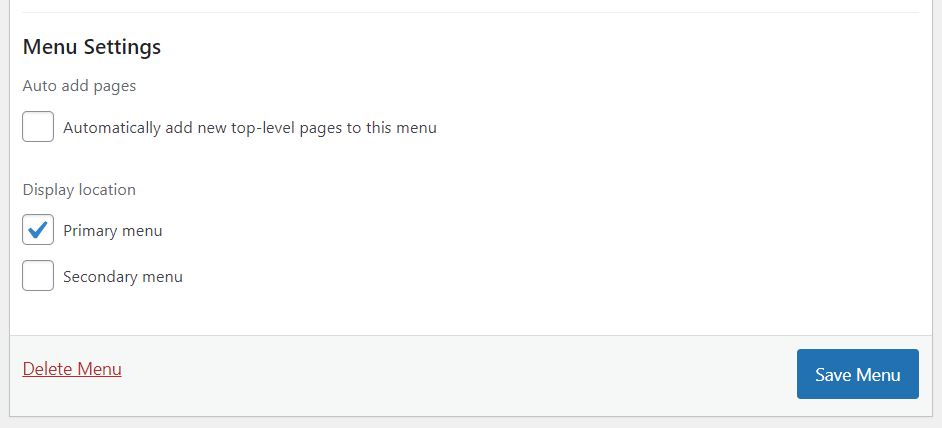
5. Save your menu by clicking the Save Menu button once you have added items to the navigation bar and decided its Display location. The Display location varies based on your theme.
#2 Create Pull Down Menu
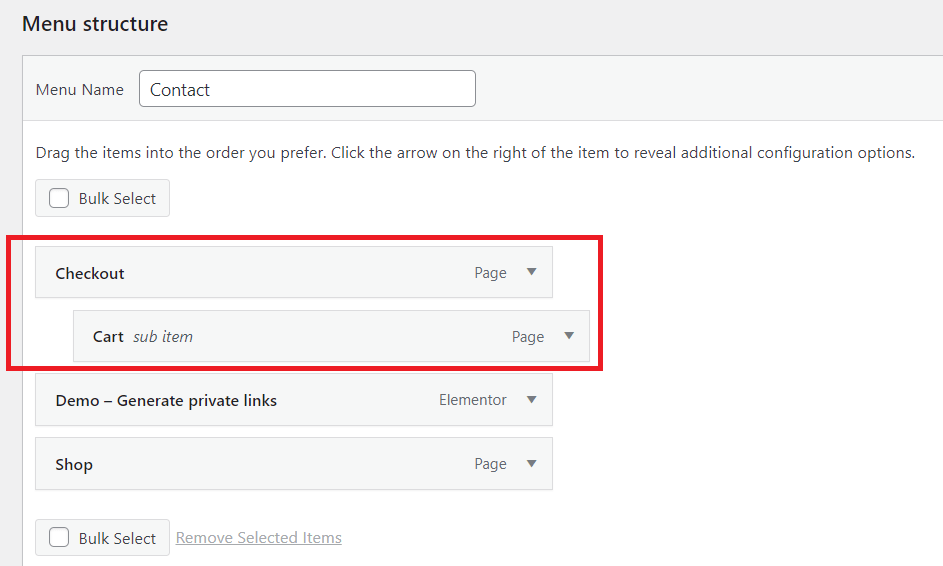
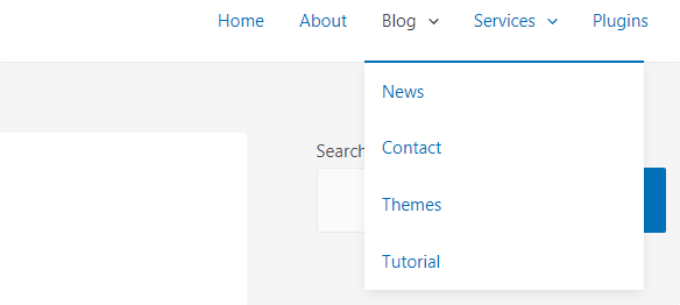
Pull down menu or sub-menu includes two main parts: parent buttons and menu items in the popover. When you move your mouse control to the parent button, all the menu items will show up in a popover.
You can make a drop-down menu by dragging an item under the parent button and then moving a little to the right before dropping it.
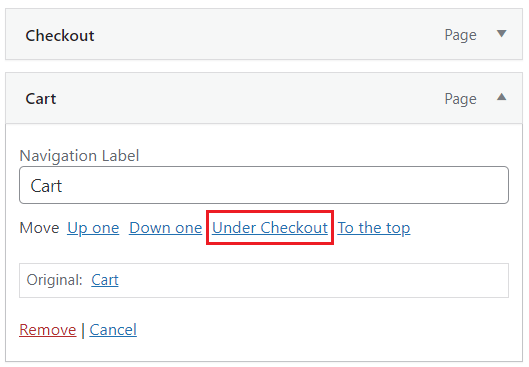
Another method is to tap on the menu items and choose Under [Menu Item Name].
You can create another sub-menu for your sub-menu by doing the same steps. Still, you must check your themes whether they support multi-layer pull-down menus.
Below is an example of a complete drop-down menu.
#3 Add Categories
If you want to build a blog on WordPress, the blog category should be on your navigation bar as a sub-menu.
- To add a category to the menu bar, click on the Categories tab in the Add menu items section and tick the box next to the categories you want them to appear in the menu.
- Click on the Add to Menu button when you are complete.
- Look to the right side of the screen. In the Menu structure field, you can see the newly added categories. Drag these categories and drop them below the Blog menu item.

4. Click Save Menu at the bottom left of your screen after you finish modifying, and the added categories will appear in your navigation bar.
#4 Add Links to Navigation Bar
If you want to redirect your users to other websites you own, to social platform profiles, or online stores to increase sales, adding links to your navigation menu can help.
- Choose Custom Links in the Add menu items section. Then insert the URL and the Link Text and tap on Add to Menu.
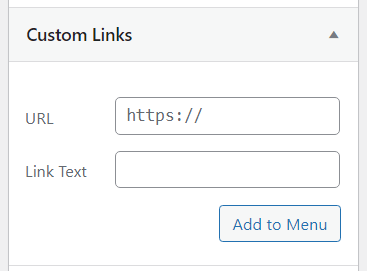
2. Remember to click on the Save Menu to apply new changes into your menu bar.
If you want your menu bar to be more eye-catching, you can add a social media icon or a CTA (call to action) button. A plugin can help you do that.
#5 Edit Items in Navigation Bar WordPress
After adding categories or pages into your menu bar, WordPress will automatically use their names as link texts. You can change it as you wish.
- Click on the arrow next to the menu item you desire to change its name, then type a new name in the Navigation Label box.
- If you want to delete this item from your menu, click the Remove button.
- You can change the location of the menu items by dragging and dropping. If you are not comfortable with it, you can use the Move link instead.
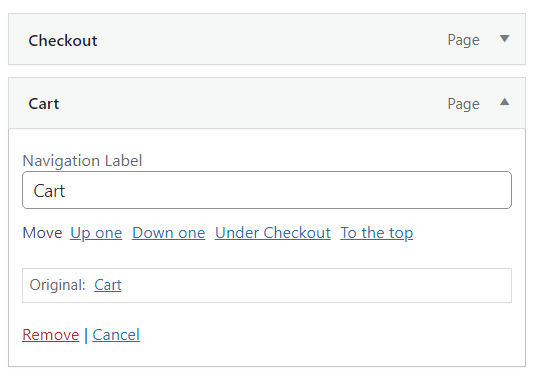
4. Always save the changes after you add or remove the menu items by tapping the Save Menu button.
#6 Modify Navigation Bar Design
In case you plan to make your navigation bar unique by customizing color and front, you can try this way.
- In the Navigation Label box of your menu item, insert the code below:
<span style="background-color:[color code];”>[Menu Item Name]</span>
This code will change the background color of your menu item.
For example, if you want to change the background of the Donate menu item into red, here is the code you should add into the Navigational Label box:
<span style="background-color:#FF0000;”>Donate</span>
Your menu item will look like:
![]()
2. Add padding property into your code and choose the width and height in pixels you want. This property will make your menu item become like a button rather than just a highlighted text. What you must do is to insert the code below:
<span style="background-color:#FF0000; padding:[pixels]”>[Menu Item Name]</span>
For instance, we will apply this code for the Donate menu item.
<span style="background-color:#FF0000; padding:22px”>Donate</span>
And there is the result:

3. If you want to change the font color of any menu item, just add this code:
<font color="[color code]”>[Menu Item Name]</font>
In this example, we’ll change the font color of Donate into red so the code will look like:
<font color="#FF0000”>Donate</font>
4. Don’t forget to click the Save Menu button to save all the changes you made.
#7 Insert Navigation Bar WordPress in Footers and Sidebars
It’s not necessary to limit yourself to placing the navigation bar in the header of your website. You can put it in the footer or sidebar, too.
- Navigate to Appearance > Menus in your WordPress dashboard.
- In the Edit Menus tab, scroll down to Menu Settings and tick the Display location for your menu bar. Another way to do so is to click on the Manage Locations tab and choose the location for the navigation bar.
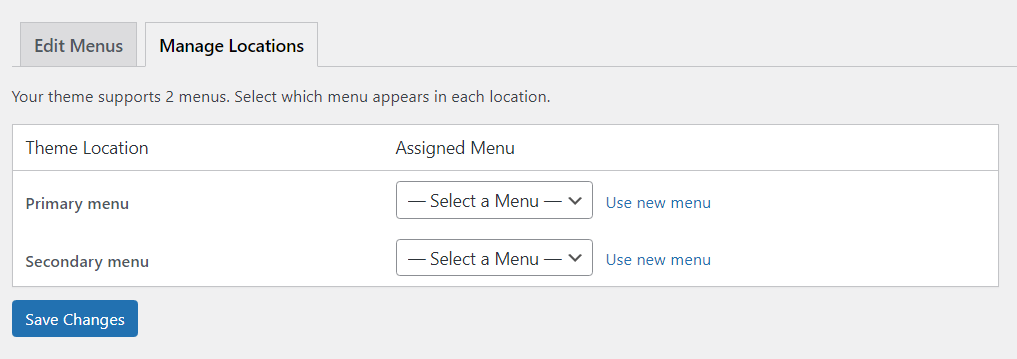
3. Always click Save Changes when you are done.
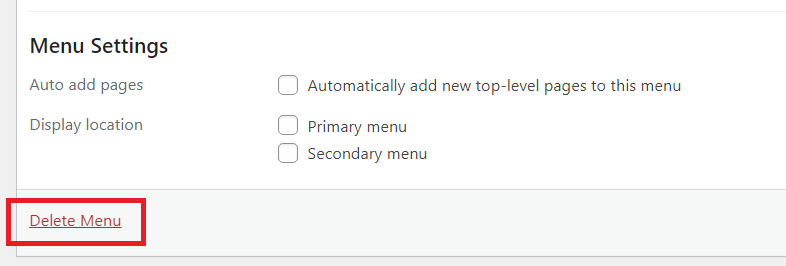
#8 Delete Navigation Bar
Here’s how to permanently remove the navigation bar from your WordPress website:
- Head over to Appearance > Menus.
- Choose the menu you want to modify from the selection box under the Edit Menus tab.
- Scroll down to find the Delete Menu button and click on it. Now the menu is completely deleted from your site.
FAQs
The following are a few of the most frequently asked questions (and answers) we get from WordPress novices about navigation bars.
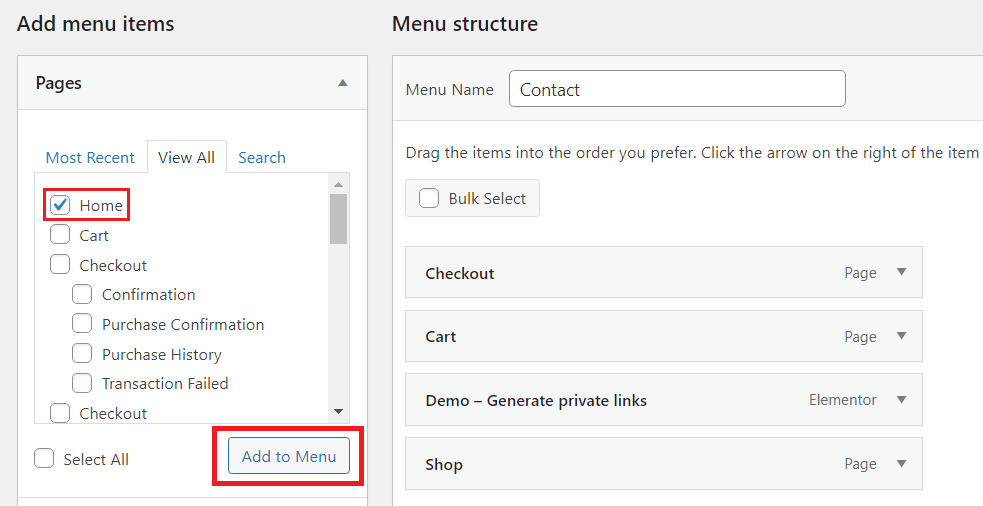
#1 How to include a link to the homepage into the WordPress navigation bar?
To enable users to access your homepage from a drop-down menu, choose View All from the Pages section. Then, tick the Home box, tap on Add to Menu, and save your changes.
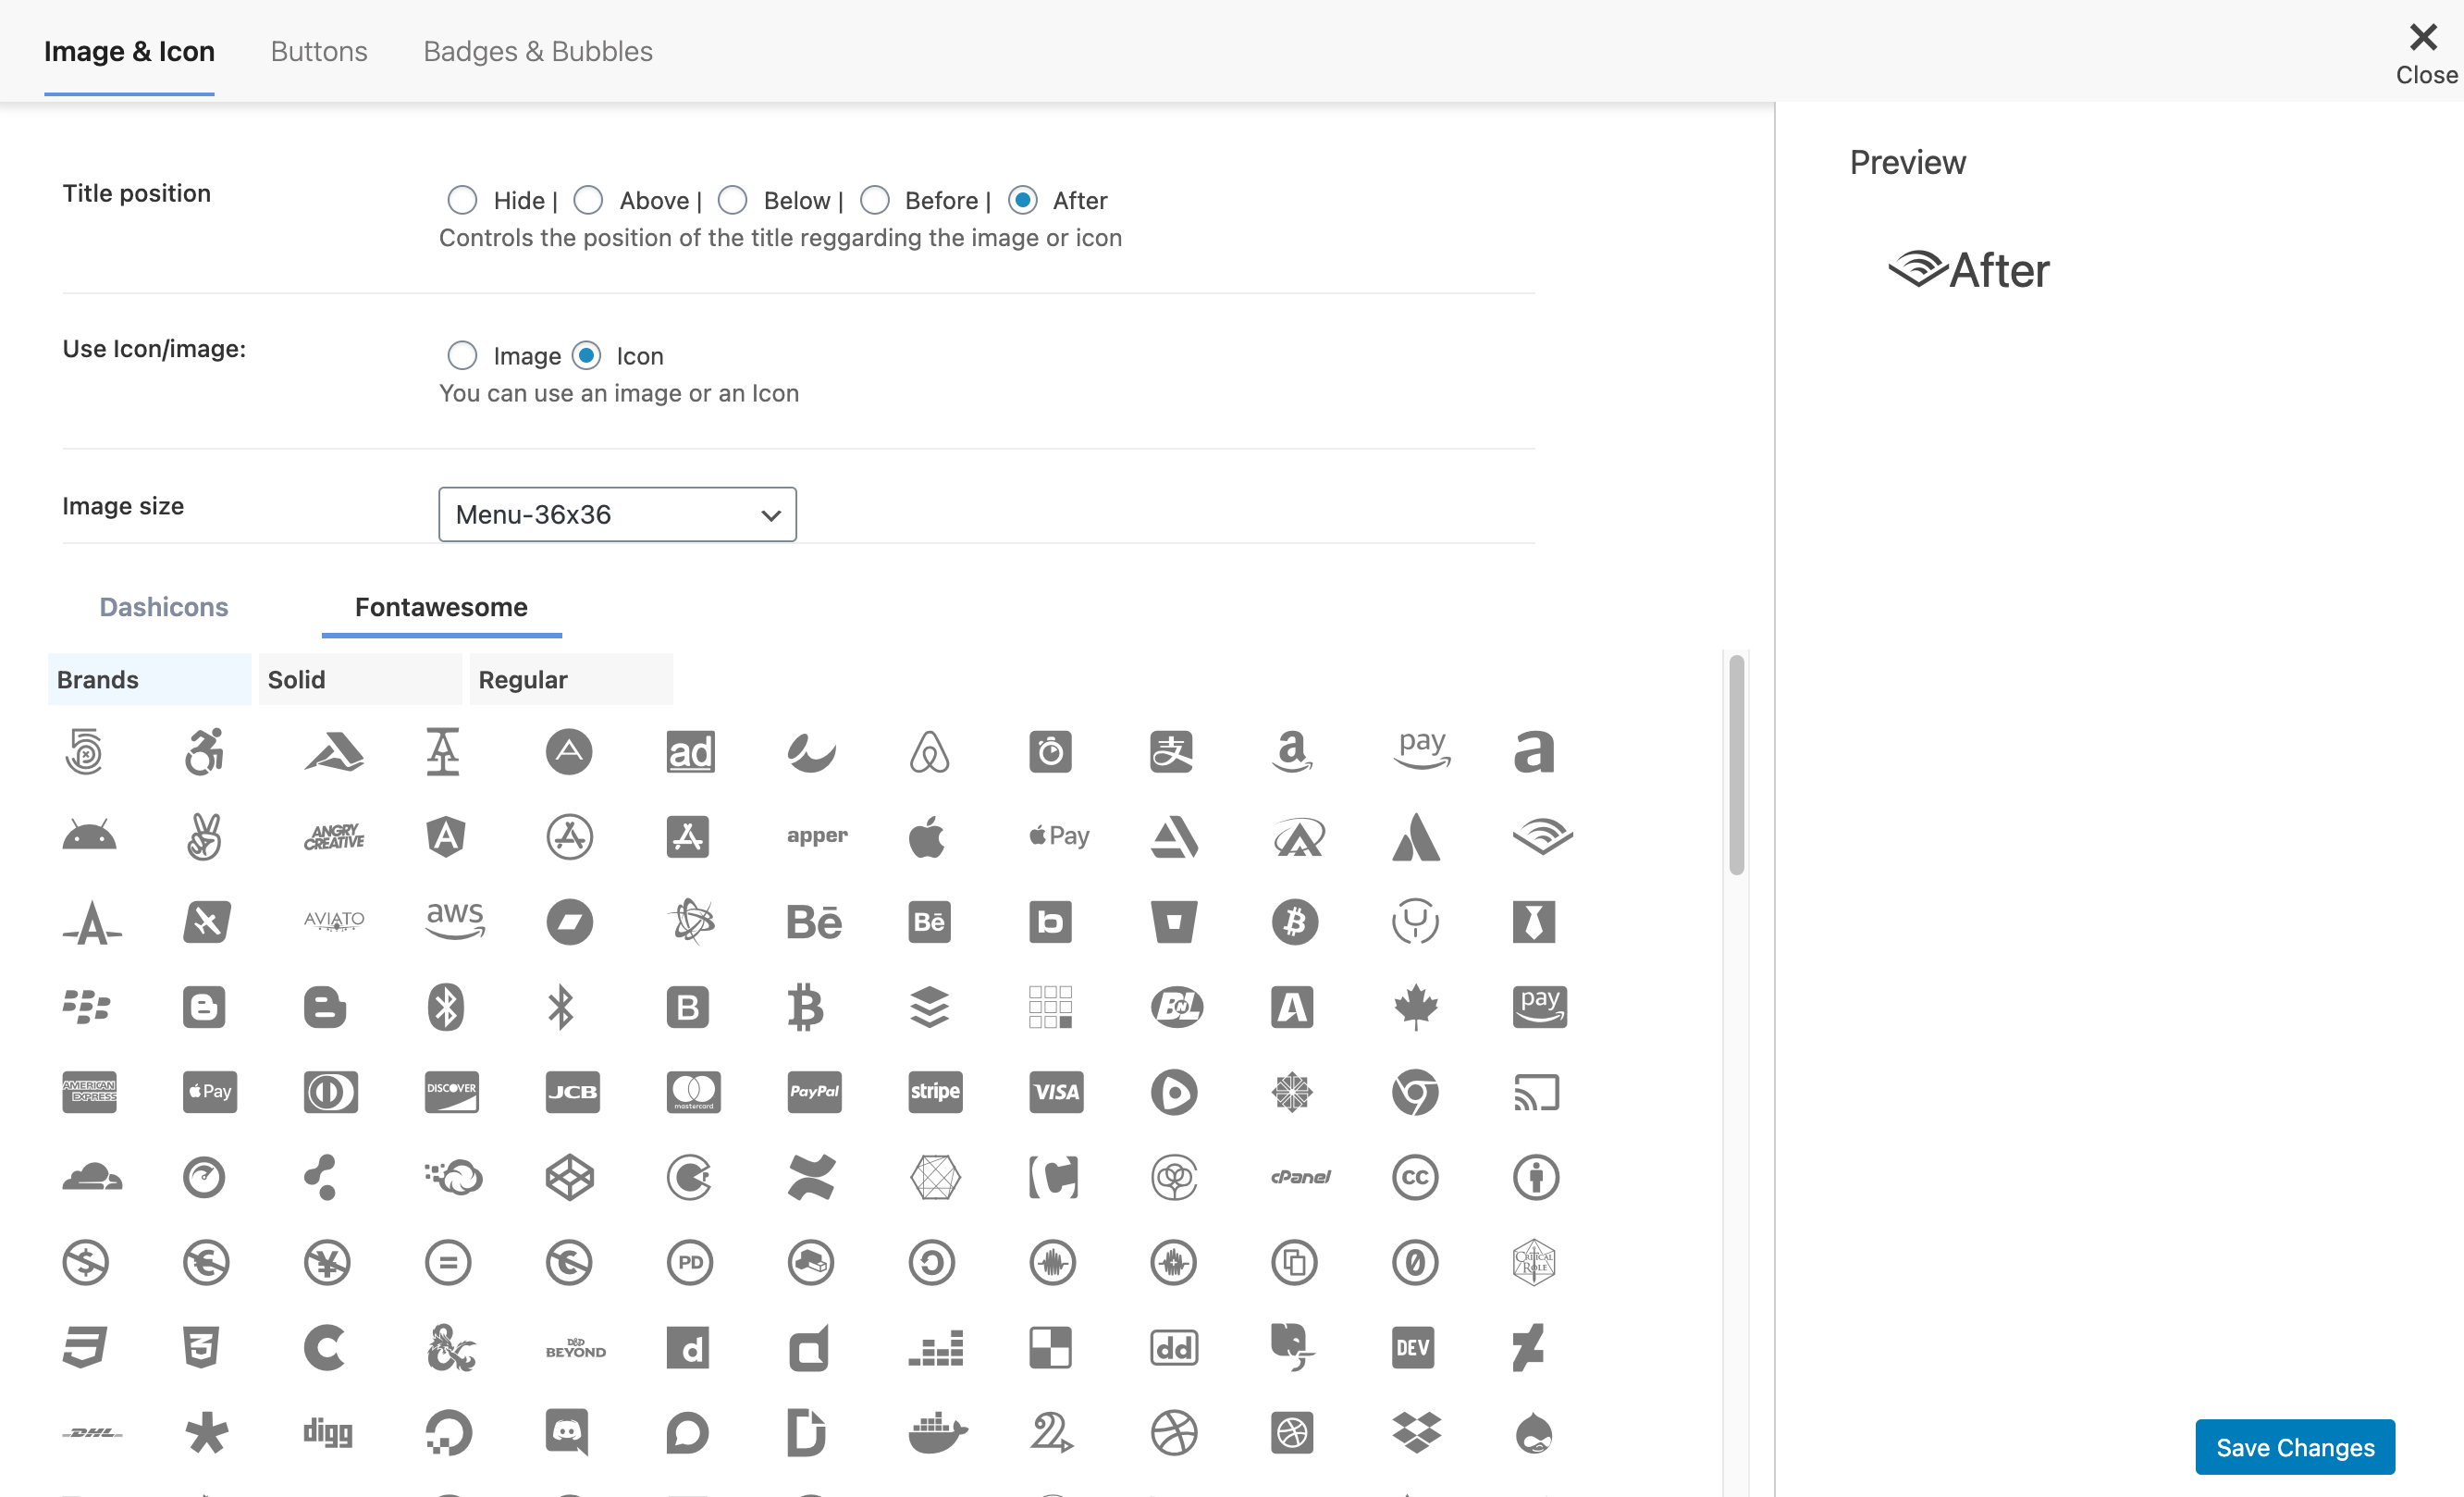
#2 Is it possible to add images to navigation menus?
The WordPress built-in function doesn’t support adding images to the navigation bar. However, the Menu Image plugin can help you do that.
You need to install and activate the plugin first. Then you can find this plugin in the sidebar of your WordPress dashboard and choose the icon or image you want to add.
Edit Navigation Bar WordPress to Your Liking
That’s all about how to edit navigation bar WordPress. We believe that you can now create and edit your navigation bar after going through this article.
You don’t have to know much about coding to edit navigation bar WordPress. Follow our guide carefully, and you can have a nice-looking menu bar. A reminder is that when you change the background color or font color of the menu item, make sure you use the code correctly, or it will not work properly.
And finally, don’t forget to subscribe to our website for more helpful information.