Anyone who is looking for ways to protect Word documents or lock Word documents from editing, we want to tell you 2 things:
First, protecting a Word document is not brain surgery at all.
Second, you’re in the right place.
This article will highlight 5 simple options to protect as well as restricting editing your Word documents.
The good news is it doesn’t require other third-party apps to get the shit done but uses Microsoft Word itself.
Without further ado, let’s get the ball rolling!
How to Protect Word Documents
Safeguarding a Word document is simple, even you don’t equip any external tools to handle this task.
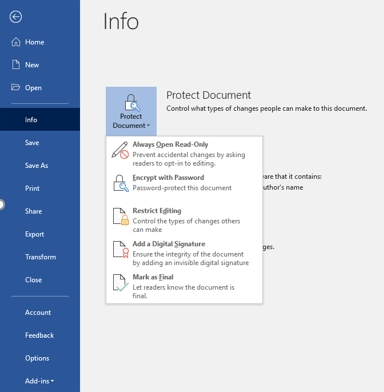
Word provides several ways for you to protect Word documents. Just open your Word document, go File > Info > Protect Document and you will see five options:
- Open in Read-only
- Encrypt with Password
- Restrict Editing
- Add a Digital Signature
- Mark as Final
Open in Read-only
Once the Read-only mode is enabled, the visitors who are not the author of the document can’t edit or make any changes to it. They can view the doc only.
An alert will prompt to notify anyone opening the document.

To remove this function, all you need to do is:
- Head to File > Info > Protect Document.
- Deselect “Open in Read-Only” and save the document.
Encrypt with Password
This option allows you to grant document access to certain people. You can password protect your doc and control who can read its content.
- Open your Word document, go to File > Info > Protect Document.
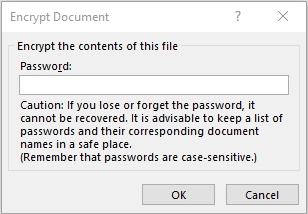
- Select Encrypt with Password
- Input your password in the pop-up box then click OK.
- Reconfirm password.
- Save and close.
Now you should go back and reopen your document. A popup requesting for password should show up.
Following these steps to remove password protection:
- Choose File > Info > Protect Document > Encrypt with Password.
- Select Delete password in the pop-up box.
- Hit OK and save your document.
Restrict Editing
In this option, it’s possible for you to let others view your document but find no ways to edit it. In other words, you can restrict editing certain parts of documents.
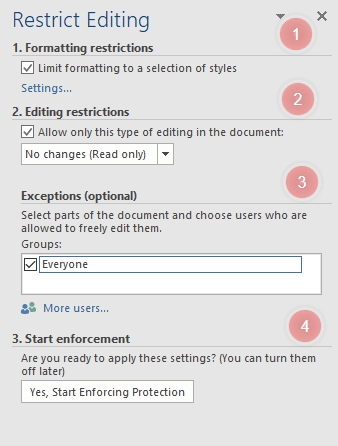
In your Word document, visit File > Info > Protect Document then choose Restrict Editing. This opens a box right on the right-hand side of your document, with many suggestions for restricting access, as follows:
- Formatting restrictions: check the “Limit formatting to a selection of styles” box. Note: Click on “Settings” and select which styles you want to restrain people from modifying your document. You can choose “All” > “None” to clear the selection or “Recommended Minimum” for Word to make the selection.
- Editing restrictions: Select the “Allow only this type of editing in this document” option. Choose from the drop-down menu which changes are allowed, such as tracked changes, comments, filling in forms, or no changes.
- Start enforcement: To apply new settings, press the “Yes, Start Enforcing Protection” button. You can create a password if you want, or just press OK.
Lock Word Document Sections
- In the Restrict Editing box, change the editing restriction options to No Changes (Read-Only).
- Highlight which sections of the document you give the go-ahead to modifications.
- In the Exceptions box, select Everyone or specific users you want to give access to.
- Press the “Yes, Start Enforcing Protection” button.
- Choose whether you want to create a password.
The document now highlights areas the person can edit. You can use the ‘Restrict Editing’ pane to navigate to the accessible regions.
Add a Digital Signature in Word
To protect Word documents, you can also insert a digital signature into them. As soon as the signature is added, the Word document will turn into read-only mode. As such, others can’t edit or make changes to your document.
Check out our detailed guide on creating digital signatures in Word here!
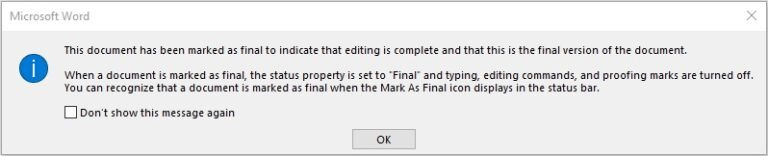
Mark as Final
Simple as its name, choose this option and you will mark your document as a final copy. Rephrasing, viewers will understand that the editing is complete and they won’t be able to tweak content or change digital signatures.
Just go to File > Info > Protect Document in your Word file, choose the Mark as Final option and you’re done.
By the time you reopen the document, a message will notify you of the document status.
In case you want to convert the document back to normal, just follow the same process above, deselect “Mark as Final,” and save your changes.
Protect Word Documents is Easy!
In this article, we’ve showcased 5 simple solutions to protect Word documents. You can enable the Read-only mode, encrypt your document with passwords, and partially restrict editing your document.
Besides, you can also add a digital signature to your file and mark it as final. Others can do nothing to your document but read it only.
Protect Word documents is just a piece of cake! Take our guide to prevent modifications on your Word documents now!