When it comes to document processing software, Microsoft Word, without a doubt, proves a clear-cut winner. This universal tool is widely used by both businesses and individuals to create and edit documents.
But do you know that Microsoft Word allows you to digitally sign in your documents as well? Not only does it give the go-ahead to visible digital signatures but also the invisible ones. Also, many users also use Word to create electronic signatures on Mac.
The topic for discussion today centers on 3 different ways to create digital signatures in Word. We’ll break down each method to make it easy to follow.
Let’s hop in!
- How to Create Digital Signatures in Word
- Add Invisible Digital Signatures in Word
- Digitally Sign a Word Document Using Adobe Sign
How to Create Digital Signatures in Word
Before we dig into 6 simple steps to digitally sign a document in Word, there are some points you should take into account:
- When adding a digital signature to an Office file, you can specify the signer’s information and the instructions for the signer.
- When you send an electronic copy of the file to the intended signer, he/she will see the signature line and a signature-requested notification.
- As soon as you perform a Sign request on Word, a digital signature will be added at the same time to verify your identity. That’s why if you’re not logged in to your Office account, it’ll ask you to get a digital ID.
- A digitally signed document is defined as “read-only” to prevent any modifications.
Following is the step-by-step guide on how to create digital signatures in Word. Anyone using Microsoft Word versions 2007, 2010, 2013, 2016, 2019, and Word in Office 365 can apply this guide.
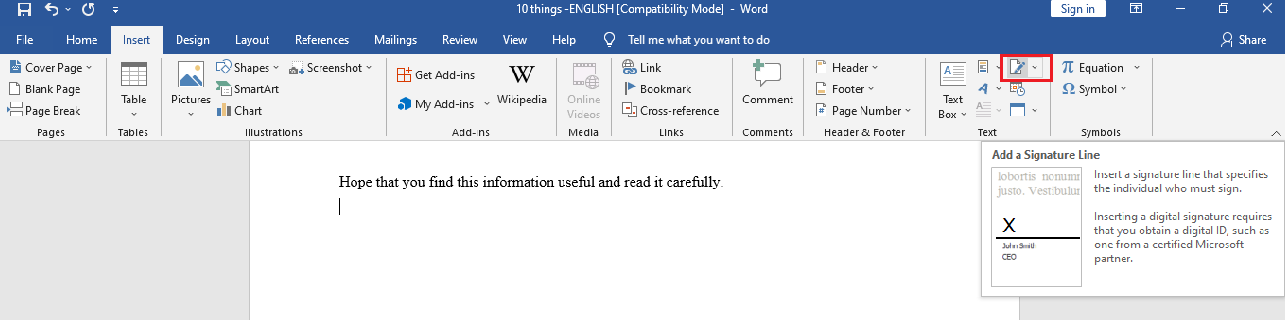
- Open your Word document, place the cursor where you want to create a signature line.
- In the Insert tab, go to the Text group, click on the “Add a Signature Line” icon.
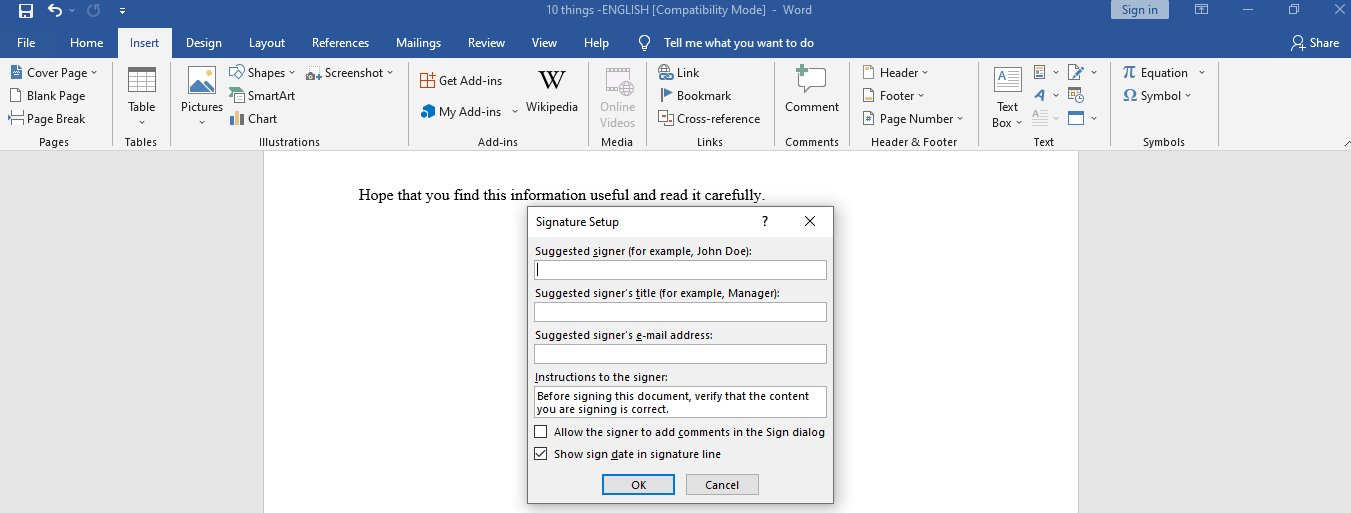
- In the Signature Setup popup, fill in the details that will appear beneath the signature line:
– Suggested signer: the signer’s full name
– Suggested signer’s title: the signer’s title, if any
– Suggested signer’s e-mail address: The signer’s email address, if required
– Signature options: Select one or both of the following checkboxes: Allow the signer to add comments in the Sign dialog and Show sign date in signature line. The former lets the signer type a purpose for signing. Meanwhile, the latter allows the date the document was signed to appear along with the signature.
- Click OK. A signature line shows up on your Word document
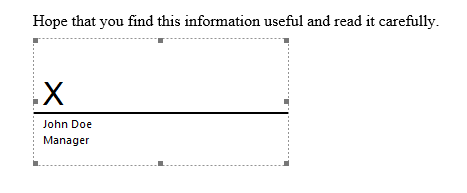
- Right-click on your signature line and choose Sign. You can either type your name in the box next to the X sign or select your signature image. Click Select Image, which opens the Select Signature Image dialog box. Choose your desired signature image file and hit Select.

- Click Sign and you’re done.
Remove Digital Signatures from Word
It’s super easy to remove the digital signatures from your Word document.
- Open the document or worksheet that contains the signature you want to remove.
- Right-click on the signature line.
- Click Remove Signature > Yes and you’re done.
Alternatively, it’s possible to remove a signature by:
- Head to the Signature Pane
- Click the arrow next to the signature.
- Hit Remove Signature and that’s it!
Add Invisible Digital Signatures in Word
Do you know that besides normal digital signatures, Word gives the green light to invisible digital signatures too? This aims to protect the content authenticity of your document. The Signatures button will be placed at the bottom of the signed documents.
What’s more, apart from Word, you can also insert invisible digital signatures in Excel workbooks and PowerPoint presentations.
We’ll walk you through 5 steps on adding indivisible digital signatures on Word documents below.
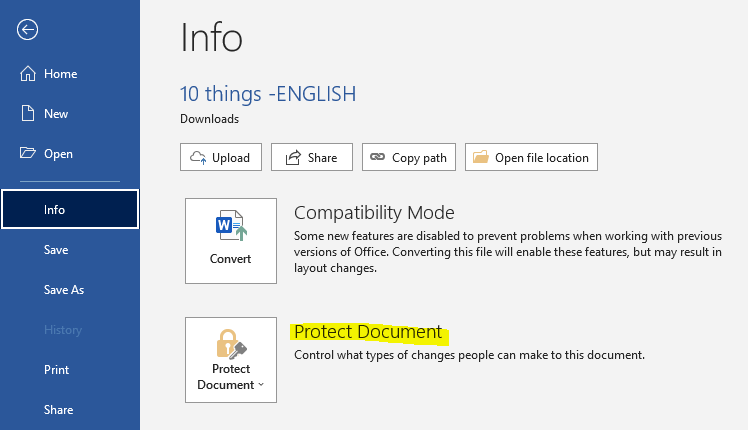
- Open the document you intend to add an invisible digital signature. Click the File tab, then choose Info > Protect Document.
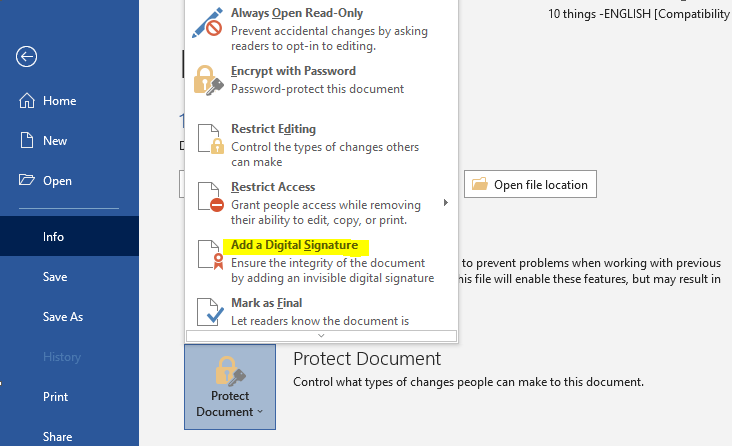
- Choose Add a Digital Signature. A message pops up. Click OK.
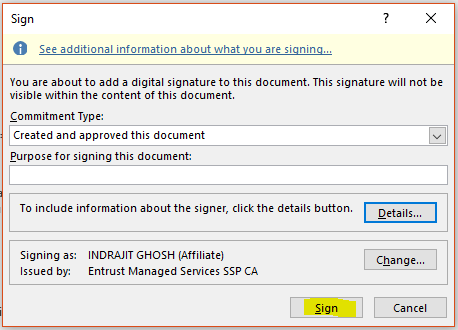
- In the Sign dialog box, fill in the Purpose for signing this document box.
- Click Sign and you’re done.
The Signatures button appears as soon as your document is digitally signed. Now, your document turns into the “read-only” mode to prevent modifications.
Delete Invisible Digital Signatures in Word
Deleting an invisible digital signature is just a piece of cake. It involves 3 simple steps:
- Open the document that contains the invisible signature that you plan to delete.
- Go to File > Info > View Signatures. This takes you back to your document and brings up the Signatures pane.
- Click on the arrow close to the signature name, then choose Remove Signature > Yes.
That’s it! Now you can get your invisible digital signature out of your Word document.
Digitally Sign a Word Document Using Adobe Sign
Though it’s super easy to digitally sign using Word itself, many people still find the signature setup process time-consuming and complicated. That’s why we bring forward an alternative – using Adobe Sign to create digital signatures in Word.
Adobe Reader boasts many advantages for digital signs. Not only it’s easy to use but it also completely compatible with Microsoft Word. All you need to do is upload your Word document to Adobe Sign, then drag and drop your digital signatures to the right position.
The following detailed guides will show you how.
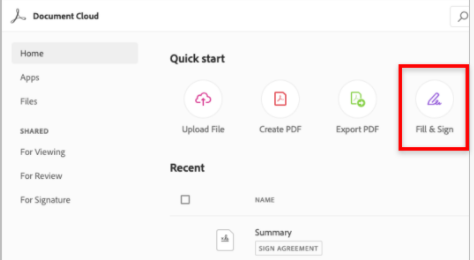
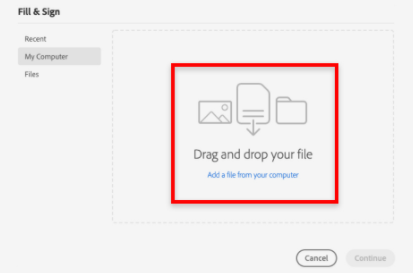
- Log into your Adobe Sign account or sign up for a free account if you don’t already have one. On your home screen, choose Fill and Sign Yourself.
- Drag and drop the document you need to sign into the files box. Instead, click “My Computer” to upload your Word doc. Hit Continue.
- Choose Add signature and click in the Word document. Place your pointer on the position you want to insert a signature.
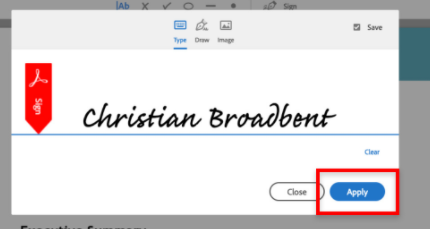
- Select your preferred digital signature setup as the signer. You have 4 options to choose from.
- Input your full name as typed text
- Use a mouse to draw a signature
- Upload your signature image
- Sign with your fingers on a touch screen
Hit Apply when you’re done.
- Click Done. You can either download your signed document in a PDF format or send its copy to others with email addresses.

Which is Your Favorite Way to Create Digital Signatures in Word?
We have guided you through 3 ways to create digital signatures in Word documents. You can either add visible or invisible digital signatures using Microsoft Word itself.
In case you find the signature setup process in Word time-consuming and involve many steps, opt for Adobe Sign instead.
Which is your favorite way to create digital signatures in Word documents? Are there any other methods that you recommend? Share with us your experience in the comment below!