Every day, thousands of users visit your Shopify stores. However, this won’t yield any profit as only a few of them make a purchase. How come?
It’s time you should look back at your Shopify checkout page. Is there any checkout barrier that you are overlooking?
Shopify wins over many of its competitors with its default conversion-focus checkout page. This leads to the fact that some Shopify store owners don’t even give care to their Shopify checkout page customization.
That’s such a terrible mistake!
In this article, we’ll show you 9 sure-fire practices to renovate your Shopify checkout page and notch up sales.
- #1. Allow Guest Checkout
- #2. Create Shopify One-page Checkout
- #3. Show Cart Security Messages
- #4. More Payment Options – Why Not?
- #5. Upsell Smartly on Shopify Checkout Page
- #6. Give a Sense of Urgency
- #7. Add Date Picker for Easy Tracking and Delivery
- #8. Highlight Refund Policy
- #9. Keep Transparent on Pricing
#1. Allow Guest Checkout
Customers visit your checkout pages for just one reason – buy your products. That’s why forcing them to create an account to continue the shopping process doesn’t make any sense here.
Even worse, this will drive customers away and increase cart abandonment. To create a seamless shopping experience in your store as well as boosting sales, you must allow guest checkout.
Buyers can log in via Facebook, Instagram, or Google account to make a purchase. As soon as they place an order, you can enable all account creation prompts to let them create accounts.
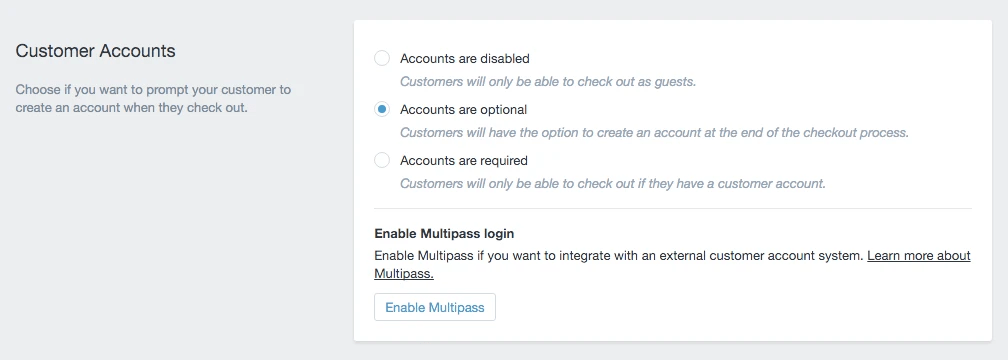
To turn on guest checkout in your Shopify store, follow these steps:
- In your Shopify admin dashboard, go to Settings > Checkouts.
- Under the customer accounts section, choose Accounts are optional.
- Select Enable Multipass to implement multiple pass login.
- Click Confirm to save your settings.
#2. Create Shopify One-page Checkout
One-page checkout helps people check out faster, no doubt. It frees customers from moving back and forth to enter shipping addresses or contact information.
This is one of the most popular and effective practices that help recover cart drop-off. Similar to WooCommerce one-page checkout, Shopify one-page checkout can include shipping, delivery, and payment information on a single page. This minimizes the number of navigations a customer has to take to complete an order.
Though the Shopify checkout page is already conversion-focus, you can also renovate and optimize it for the better.
#3. Show Cart Security Messages
Privacy comes as the paramount importance when it comes to shopping online. While you have SSL as a strong emphasis of your store security, you should also display an extra cart security message.
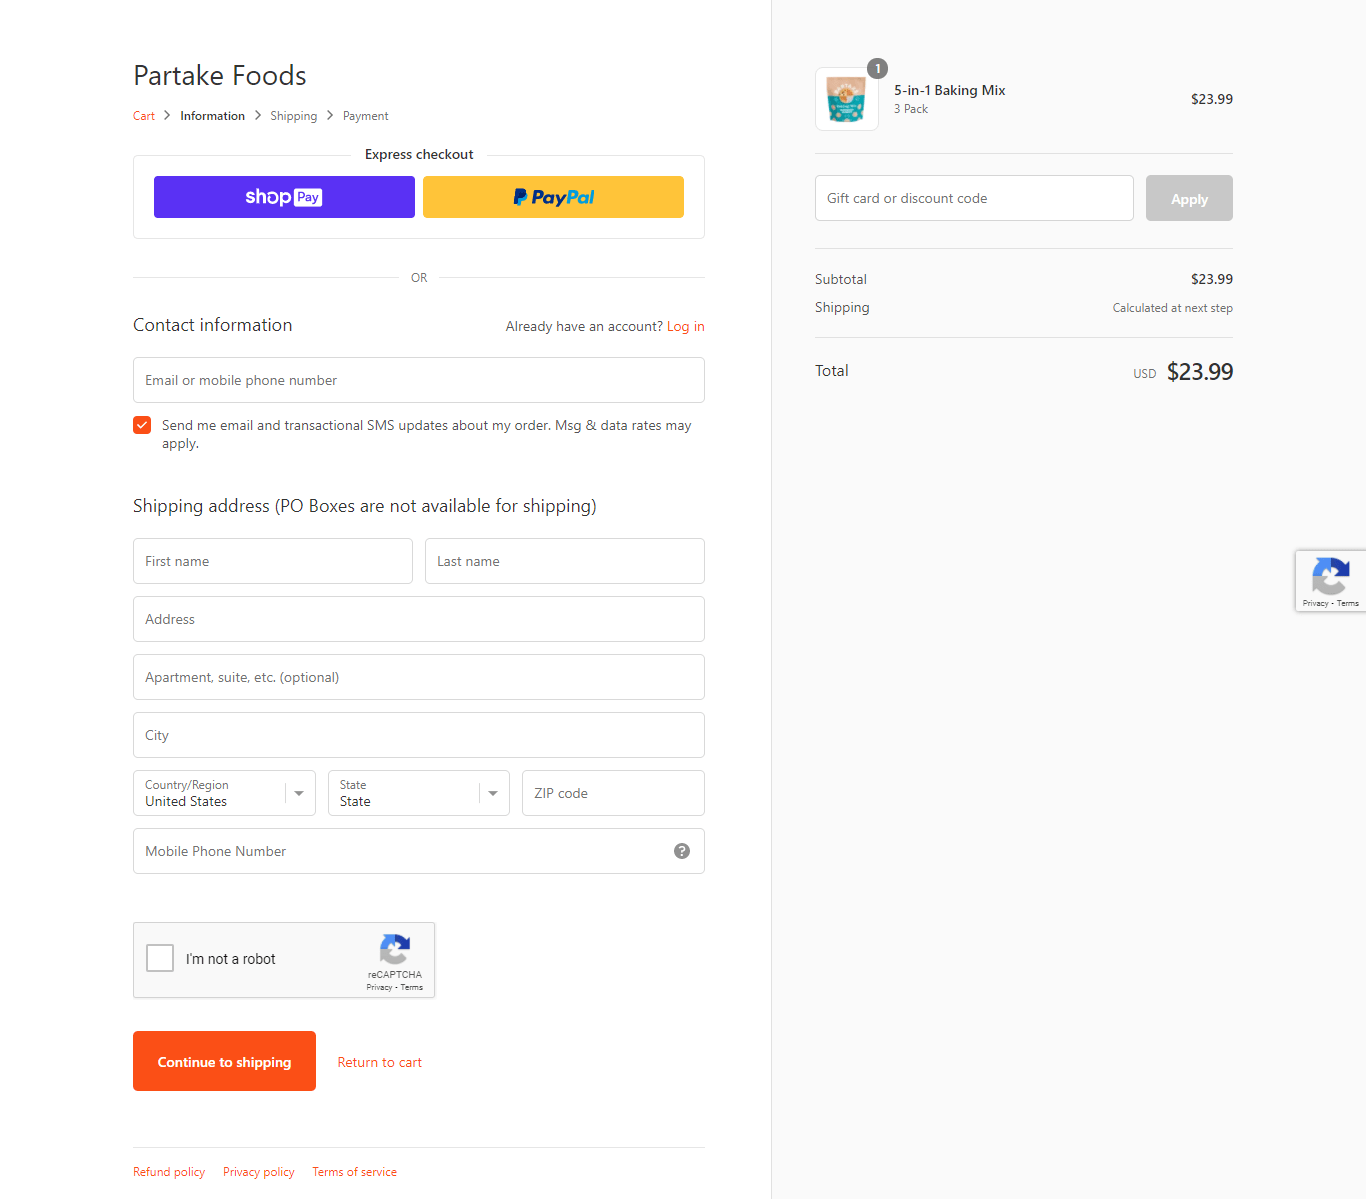
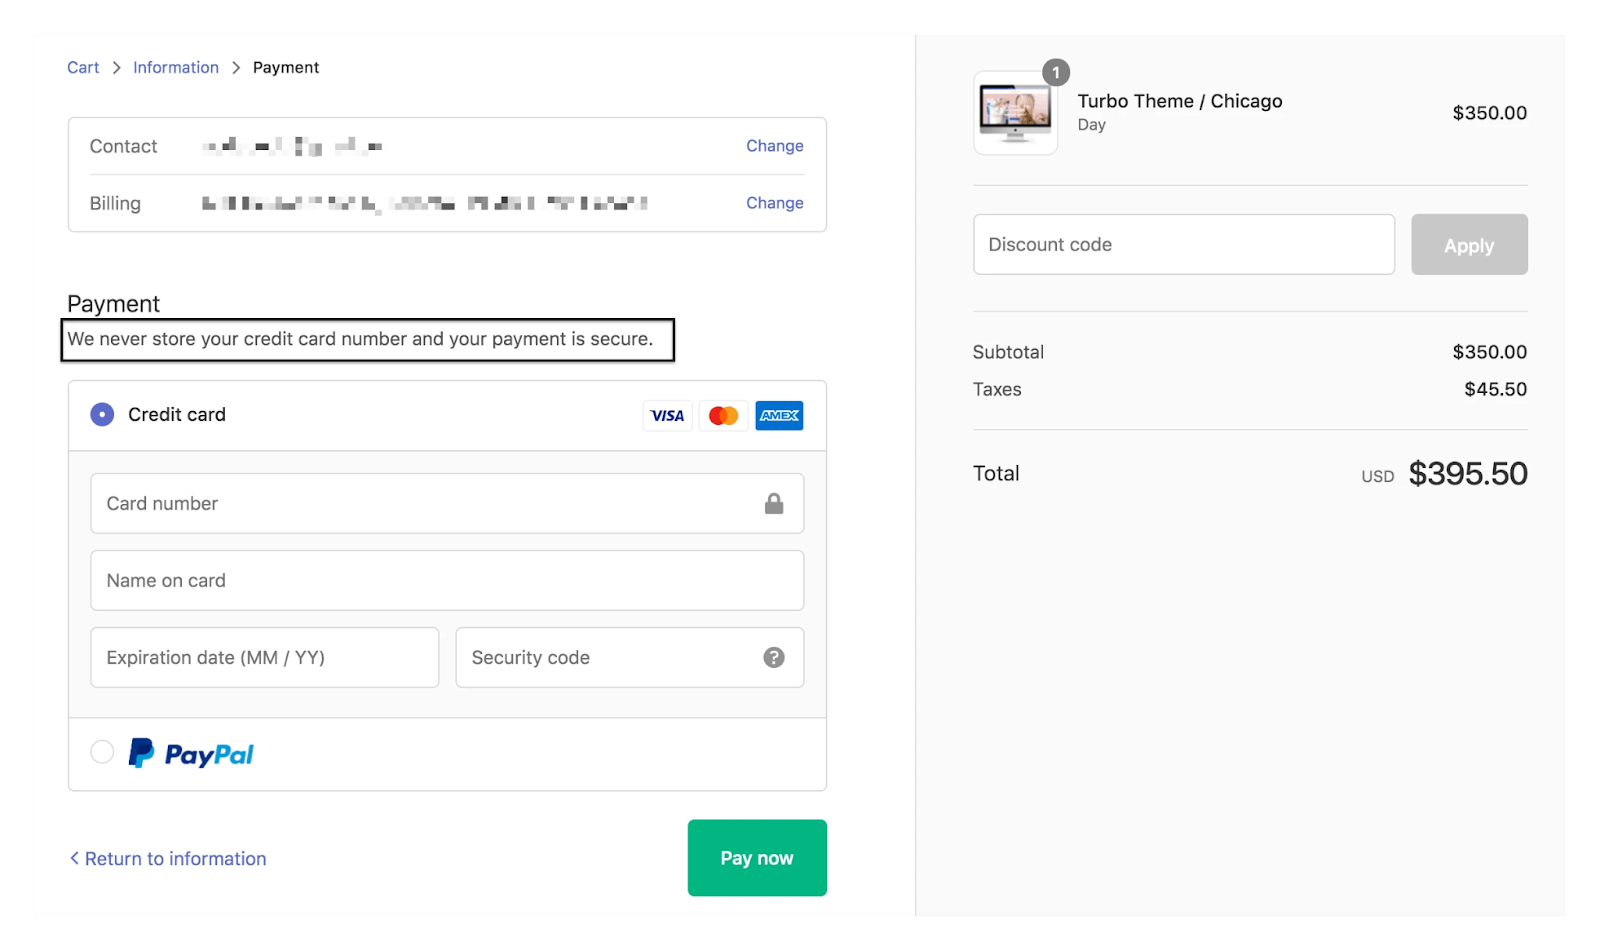
Shopify does showcase the “All transactions are secure and encrypted” note above the credit card detail requirement field. Your duty is to tweak and give it a “human vibe.”
It can be “We never store your credit card number and your payment is secure” or something more personal and buyer-friendly.
To change the Shopify default cart message, all you need to do is:
- Search by All transactions are secure and encrypted and look for Card security notice under Checkout& system/Checkout payment.
- Update that message with your own one and save your changes.
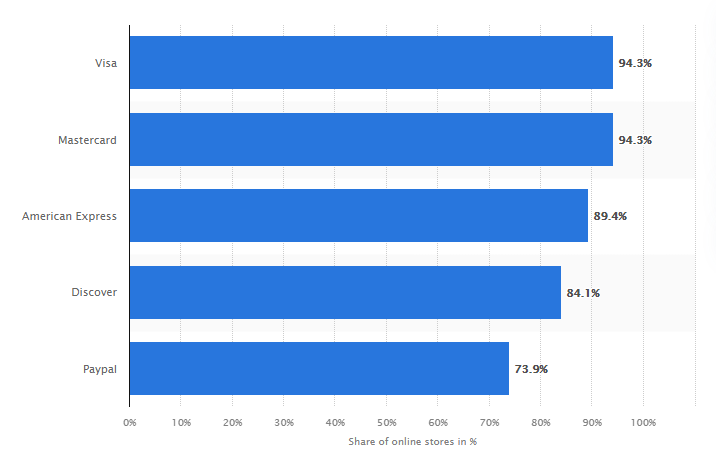
#4. More Payment Options – Why Not?
We all know that PayPal is the most popular payment gateway on this planet. But this title doesn’t guarantee that all of your customers will prefer Paypal as their to-go payment option.
Lack of payment options results in 8% of cart abandoners ditching a purchase.
In fact, not less than once do we hear our friends and relatives complaining “Why just Paypal?” when they’re shopping online.
Put yourself in the client’s shoes. Some love paying via Paypal, Pioneer. Others fancy credit cards. It’s highly recommended that you should give the go-ahead to multiple payment solutions if you want to notch up your sales.
Adding more payment options to your Shopify checkout page is not brain surgery at all.
- From your Shopify admin, go to Settings > Payments.
- In the Alternative Payments section, click Choose alternative payment.
- Choose a provider from the list.
- Enter your account credentials for the provider you chose.
- Click Activate to enable the provider
#5. Upsell Smartly on Shopify Checkout Page
Showing similar products proves the most effective way to upsell.
eCommerce stores that show product recommendations on their checkout pages have seen an increase in revenues up to 26%.
Do you know that Amazon’s recommendations engines did contribute 35% to its total revenues?
Inserting product recommendations into your Shopify checkout page is simple. However, you have to make sure your customers find it hassle-free to add them to their carts.
For upselling smartly, you can refer to upsell apps to help you handle the job. There are tons of best free Shopify apps for upselling and cross-selling, ReConvert Upsell & Cross Sell can be a trustworthy pick.
#6. Give a Sense of Urgency
Flash sales, which last for a few hours always create a trigger in increasing sales. This is based on a human psychological phenomenon called “FOMO” – fear of missing out.
While most eCommerce site owners used to add a timer, you can try something different, such as:
- Display how many people have added that item to their carts
- Offer a limited-time discount along with free shipping
- Attach a free gift or free voucher for any customer returning to your store
#7. Add Date Picker for Easy Tracking and Delivery
Adding a date picker significantly assists buyers in keeping track of their orders. Plus, you can provide more options on shipping and pickup options, for example, customers can choose to get their items during administrative hours or their daily runs.
So how to add a calendar to your Shopify checkout page? You might have to insert jQuery into your theme liquid, create a delivery snippet then add it to your checkout page.
Highlighting the refund policy carries a lot of weight in boosting credibility and building up trust with your dear consumers.
According to ShipBob, over 60% of online shoppers look at a return policy before making a purchase. Once they know that it’s possible to return a product if it doesn’t meet their expectations, they’ll feel more secure to go ahead with the purchase.
Keep in mind that your refund policy must be very clear in every detail, including refund conditions, a warranty, a warranty period, and a return window.
Following are the step-by-step guide to display a store policy on the Shopify checkout page:
- Log in to your Shopify admin dashboard then head over to Settings > Legal.
- Fill in your policy or choose a pre-made template from Shopify.
- Edit and add links as per your needs, then click Save to confirm your settings.
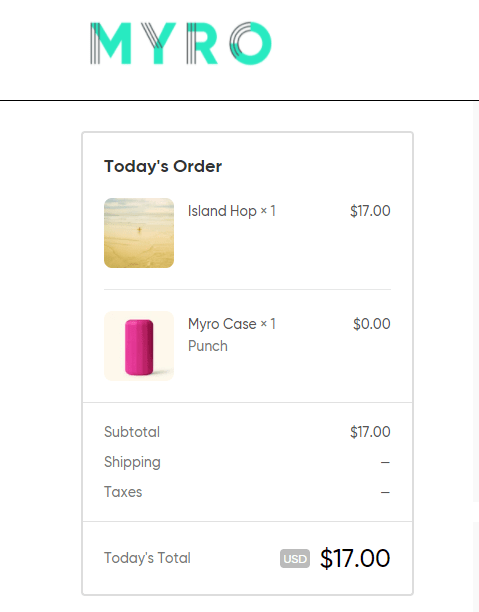
#9. Keep Transparent Pricing
No customer will end up happy if they find out there are some hidden costs in the checkout process.
Baymard Institute has pointed out that 55% of customers abandoned their carts as they saw some extra charges that they can’t understand.
You should showcase the breakdown of the payment of your customers as clearly as possible. The price of actual items, the shipping costs, taxes cost, or even price after discounts must be broken down in lines.
The more transparent your pricing is, the more trust you build and gain from buyers.
Optimize Your Shopify Checkout Page Now!
This article has walked you through 9 best practices that you might need to optimize your Shopify checkout page and improve your bottom line.
You can allow guest checkout and create one-page checkout to simplify the checkout process.
We recommend offering more payment options, adding a date picker, highlighting refund policy, and keeping pricing transparent to improve the shopping experience.
In terms of driving more sales, you should show up product recommendations and add a sense of urgency.
Having any questions? Let us know in the comment section below!