Staying reachable and in touch with users or customers are the cornerstone to the success of any website. Apart from email addresses, using a contact form is the simplest and most effective way to let visitors reach out to you and your services at any time.
In this article, you’re going to learn how to add a contact form to WordPress sites. We’ll start off with the reasons why using the contact form is a smart idea, then continue with step-by-step guides on how to add contact forms to WordPress with the help of the WPForms and Contact Form 7 plugins.
By the end of this article, you’ll know:
Contact Forms vs Direct Email Submission: Which One Better?
Lots of you may wonder why need to use contact forms while posting emails seem to be more direct? Using contact forms in WordPress sites turns out to be more beneficial than you might think.
Among them, the greatest benefit to mention is to protect your site from spam. Posting your email address on a WordPress site easily increases the likelihood of being included in the email spam list. Hawk-eyed spammers usually scan websites to seek unprotected email addresses and flood them with junk messages. A contact form thankfully serves as a spam filter and keeps your emails private.
What’s more, it saves your time from organizing user information. Contact forms allow you to wisely request users to send specific and relevant information that you need. Filter inquiries are also provided to help you to classify information, which direct email submitting can’t do.
Last but not least, the presence of a contact form gives your site a professional vibe and better customer engagement. A boring old-fashioned process of copying your email address, typing text, and sending emails may drive potential customers away. With a contact form right insight, they can enter messages and hit submit immediately, which is way more convenient and time-saving.
Impressed by how useful a contact form is? Then let’s discover how to add contact forms to WordPress sites.
2 Ways to Add Contact Forms to WordPress
WordPress doesn’t provide any built-in contact form by default, that’s why we need the support of contact form plugins to smooth the way for this task. In this tutorial, we will be using WPForms and Contact Form 7. They’re one of the most featured-rich and reliable WordPress contact form plugins in this field.
Using WPForms
The process of adding a contact form in WordPress using WPForms basically goes through 5 steps:
- Step 1: Install WPForms
- Step 2: Create a contact form
- Step 3: Set up form notifications and confirmation settings
- Step 4: Add contact forms to WordPress pages
- Step 5: Embed a contact form to a sidebar
Let’s hop to it!
Step 1: Install WPForms
- First off, open your WordPress dashboard, go to “Plugins,” choose “Add New.”
- Search for “WPForms” in the search box and click the “Install Now” button.
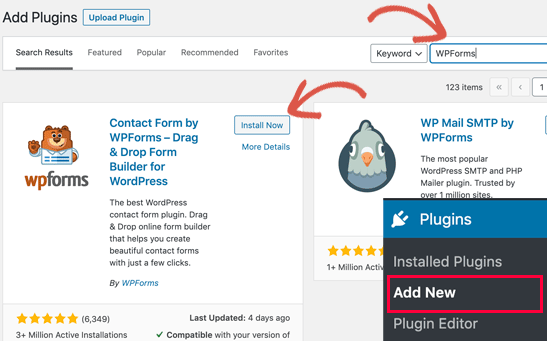
- Once the installation has finished, click “Activate.”
Step 2: Create a Contact Form
- In your WordPress dashboard, mouse over to “WPForms”, choose “Add New.”

- The form setup page will be opened. You need to fill in your form name and select “Simple Contact Form.”
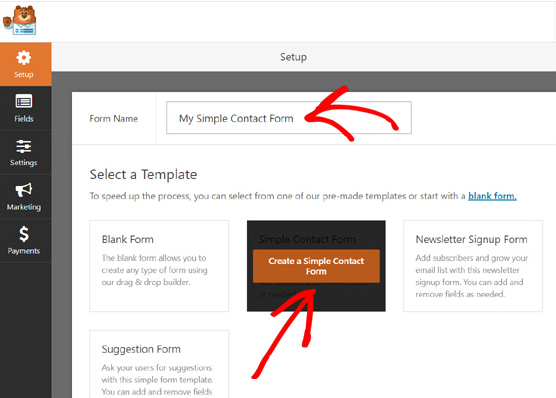
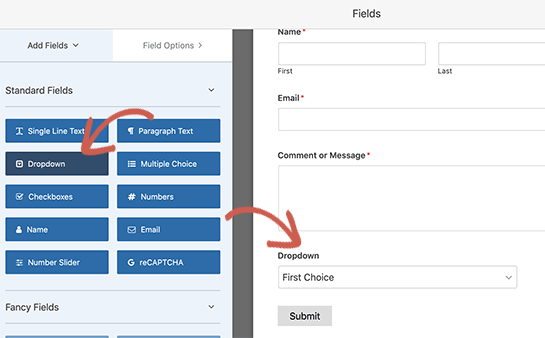
- The WPForms drag and drop form builder will be shown up. Next to it, there’s a pre-built contact form that comes with basic fields, such as “Name,” “Email,” and the “Message” box. You can customize your form per your needs by selecting additional fields on the left sidebar, or dragging and dropping the field order. Once you’re done editing, hit the “Save” button at the top.
Step 3: Set Up Form Notifications and Confirmation Settings
Form notifications are the email you get every time people submit the contact forms on your site. While the form confirmations refer to the thank you page or the redirect page after form submissions.
- To set up form notifications, on the WPForms menu, select “Settings,” click “Notifications”. What you need to do is setting up your email address, form name, and email subject. By default, the notifications will be sent to the admin email that you set up on your site. You can replace it with your custom email. In case you want to send notifications to multiple emails, fill the email list in and separate each of them with a comma.

- For form confirmations, you can opt for displaying a thank you message or redirecting users to another page. Click “Settings,” choose “Confirmations” and start to configure your form confirmations.

- Don’t forget to click “Save” in both settings.
Step 4: Add Contact Forms to WordPress Pages
- To embed a contact form into a page using the WPForms button, you can either open an existing page or create a new one, then find the plus icon and click on it.
- This will open a search box. Look for WPForms and add it to your page.
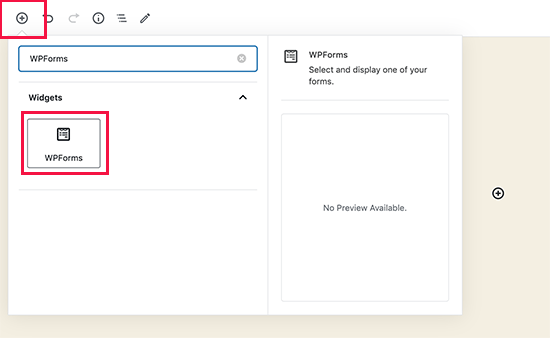
- Next, the WPForms block will appear in your content area. Select the contact form you already created on the drop-down menu.

- Hit “Publish” and you should see a contact form embedded on your page.
- For a WordPress page that comes with WPForms shortcodes, navigate to the WPForms menu and click “All Form” to look for the contact form shortcode.
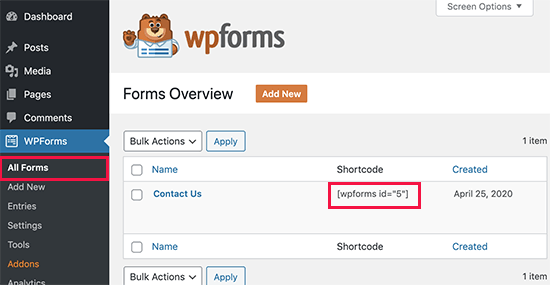
- Copy and paste that code to your WordPress post and page.
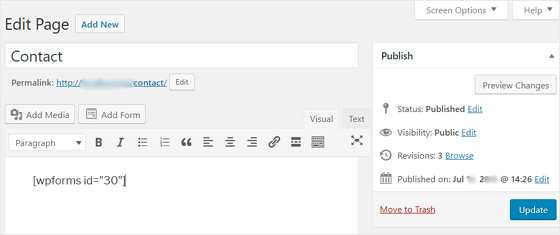
- Save your page.
The process of creating contact forms in WordPress is almost done. However, if you wish to add contact forms to WordPress sidebars or any widget-ready areas, move to the last step.
Step 5: Embed a Contact Form to the Sidebar (Optional)
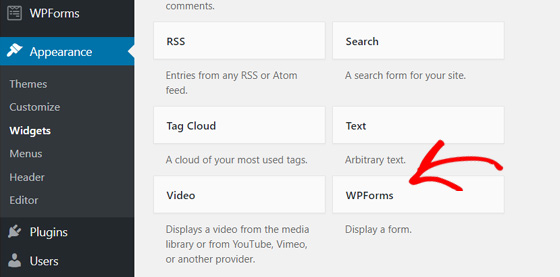
- In your WordPress admin area, head over to “Appearance,” choose “Widgets”, and opt for WPForms widgets.
- After that, choose “Sidebar” on the appeared drop-down menu.

- Hit “Add Widget” and you’re done adding a contact form in WordPress using WPForms.
Using Contact Form 7
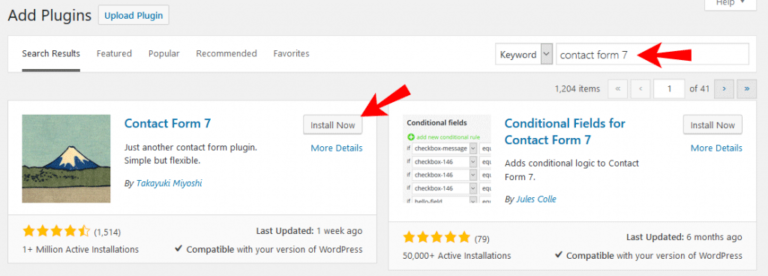
Another great alternative for WPForms is Contact Form 7. Similar to WPForms, you need to install Contact Form 7 to your WordPress site first. Logging in to your site, go to “Plugins,” choose “Add New” and type its name in the search bar. After that, click install and activate the plugin.
As soon as its installation has finished, you’re good to go!
We’ll walk you through 4 straightforward steps:
- Step 1: Create your contact form
- Step 2: Edit email settings and form messages
- Step 3: Add contact forms to WordPress sites
- Step 4: Insert a contact form into the sidebar (optional)
Step 1: Create Your Contact Form
- Open your WordPress dashboard and you’ll see a “Contact” tab in the sidebar. Clicking on it takes you to the screen below.
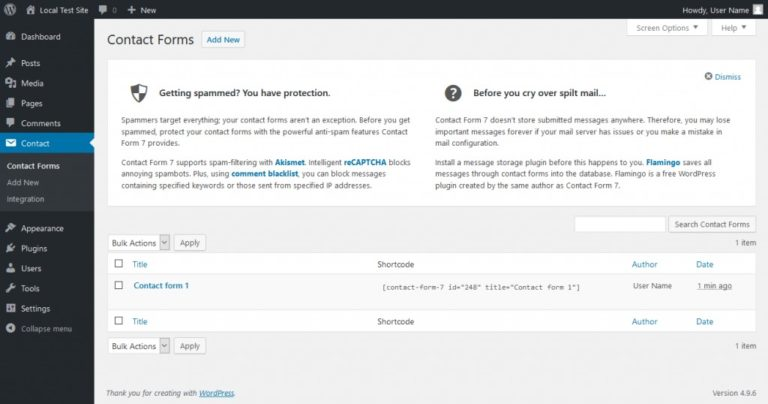
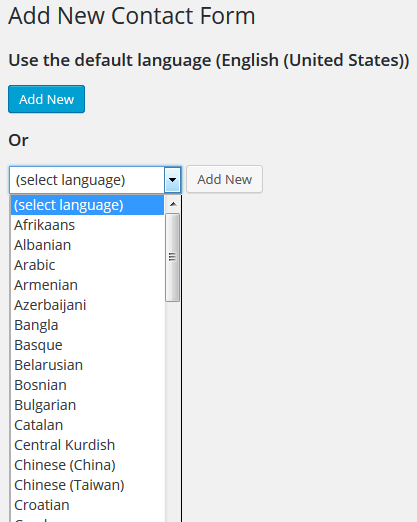
- There’s a default ready-to-use contact form named “Contact Form 1,” which contains all basic fields and can be inserted into any post or page. You can either use it or create a new one from scratch by clicking on “Add New” and choosing your language.
- After that, you’ll be taken to a new contact form editor. Type your form’s title and start editing your form that suits your taste.
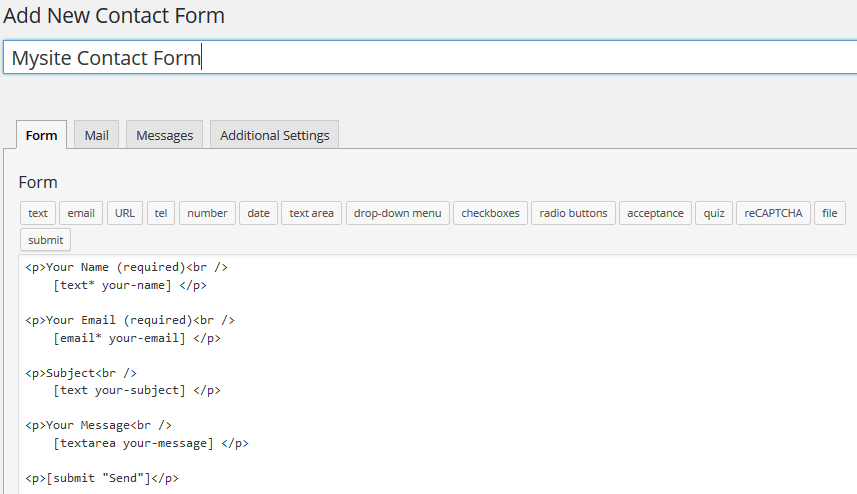
- The new form already includes basic fields, such as name, email, message, and send. You can keep all these fields and add extra fields by selecting many available tags in the form field section. Let’s say you want to add a protection layer to your form, you need to choose the “reCaptcha” tag. After that, click on “Insert Tag.” Lastly, hit the “Save” button.
Step 2: Edit Email Settings and Form Messages
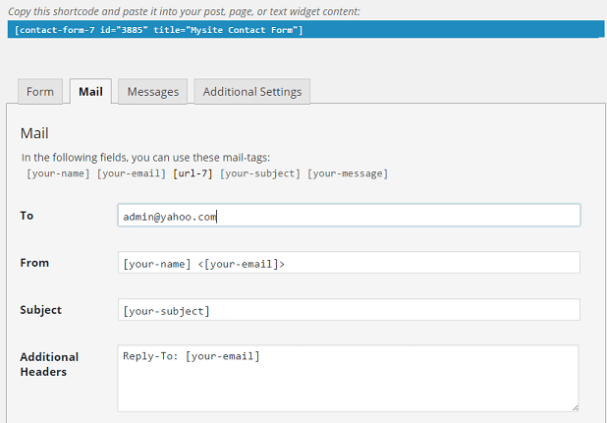
- To set email notifications, click on the “Mail” tab next to the “Form” tab. In the “To” field, type the email address to which the messages will be sent. Click on “Save” when you’re done.
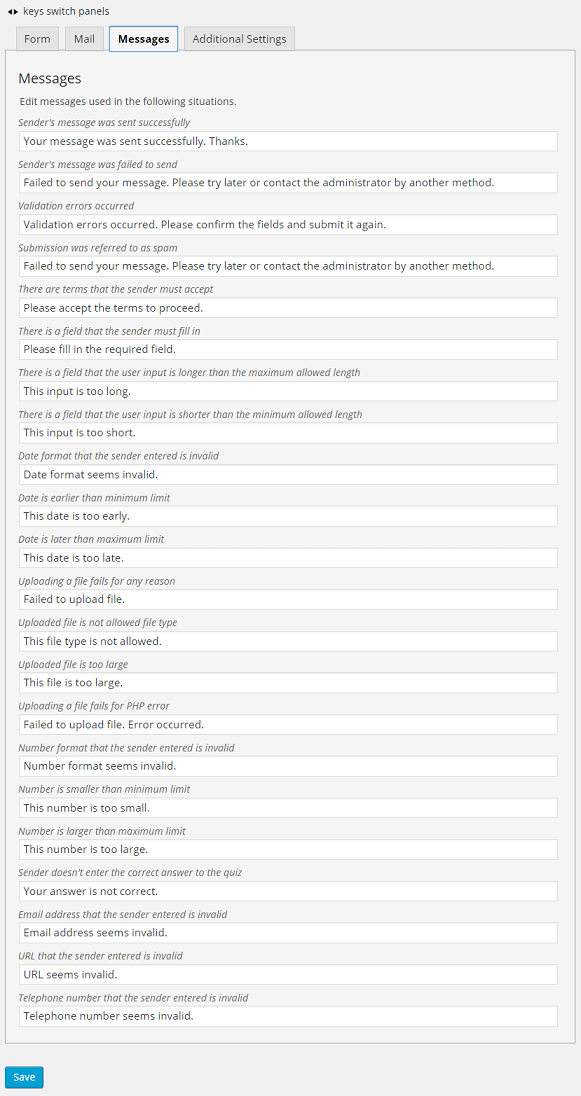
- To edit form messages, head to the “Messages” tab. Contact Form 7 displays a list of default error messages, success submission, or just guiding messages. You can change any of them to fit your website’s style. Next, click “Save” after finishing all customizations.
Step 3: Add Contact Forms to WordPress Sites
Now that you’ve done configuring the form, it’s time to add it to your site.
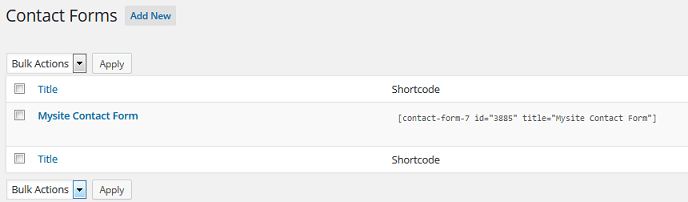
- Back to your WordPress dashboard, navigate to “Contact,” choose “Contact Forms.” Copy the shortcode of the contact form you wish to display on your site.
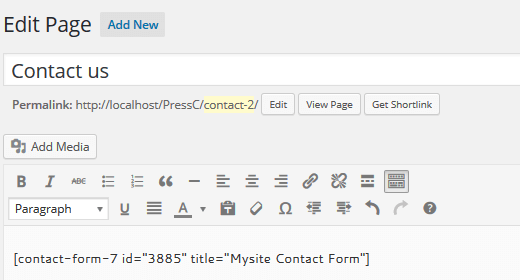
- Open the page you want to add the contact form and paste that shortcode in the text area of your page editor.
- Publish your page and view your contact form in the front-end. You should check if the form is working properly. Normally, the messages from the contact form will be directly sent to the email address you specified earlier in the “Mail” settings.
Step 4: Insert a Contact Form into the Sidebar (Optional)
This cakewalk step won’t take you much time.
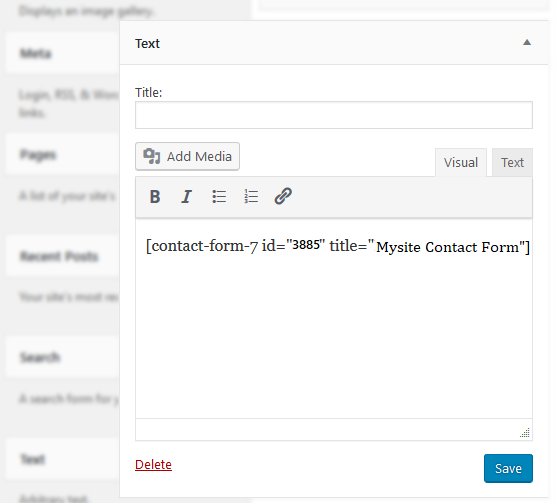
- Go to “Appearance,” select “Widgets” and paste the contact form’s shortcode to your widget’s text area. Save the widget and you’re done!
Ready to Create Your Contact Form?
Being highly skilled in creating WordPress contact forms is a must for any WordPress site owner. A contact form not only filters out spam, allows you to have better communication with users but also offers your site a professional look.
In this article, we’ve covered how to create and add contact forms to WordPress sites, using WPForms and Contact Form 7. Between the 2 provided options, which ones do you prefer?
Please share your thoughts in the comments below!
If you like this article, visit our website and subscribe to our Youtube channel for more helpful tutorials.