If you’re searching for a simple yet effective solution to auto-populate fields in WordPress form, this article is just the ticket.
In this article, we will show you how to auto-populate form fields in WordPress with the help of versatile WPForms.
The post will start with the benefits of auto-filling fields, then continue unveiling the 4 easy steps to use post types and products to create form field options. By the end of this article, you’ll get a clear insight into:
- What are Auto-populate Form Fields and Their Benefits?
- 4 Steps to Auto-populate Form Fields Using WPForms
What are Auto-populate Form Fields and Their Benefits?
Auto-populating fields on online forms help improve accuracy, save textual-typing time and ensure user flow. The idea behind auto-fill was originally aimed to assist physically-disabled users in typing faster and more accurately. Along with that, it also decreases the number of keystrokes required to complete fields.
Auto-populating form fields allow users to input data one time and set their minds at rest, considering all information will be automatically filled in the same relevant areas.
Plus, according to Google, using auto-fill can help people fill out forms 30% faster. Enabling auto-populate form fields saves you time and effort from typing some long and hard-to-remember shipping codes or technical data. At that point, the process of filling forms will take place faster. This contributes to lowering the form abandonment rate and concurrently boosting form conversions.
Auto-populated form fields are best suited for customer support forms, inquiry forms, job application forms, business contact forms, and so on.
Now you know how pre-populating form fields can benefit you in various ways. It’s time to discover 4 easy steps to auto-populate form fields using WPForms. We’ll make it as straightforward as possible.
4 Steps to Auto-populate Form Fields with WPForms
WPForms authorizes you to auto-populate form fields in a snap thanks to its dynamic field choices. Instead of manually typing in each answer, a dynamic field choice automatically completes the form fields for users based on the data they have inputted at some prior time.
In WPForms, you can use dynamic field choices to auto-populate 3 field types: dropdowns, multiple choices, and checkboxes
Assuming that we’re going to create an auto-populated product request to the contact form. The process goes through 4 stages:
- Configure form settings
- Add auto-populated form fields
- Set up notification settings and confirmation messages
- Publish your form
Let’s get the ball rolling!
Configure Form Settings
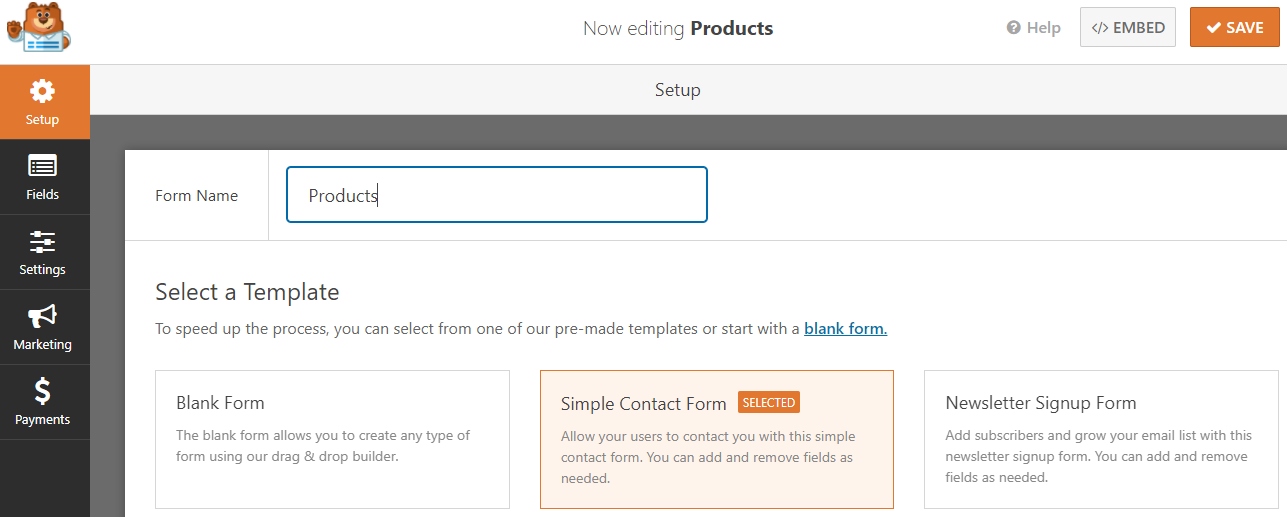
After having WPForms installed and activated, head to WP Forms > Add New and fill in your form name. Next, click “Simple contact form” to start.
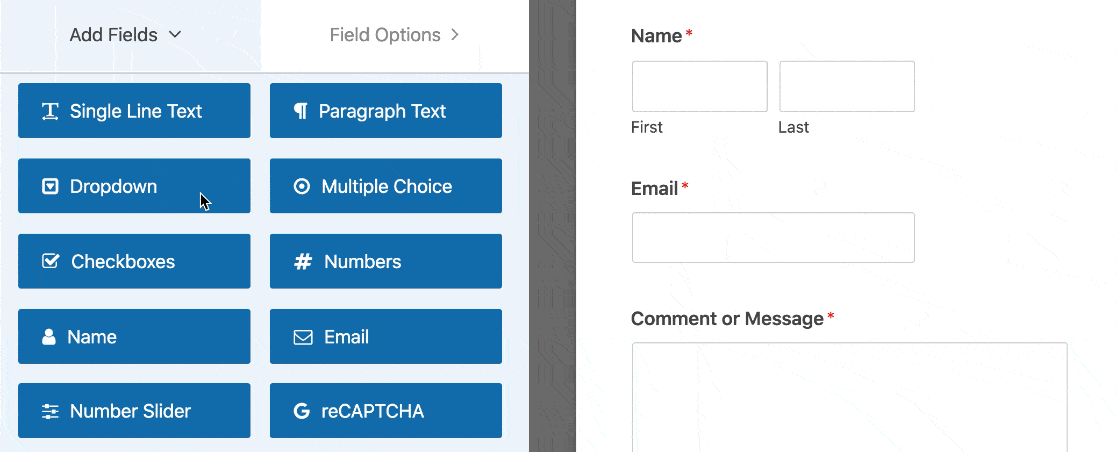
A basic contact form will show up. In “Standard field,” drag the “Dropdown” block to the form you’ve created. Click on the drop-down field to edit its options.
- Label: describe the contents of the dropdown. Here we type “Product Request.”
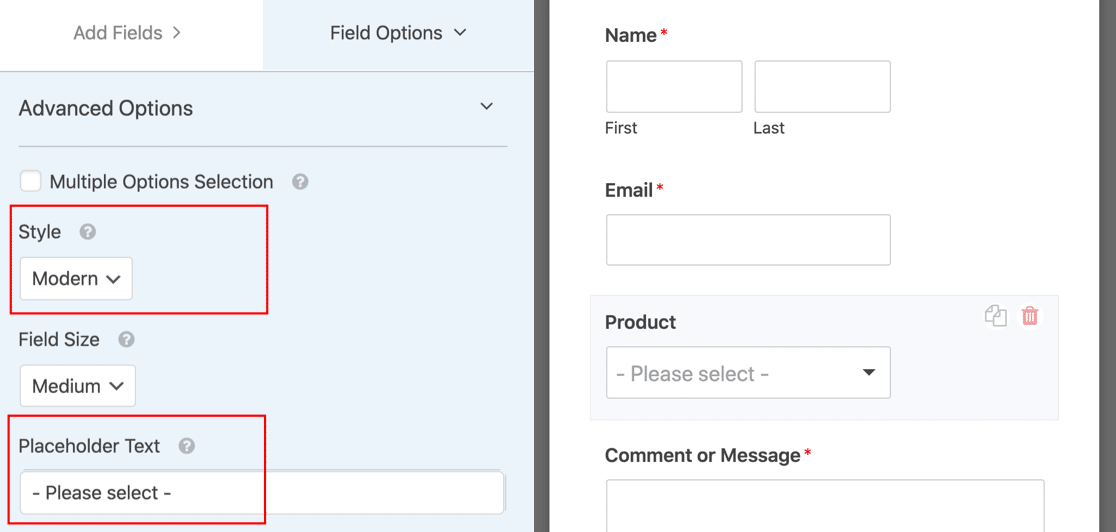
Scroll down a bit and you’ll see “Advanced Options.”
- Style: choose “Morden.”
- Placeholder: fill in your placeholder text.
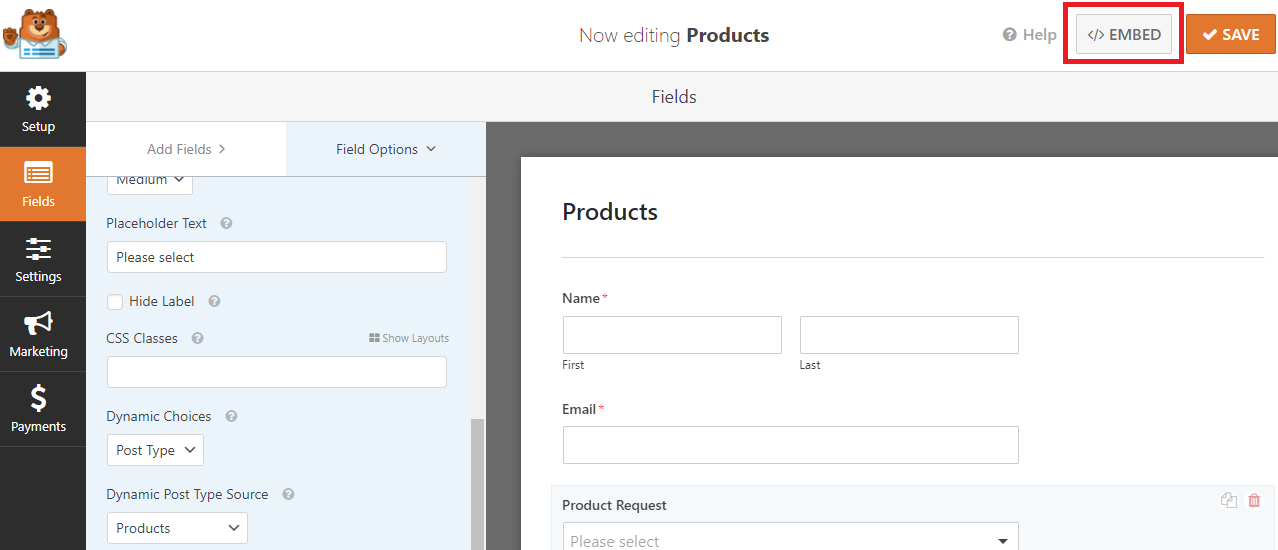
Add Auto-populated Form Fields
Now we’re going to set up the options that will display on the dropdown list.
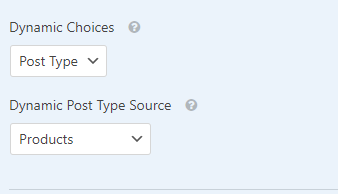
In the “Dynamic Choices” tab which is set “Off” as default, there are two options in the dropdown: Post Types and Taxonomy.
Post Types enables you to auto-populate form fields from the Dynamic Post Type Source. There are three options you should pay attention to:
- Posts: a list of all the posts of your site.
- Pages: all the pages of your site.
- Products: all products on your online store.
On the other hand, selecting “Taxonomy” lets you auto-populate form fields from the Dynamic Taxonomy Source. Among them:
- Tags: all the tags in your blog.
- Categories: all the categories associated with your blog.
- Product categories: categories related to your eCommerce products.
- Product tags: tags you’ve added to your products.
- Product types: product types or variants.
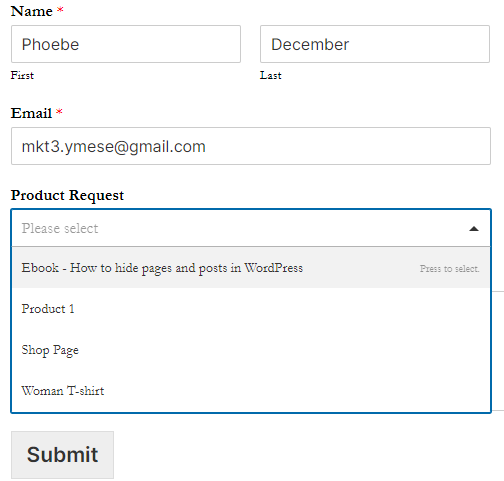
In this tutorial, we select Post Type > Products, which will display all the products of your eCommerce shop.
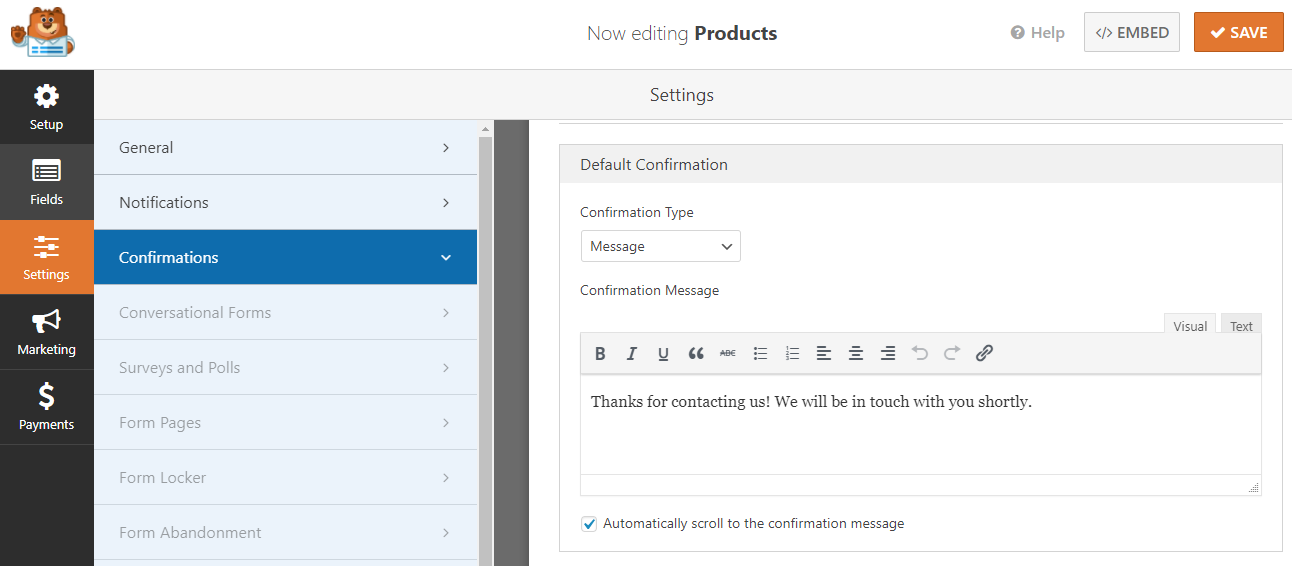
Define Notification Settings and Confirmation Messages
In this step, you can modify your form notifications and confirmations.
- Under the “Notifications” tab > “Send To Email Address” field, fill in the email address to which the messages will be sent to.
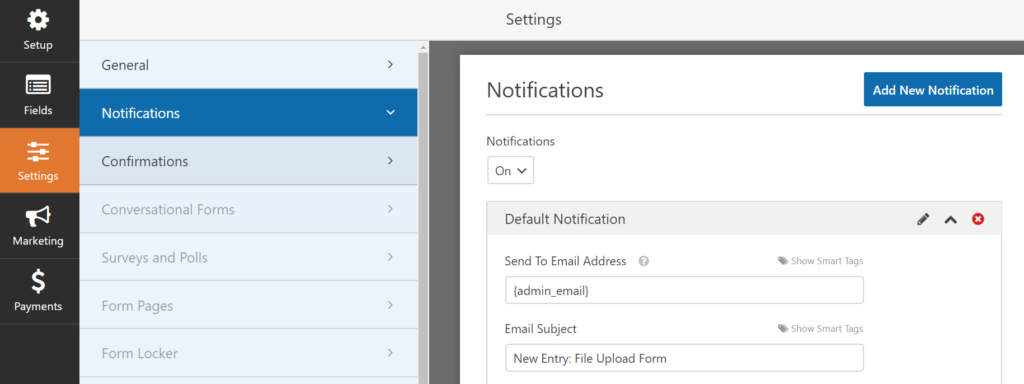
- After that, click on the “Confirmations” tab, which offers you 3 options for successfully submitting confirmation. You can either choose to display a message, a thank-you page, or redirect users to another website after they submit their requests. Click “Save” to update all your changes.
Publish Your Form
You can choose to publish your form on a post, page, or sidebar.
1.Hit “Embed” on the top right corner of the form.
 2. A popup appears. Select “Create New Page.”
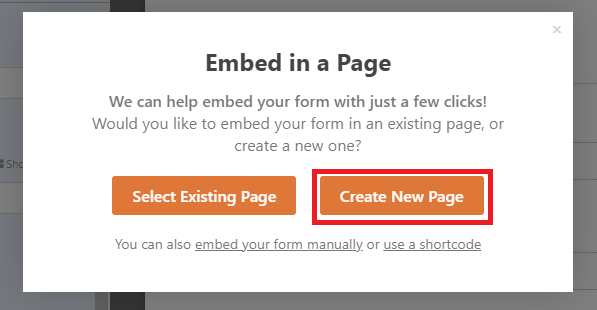
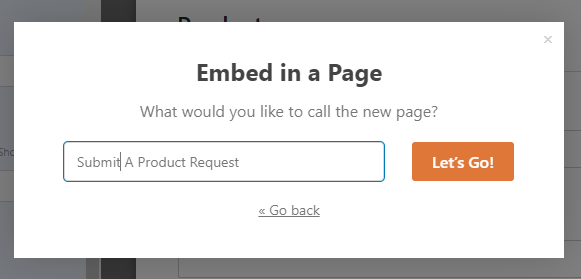
3. Fill in your page name and press “Let’s Go!”
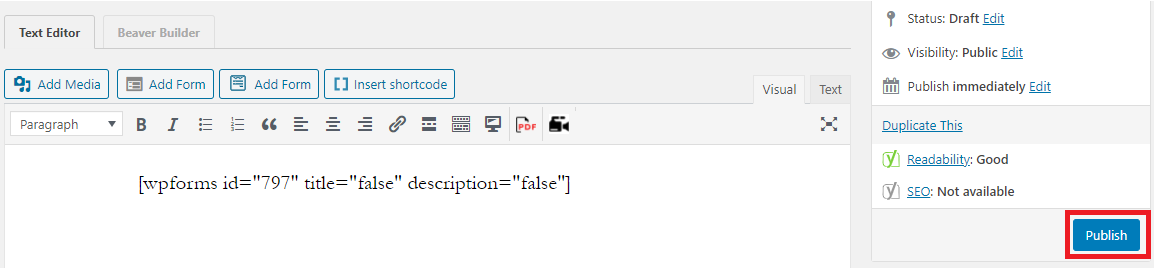
4. The form will be embedded into a page under the shortcode format. Hit “Publish” and your form is ready for submission.
That’s it! You’ve successfully created auto-fill fields in WordPress forms.
Conclusion
It’s necessary to auto-populate form fields on your online forms. This helps to sort out the accuracy problems, ensure user flow, and save the user time and effort from remembering and inputting complicated data.
We’ve walked you through 4 simple steps of how to auto-populate form fields using Dynamic Form Choices of WPForms.
If you have any questions related to this topic, don’t hesitate to drop us a line by leaving a comment below!