If you’re looking for creating a login popup for your online stores, this article is just a ticket!
As a store owner, you surely strive to get rid of the complexity of the checkout process and optimize user experiences.
In this article, we’ll reveal the simplest way to ensure a pleasant experience for your customers, by adding a WooCommerce login popup to your sites. The post will dig deep into the benefits of having a login popup as well as spelling out 3 easy steps to turn this idea into action.
By the end of this article, you’ll know:
- Why You Should Include WooCommerce Login Popups for Your Stores
- 3 Steps to Create a Login Popup
- Easy Login WooCommerce Alternatives
Why You Should Include WooCommerce Login Popups for Your Stores
WooCommerce login popup allows you to display a login form without redirecting buyers to another login page. This comes in super handy in terms of improving user experience.
Looking back to the normal login method. Customers are required to click on the login link, which takes them to a new page solely for login or signup. Once logging in successfully, customers, again, are redirected to the page they previously browsed.
In online services, customer experiences are the top priority. Online purchasers always hunger for swiftness and convenience. A login page that pops up in a fraction of a second can save them a huge amount of time.
More than that, as a store owner, it’s your duty to let customers make a purchase, manage accounts, and complete transactions seamlessly almost on a page. This not only contributes to optimizing the customer experience but also reduces cart abandonment, increases conversion, and kicks your sales up a notch.
Plus, crafting a custom login popup using your images and logos can impress and pique user interest in your sites and your offers.
Having said that, it doesn’t mean that including a login popup is compulsory for every site. Following are some typical types of WooCommerce stores that need a login popup:
- Public store with mandatory user accounts: Everyone can browse this store but only logged-in or registered users can make a purchase.
- Public store with guest checkout: This store offers no protected content or member-only products. This means anyone can browse and buy all your products without having to log in or register.
- Stores offering member-only products: This type of store has restricted products that can only be seen/bought by members.
- Entirely private WooCommerce store: Buyers must log in to access your shop.
- WooCommerece auto-login links: Instead of inputting username and password, customers can click on a link to log in or register.
Since you know the benefits of a login popup, it’s time to turn this idea into action. In the next section, we’ll show you 3 easy steps to create a WooCommerce login popup.
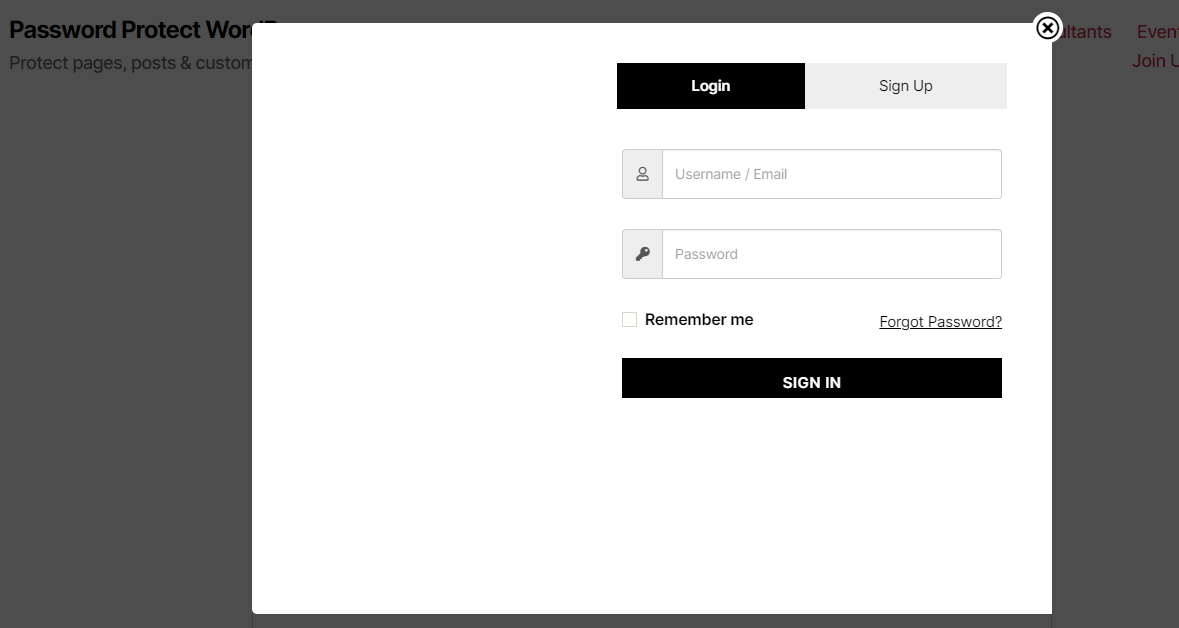
3 Steps to Create a WooCommerce Login Popup
Gaining over 20,000 active installations with tons of 5-star reviews from users all over the world, Easy Login WooComcerce, aka Login/Signup (Inline Form + Woocommerce) stands out to be the most reliable plugins for creating WooCommerce login popup.
This free and lightweight plugin enables the process of registrations, login and password reset to take place smoothly in a blink of an eye. On top of that, its super-intuitive user interface wins people’s hearts. Besides popup, you can also create inline forms with shortcodes.
Following are the step-by-step guides on how to create a login/register popup with Easy Login WooCommerce.
Step 1: Install and Activate Easy Login WooCommerce
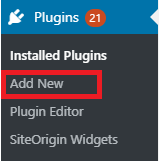
- In your WordPress dashboard, go to Plugin > Add New.
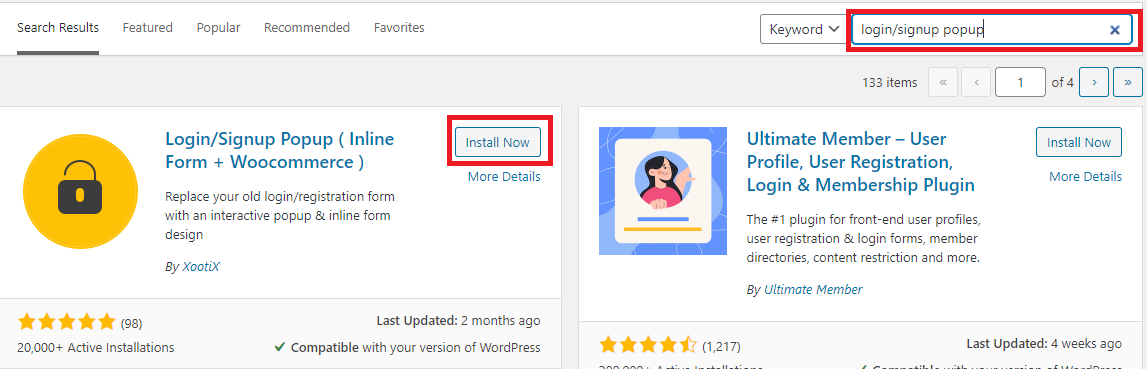
- Type “login/signup popup” in the plugin search bar, enter and you’ll see the plugin shows up. Click “Install Now,” then “Activate.”
Step 2: Configure Settings
After having the plugin activated, a new “Login/Signup Popup” tab appears on your dashboard. It’s time to modify its settings.
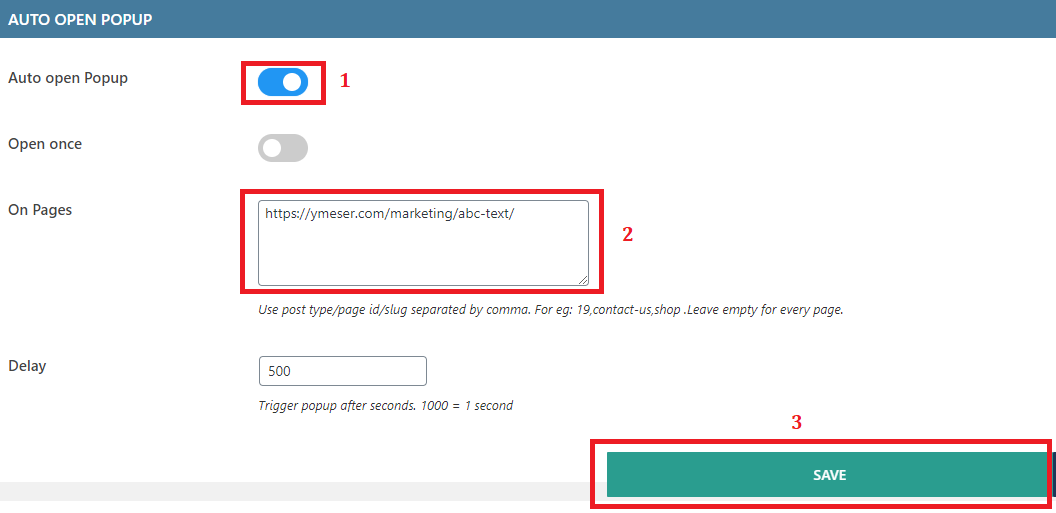
- Navigate to Login/Signup Popup > Settings, which opens a new screen containing overall popup settings.

- In the General tab, scroll down and you’ll see the “Auto Open Popup” section.
Enable the Auto open Popup option. Paste your desired page URL in the “On page” box. Hit “Save.”
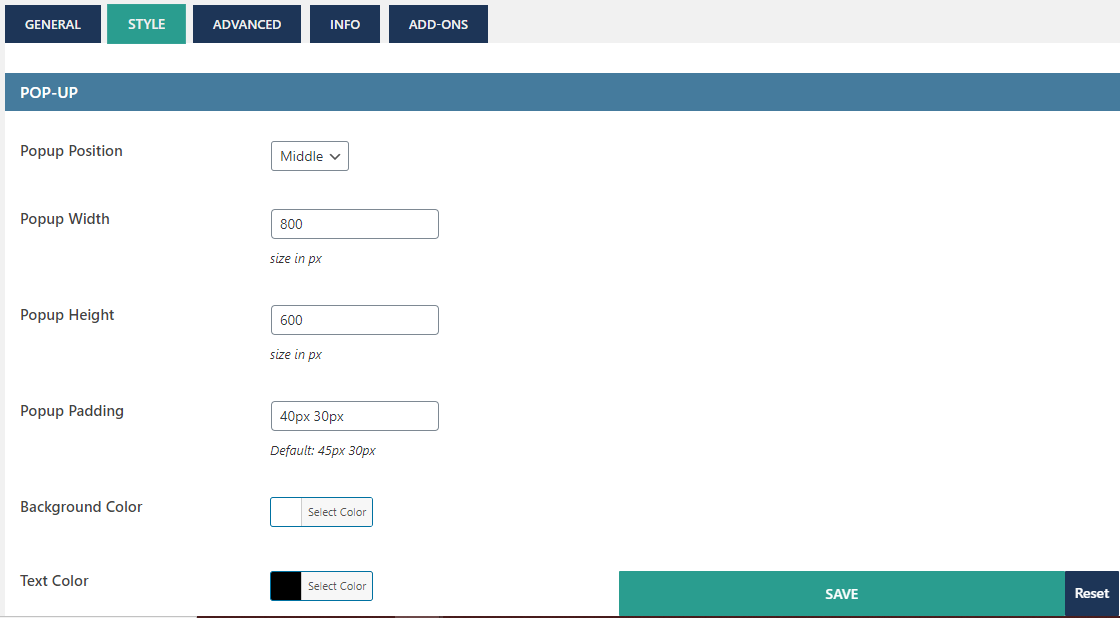
- Switch to the “Style” tab if you’d like to give your popup appearance some tweak. You can set up the popup position, width, text color, or even insert your preferable sidebar image, and so on.
Click “Save” to update your setup.
Step 3: Make Your Form Pop Up
To make your form pop up, simply adding #login or #register at the end of the URL you already added to the “On Pages” in step 2.
For example: <a href=”wwww.mywebsite.com#login”</a>
In this tutorial, it should be: https://ymeser.com/marketing/abc-text/#login
- Open the page you want to add a login popup.
- Insert #login or #register at the end of this page’s URL.
- Copy the full link and paste it on a new browser. You should see a login form popup.
That’s it! The process of creating a login popup for your WooCommerce stores comes to an end.
Easy Login WooCommerce Alternatives
Developed by Yith, Yith Easy Login & Register Popup for WooCommerce comes as a rising star in creating WooCommerce login popup for multi membership sites.
This premium plugin lands a helping hand in simplifying the login, registration, and password reset processes during checkout. At that point, this significantly helps reduce the cart abandonment rate.
By enabling social login, registration, and password recovery, customers can complete the purchase without leaving the checkout page.
Price:
- Single site: € 79,99/ year
- 6 sites: € 479,94 / year
Conclusion
We’ve walked you through the 3 easy steps to create a login/register popup using Easy Login WooCommerce. Besides, we also explain the benefits of having a WooCommerce login popup in detail.
Though login or registration is not mandatory for online stores, they boast certain advantages in improving customer experiences and notching up sales.
If you get stuck on any steps above, feel free to ask us by dropping a comment below! We will get back to you as soon as possible.