
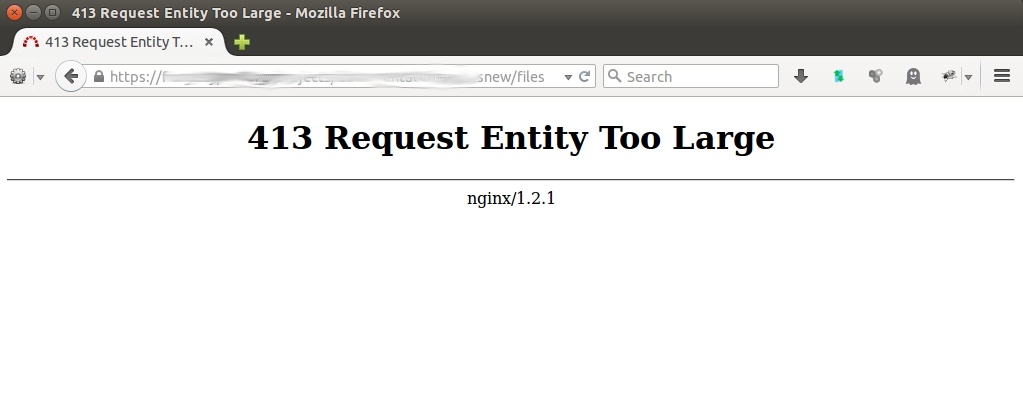
The 413 Entity Too Large WordPress is a common issue for WordPress websites. It usually occurs when you upload files that are larger than the maximum file upload limit on your site. The most likely occurrence of this error is during theme or plugin uploads.
Let’s try to analyze this error!
- Understanding 413 Request Entity Too Large WordPress
- Preparations
- #1 Upload Large Files to the Server through SFTP
- #2 Check for Server Permission Errors
- #3 Edit WordPress functions.php File
- #4 Increase Upload File Size Limit via .htaccess File
- #5 Change Your NGINX Server Configuration
- What If the Error Still Occurs?
Understanding 413 Request Entity Too Large WordPress
So, what is the 413 Request Entity Too Large WordPress error?
- 413: This annoyance is on the list of the 4xx error codes. It happens due to a problem between the server and the browser.
- Request Entity: Entity in this case is the payload that a client requests the server to provide to upload files.
- Too Large: The entity is larger than the server’s preset quota for uploading.
The web hosts usually set a limit on the upload size. This prevents users from taking up too much storage resources, causing the website to be overloaded. However, it is common for users to forget about the limit while uploading files.
Although the error is worth concerning, it’s not fatal like the white screen of death in WordPress. We can solve it by modifying some information on the server.
In this article, we will show you 3 ways to easily fix the 413 Request Entity Too Large WordPress error.
Preparations
Fixing 413 Request Entity Too Large WordPress is relatively simple for those who are used to WordPress. However, it is extremely difficult for newcomers. To help you overcome the limitation, we’ll show you how to fix the 413 Request Entity Too Large WordPress error step-by-step.
Here is a list of things you’ll need to prepare first:
- Administrator access to your server.
- A suitable FTP/SFTP client.
- The knowledge of how to use FTP/SFTP
- A current website backup in case the worst happens.
If you’re ready and have backed up your website, let’s get started!
5 Ways to Fix 413 Request Entity Too Large WordPress
The following 5 methods are listed from easiest to toughest.
#1 Upload Large Files to the Server through SFTP
Instead of uploading large files using the built-in WordPress admin dashboard, try to upload them through SFTP. This is a great idea because protocols like SFTP are almost the closest way to your server access. Besides, you can eliminate all the issues associated with the front end that may be causing the error.
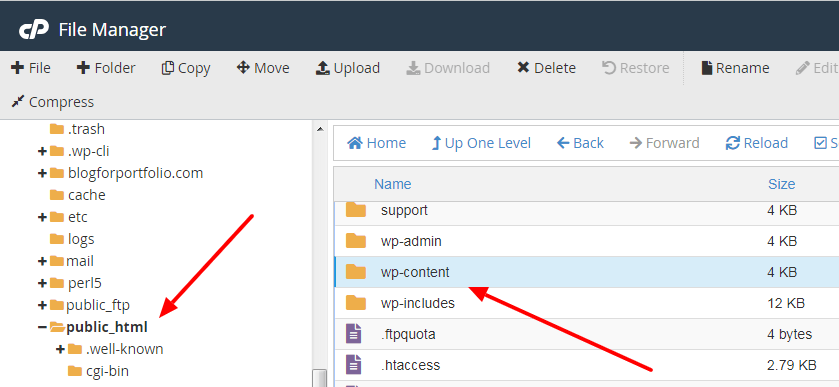
First, you should log into your site through SFTP and find the /wp-content/ folder. Then upload your file to this folder on the server and wait for the best to come.
To learn more about WordPress file and folder structure, check out our detailed guide.
#2 Check for Server Permission Errors
Double check your WordPress file permissions to see if the user has permission to upload any sizes of files. Once this is sorted, the error should disappear.
It’s important to define whether the issue happens because specific users are restricted for some reasons. For more details, refer to our instructions on fixing WordPress file and folder permission errors.
#3 Edit WordPress functions.php File
Editing the functions.php file is quite simple and can be done within the WordPress admin interface.
To edit the file, first off, you need to enter the WordPress admin dashboard. Then, go to Appearance and click on Theme File Editor. You will see the functions.php file located on your right.
The functions.php file should be at the root of your server. In many cases, this root is called www or public_html, or it could be the abbreviation of your site. Most of the time, you can find the functions.php file in the WordPress theme folder.
This file is commonly used to define ‘classes’ and ‘actions’ on your WordPress site. It can add features like enabling post thumbnails, post formatting, and creating navigation menus.
Once you have the file open, enter the following code:
@ini_set( '_max_size' , '64M' );
@ini_set( 'post_max_size', '64M');
@ini_set( 'max_execution_time', '300' );
This code will increase the maximum file size to upload. The numbers should be large enough to make the error disappear.
When it’s done, save your file and upload it to the server again. If the 413 Request Entity Too Large WordPress error still exists, move on to the next method.
#4 Increase Upload File Size Limit via .htaccess File
The .htaccess is a configuration file for Apache servers, which means it is read by the server. So you must be careful while editing it. Do not make any unnecessary changes because it can override server configuration parameters such as authentication, caching, and server optimization.
Much like your functions.php file, your .htaccess file sits on your server. So first off, you need to log into your server and look in your root folder as before.
The .htaccess file should be within this directory. If it’s missing, we recommend contacting your host to know where it is, and whether your server runs on NGINX instead.
Open it up once you find it. You will see the text editor pop up, navigate to # END WordPress at the end of the file, and paste the following code below it:
php_value upload_max_filesize 64M
php_value post_max_size 64M
php_value max_execution_time 300
php_value max_input_time 300
This looks similar to the code you’d add to the functions.php file, right? The difference here is you are giving the server direct instructions.
Save your changes and close the editor window. Then, go back to the WordPress admin page and try uploading a new file.
#5 Change Your NGINX Server Configuration
If you follow the steps above and still get the error, you also need to configure NGINX. NGINX has a client_max_body_size parameter to limit the maximum size requested by the client. If the request exceeds the above number, you have to adjust this number configuration so the error won’t appear.
While using NGINX, you are working with the server, rather than going through WordPress. Remember that the nginx.conf configuration will require a text editor to edit. Find a suitable one and start editing by logging into the web server and navigating to the nginx.conf file.
Open the file and check the line of code: client_max_body_size. You can change this text to the value you want, for example:
# set client body size to 8M #
client_max_body_size 8M;
What if you don’t see the code? No problem, you can add this code to the end of the server, location, or http block like this:
server {
…
client_max_body_size 64M;
}
Save and close the file. You can then restart the NGINX web server with the following command:
service nginx restart or # nginx -s reload
What If the Error Still Occurs?
Go along with all the methods but the error still appears? We suggest you contact the hosting support of your current CDN service for help. Report the problems and the steps you took to resolve them.
If you use a CDN to improve your site’s performance, this could also be the cause of your problems. The CDN server you’re using may impose a file size limitation that is too small.
Since you can’t modify the files of these servers directly, consult your CDN provider’s documentation or contact support to resolve the error. Lastly, you can consider uploading alternative files, reducing your current file size, or upgrading your storage plan.
Don’t Let 413 Request Entity Too Large WordPress Bother You Anymore!
In spite of being a rock-solid platform, WordPress also has plenty of errors over time. The 413 Request Entity Too Large WordPress is one of the most common ones. So you should understand your website’s limits as well as a diverse approach to solve them.
Through this article, we have given some basic information about this error and 5 ways to fix it. Feel free to contact your hosting Customer Support whenever you feel that you need them.
This is a problem caused by the maximum file upload limit. Sometimes, you may get into trouble with the file upload types. Simply put, WordPress sets restrictions on several types of files for security reasons. Let’s see how to fix that!