If you’re looking for a free and convenient solution to gather customer feedback and evaluation, lucky you, you’re in the right place!
In this article, we’ll show you how to create a survey with the help of the free and easy Google Forms.
Boasting huge advantages, such as to-the-point interface, direct accessibility from Google Drive, diverse question types, convenient analytics,…Google Forms is definitely one of the most favored form creators in the market.
The post will start with the explanation of Google Forms and Google Surveys, then continue unveiling the 4 easy steps to create a survey. We’ll also describe various types of questions based on response purposes. Along with that, how to collect and analyze response data will be provided as well.
Without further ado, let’s dive in!
- Google Forms vs Google Surveys
- Step 1: Get Ready with Google Forms
- Step 2: Choose Types of Questions
- Step 3: Configure Your Survey
- Step 4: Get Responses
Google Forms vs Google Surveys
Google Forms and Google Surveys, both of them are specialized in creating surveys. However, they serve different customers, in different situations, and with totally distinct functions.
Google Surveys, in brief, refers to a business product that supports companies in market research and content access. By serving as a paywall, it helps publishers or websites monetize the content they offer, not for free, to users.
Google Forms, on the other hand, is a popular tool that anyone can use to collect information. It’s included in Google Drive and well-integrated with other Google services, such as Google Sheet, Google Docs, and Google Slides.
So, if you wish to quickly create a survey and share it with your respondents, Google Forms hits your spot. In the next section, we will introduce the 4 easy steps to create a survey in Google Forms.
Step 1: Get Ready with Google Forms
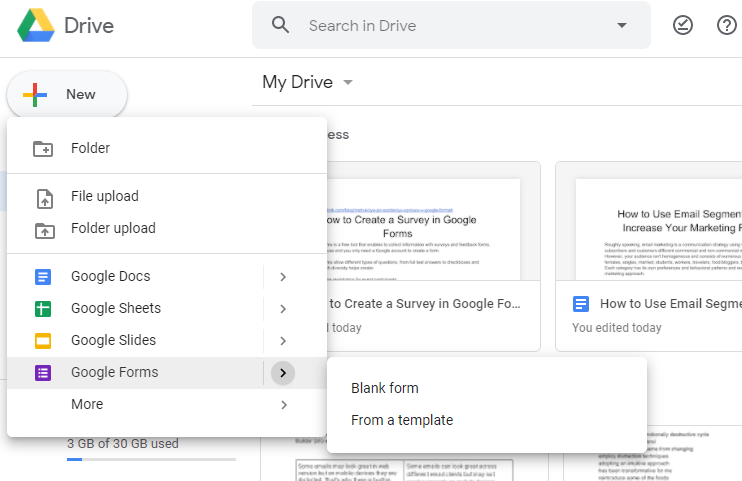
To create a survey with Google Forms, first, logging in to your Google Drive account, click New > Google Forms.
There are 2 options for you to choose from. If you want to create a survey from scratch, click on “Blank Form.” Alternatively, select “From a Template” to build a survey from a pre-designed template.
In this tutorial, we’ll start with a blank form. Now, you need to define your form settings.
- On the form you’ve created, there are 2 tabs titled “Questions” and “Responses.” Click on “Responses,” head over to the setting icon on the top right corner, and click on it.
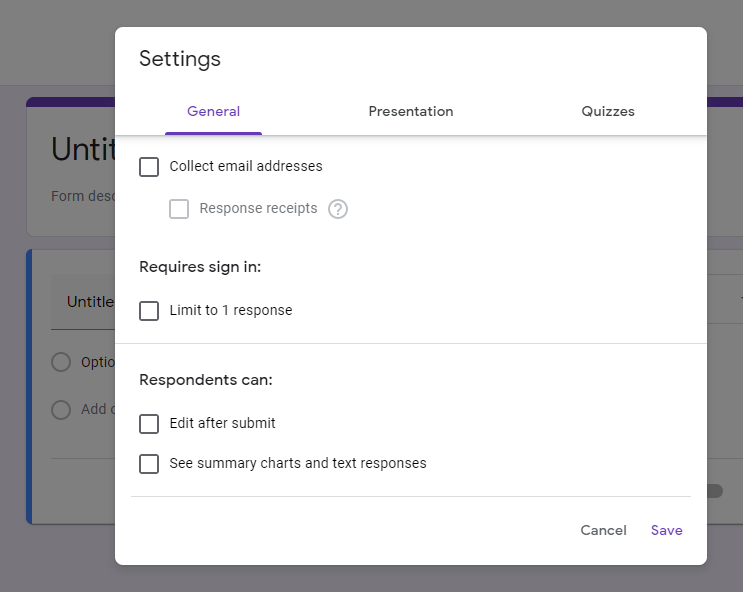
- The “Settings” window shows up, which contains 3 tabs: General, Presentations, and Quizzes.
- General: if you want to collect the respondent’s email address, tick on the checkbox. Users won’t see other survey questions until they enter their emails. You can also limit the response per user: each user can only submit one form from their Google account.
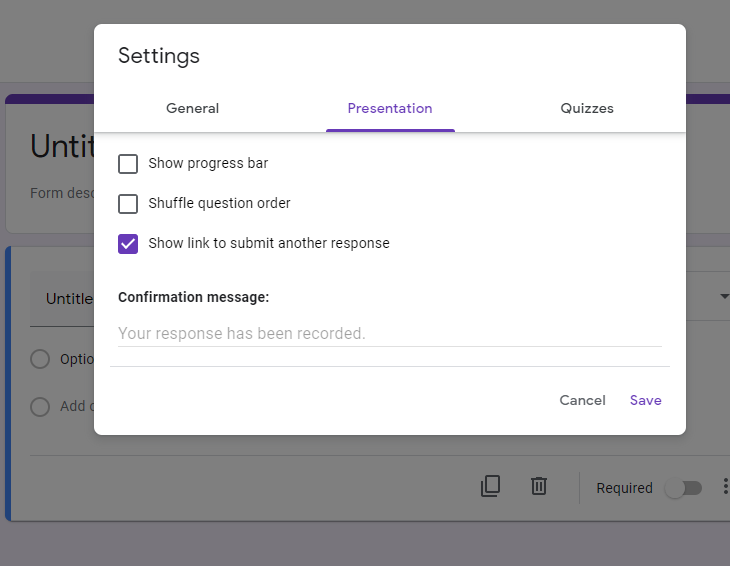
- Presentation: this setting customizes your form appearance and you can edit your confirmation message here. Save your changes when you’re done.
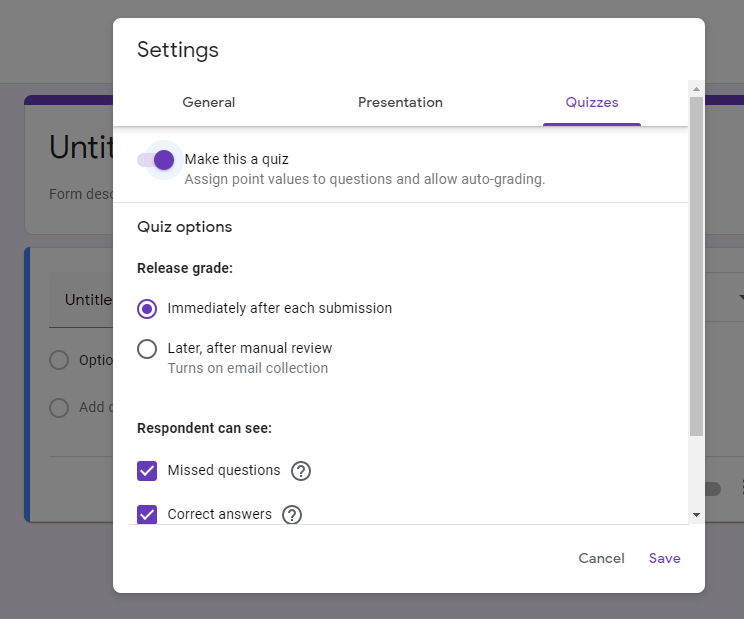
- Quizzes: turn your form into a quiz by enabling the “Make it a quiz” option.
- Next, it’s time to add the first question to your form. Replace “Untitled Question” with your actual question, then click on the “Multiple Choice” tab.
- The multiple choices are set up by default. However, Google provides different kinds of questions for individual response purposes. We will describe each type of question in the next step.
Step 2: Choose Types of Questions
Click on the down arrow next to the “Multiple Choice” tab and you’ll see a drop-down menu of question types. In this part, we will take a deeper look at these types of Google Survey questions.
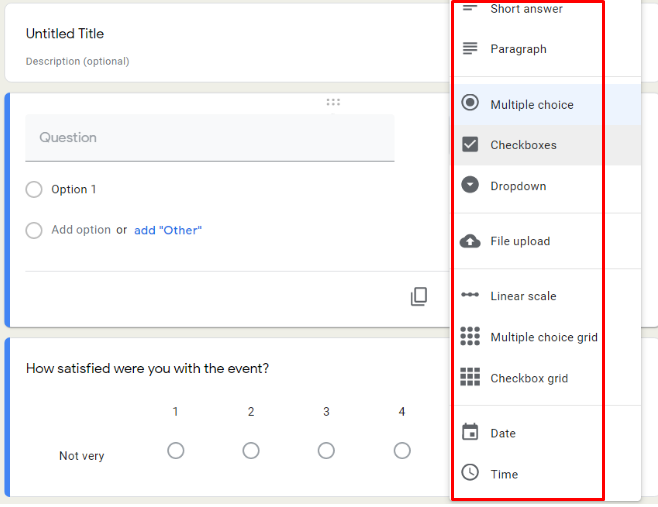
Short Answer
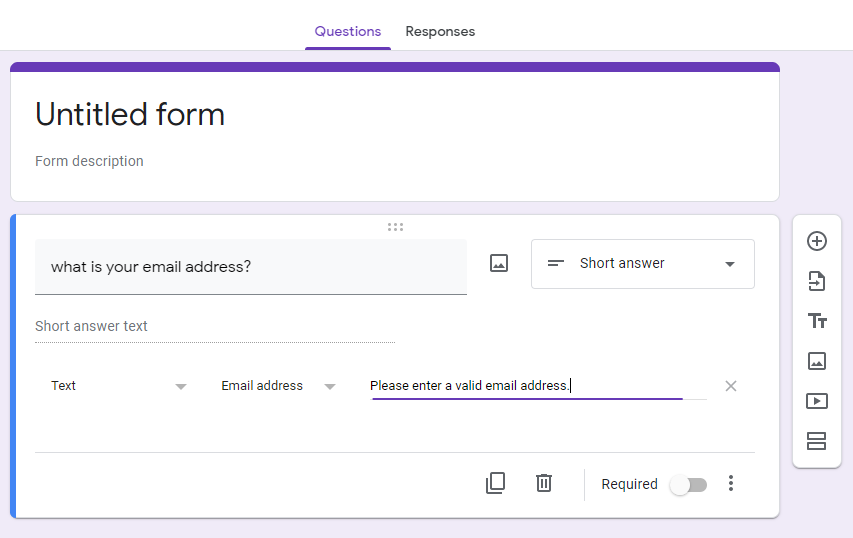
This type of question is suitable for getting some very short answers, such as the respondent’s names, email, address, etc.
To ensure users enter valid data, you need to set up the validation rules using the “More” icon (three vertical dots) on the bottom right corner of the screen.
A new window pops up. In the drop-down menu of the first blank, choose “Text.” Select “Email address” in the second and type “Please enter a valid email address” in the “Custom error text” field.
If you want to make the question required, slide the “Required” toggle button on the bottom right corner. A red asterisk will show up in the survey to indicate that it’s required.
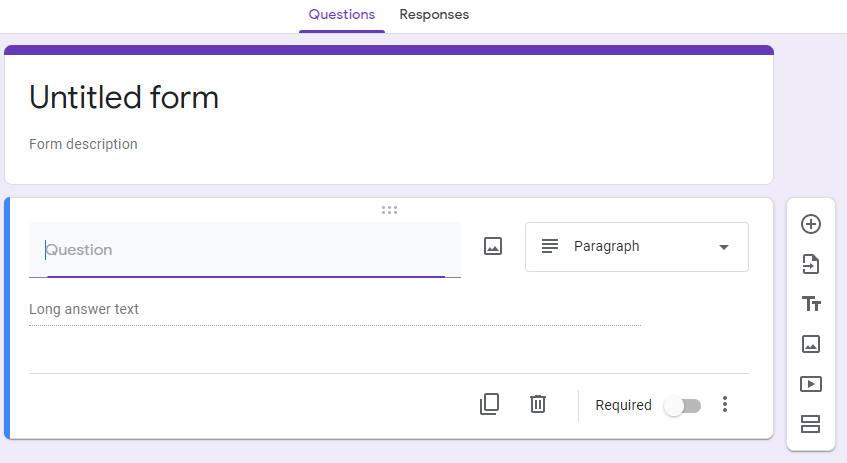
Paragraph
This option is suitable for detailed answers, such as feedback, comments, or essay-length responses.
Click the question type menu and choose “Paragraph.”
Multiple Choice
Participants can select only one option with multiple-choice questions.
Type your first answer in the field labeled “Option 1.” To create the second answer, choose “Add option.”
You can also select “add” Others” to insert a blank field which enables users to input their preferable answers.
To remove an option, click on the “X” symbol on the right.

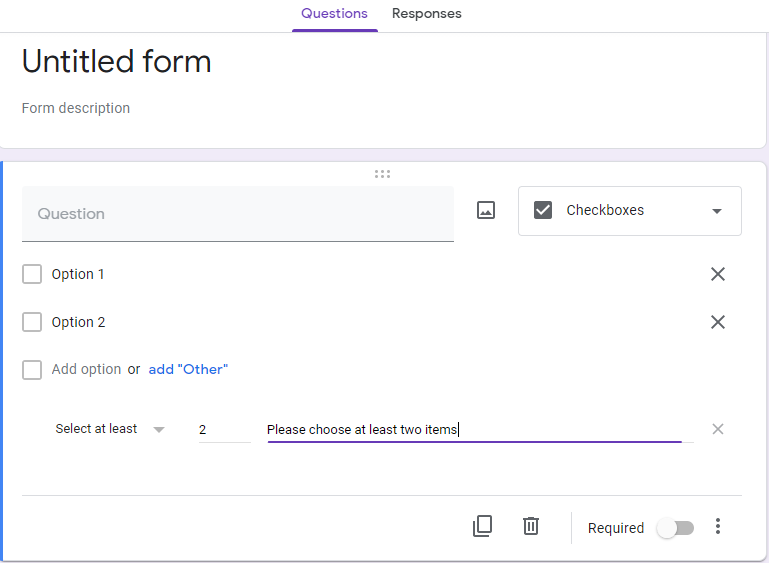
Checkboxes
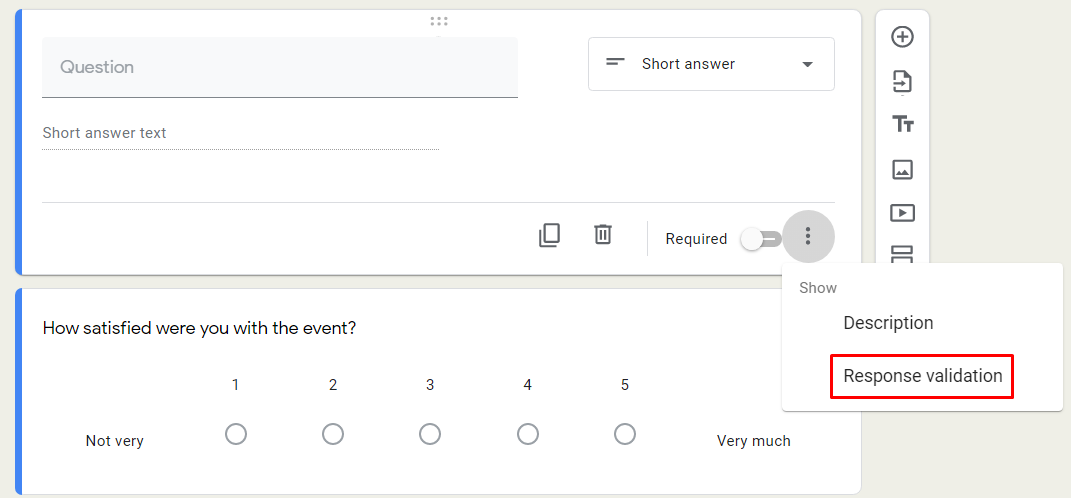
Respondents can select multiple items with the checkbox option. The process of defining your checkboxes is similar to the multiple-choice questions. On top of that, you can specify the minimum, maximum or exact numbers of items using the “Response Validation” settings.
- Click on the three-dot icon at the bottom right of the window, then choose “Response Validation.”
- If you want to set the minimum number of items that require respondents to choose from, hit “select at least” in the dropdown. Input the ideal number in the “number” field and a descriptive sentence in the “Custom error text.” For example, Please choose at least two items.
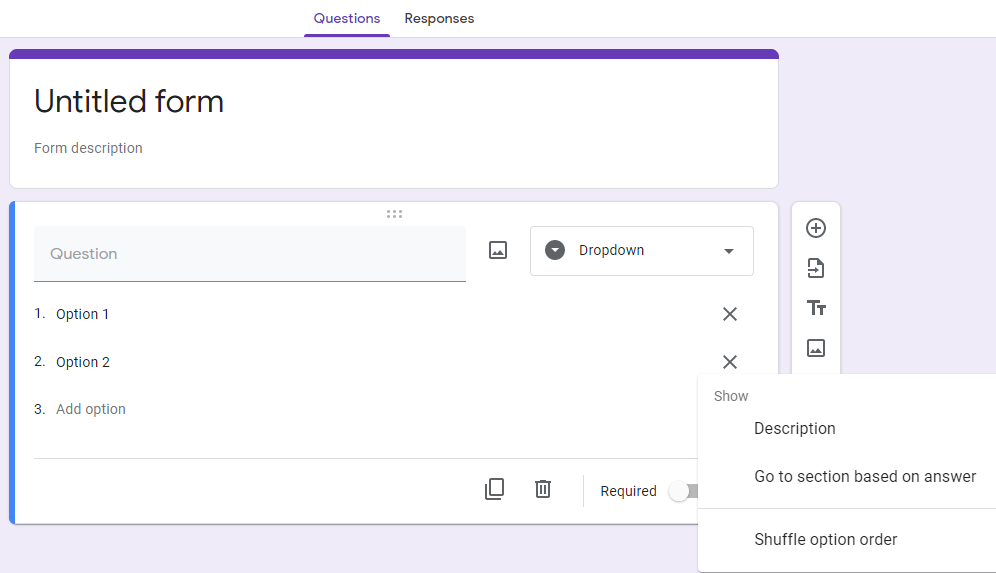
Dropdown
A dropdown question type is ideal for absolute answers rather than opinion-based ones, as users can opt for only one answer. It’s also a good choice if your forms have limited space.
- Select “Dropdown” as the question type.
- Input your questions in the “Question” fields.
- Add answers on “option 1,” “option 2,” and so on.
To remove the option, hit the “X” sign. In case you want to add a description or shuffle option order, click on the three-dot sign and choose the settings accordingly.
File Upload
With this option, you can configure the file types, numbers of uploaded files, and maximum file types.
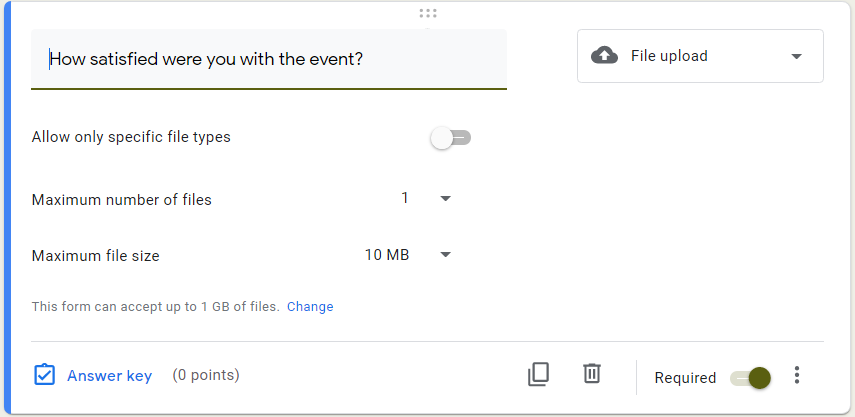
There are some points you should take into consideration when creating this type of response:
- Users must log in to their Google accounts to upload their files.
- The uploaded files will reside on the Google Drive space of the survey owner.
- File Upload can’t be used if the Google Forms is stored on a shared disk or the “Data Loss Prevention” mode is set active.
Linear Scale
This survey option is great when it comes to evaluating. By default, the numerical rank ranges from one to five. You can expand the scale up to ten and provide labels for the lowest and highest score.

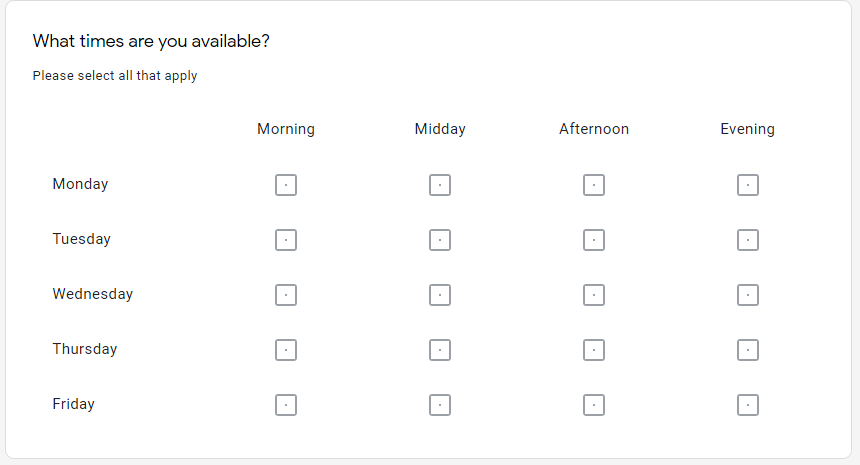
Multiple Choice Grid and Checkbox Grid
Similar to a single multiple-choice or checkbox question, a grid allows participants to evaluate group options using the same scale.
- Choose Multiple Choice Grid or Checkbox Grid as the question type.
- Type your questions in the “Question” fields.
- Add an option for each row and label for each column.
Apart from including a description and mark the question “required,” you can restrict responses to one choice for each column.
- Click on the “three-vertical-dot” icon and pick “Limit to one response per column.”
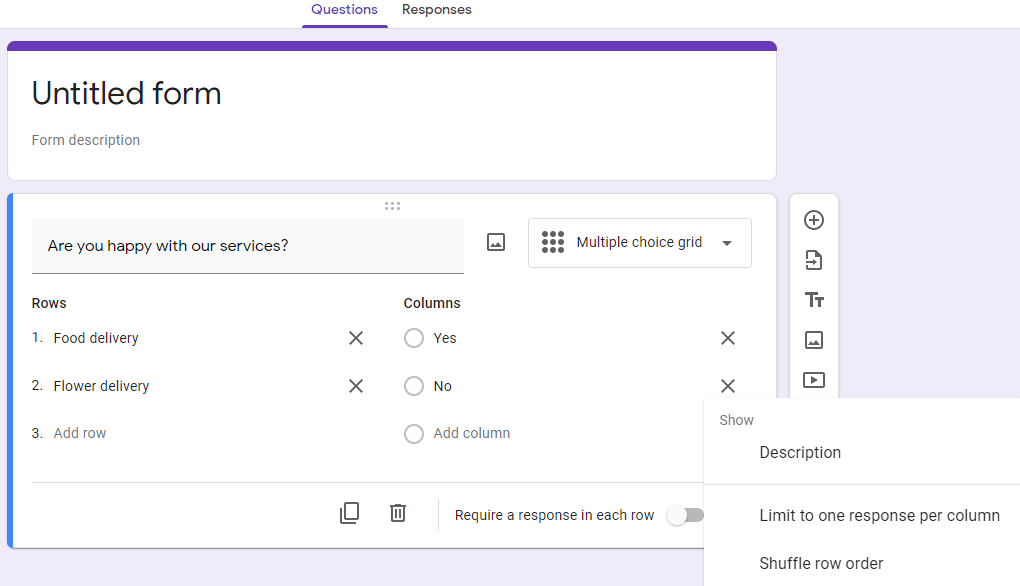
Meanwhile, with the Checkbox Grid, participants can pick multiple answers in the same row.
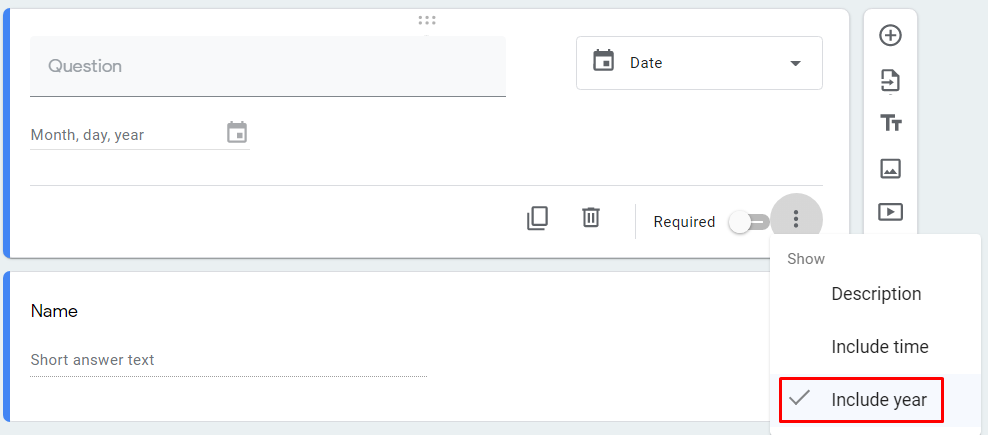
Date and Time
The Date question lets users pick a particular date from the calendar. What’s more, you can add the year selection or the specific time in the form settings.
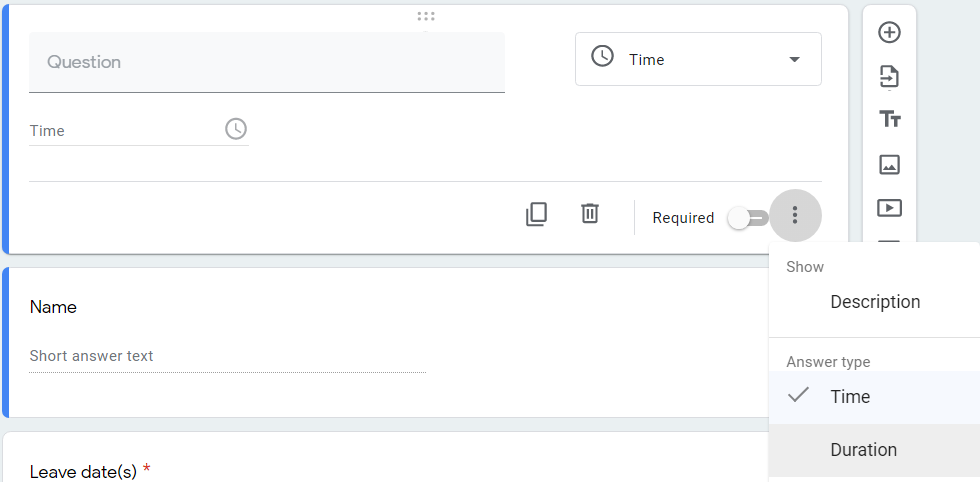
With the Time question, users can input time values in hours, minutes or mention duration in hours, minutes, and seconds. This is useful for booking or specifying the delivery time.
Step 3: Configure Your Survey
When you’ve finished choosing the appropriate question types, click on the eye icon for previewing and testing your form. In case you want to reorder questions, just hover your mouse over them and drag them into place.
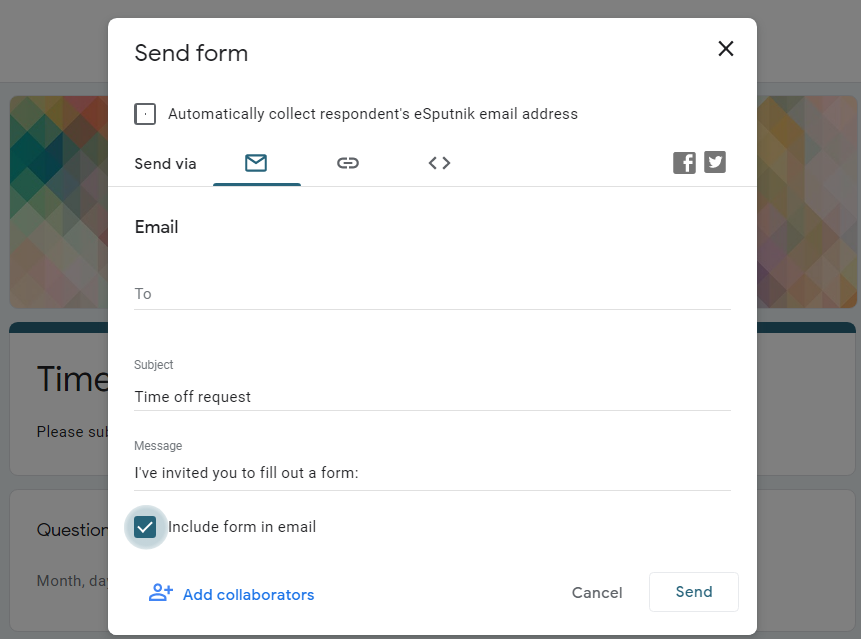
Once your form is ready, it’s time to share it. Hit the “Send” button and you’ll be taken to the next screen labeled “Send form.” Here, there are several options to deliver your survey, whether via email, link, website, or social media.
- To send your survey via email, click the Email tab then fill out the “Subject,” “Message” fields, and finally, hit “Send.”
- To distribute your survey via shareable links, click on the link icon then select “Copy” to make a copy of the URL.
- To embed your survey into your website, click the Embed HTML icon. Change the width and height to fit with your website. Copy the code by clicking “Copy” and paste it onto your webpage.
- Lastly, click on the social media icon on the right corner to share your survey through Facebook or Twitter.
Step 4: Get Responses
After you’ve sent your survey to users, Google will automatically store the received responses in the “Response” tab.
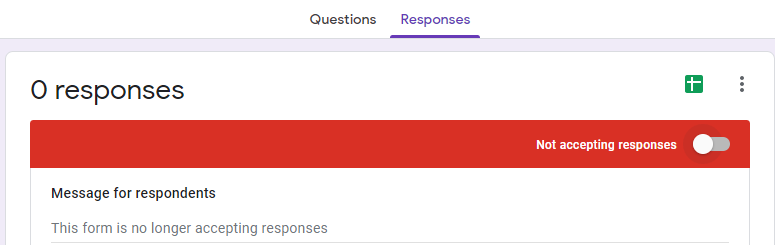
Please note that users won’t be able to submit the survey unless the “Accepting response” switcher is active.

Here you can view the real-time answers of each participant as well as the overall survey result. For more detailed analysis, consider linking your survey to Google Sheet.
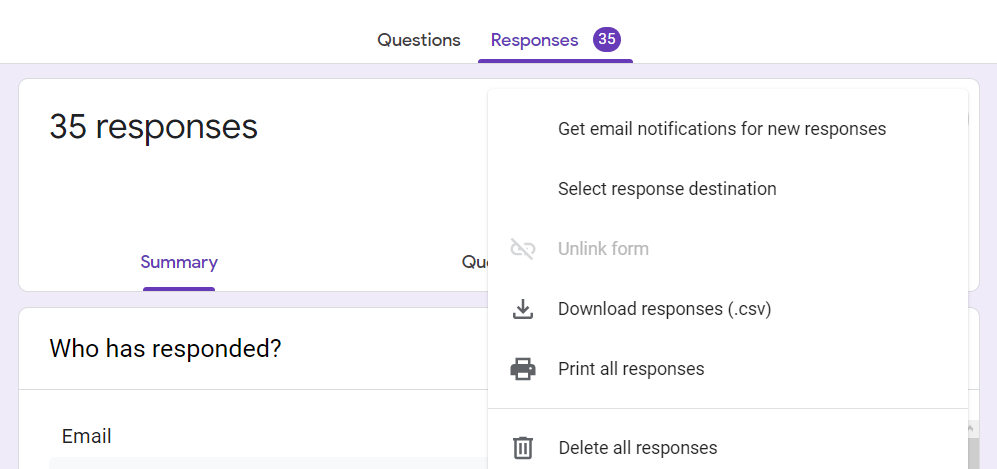
To do so, you can either click on the green sheet icon or hit the “three-vertical-dot” icon and opt for “Select response destination.” This action will open a popup asking you to create a new sheet or choose an existing one.
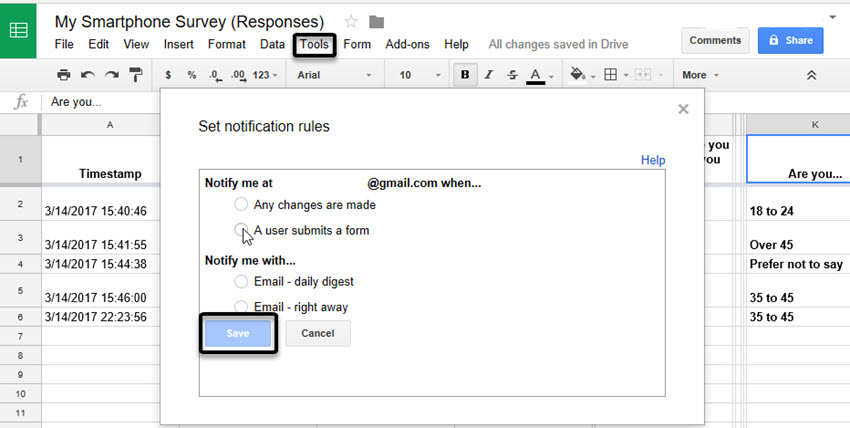
One key benefit of using Google Form is its response notification feature. It sends you real-time notifications whenever responses come in. In the spreadsheet, click Tools > Notification Rules and set up your real-time notifications.
When you receive enough responses, you can close your survey down by deactivating the “Accepting responses” mode.
That’s it! The process of creating a survey and getting responses with Google Forms now comes to an end.
Conclusion
This post has spelled out the differences between Google Forms and Google Survey, as well as guiding you through 4 easy steps to create a survey in the twinkling of an eye.
Building a survey with Google Forms is such a snap thanks to its intuitive interface and full integration with Google services. This proves useful when you share your survey ideas with specific groups and invite collaboration on survey data analysis.
Let us know in the comments if you get confused in any step above. Don’t forget to share and follow our website for more useful tutorials.