In today’s modern society, emails have become one of the most powerful ways to communicate with your customers.
It can be said without exaggeration that email offers countless benefits at the lowest price compared to other marketing strategies. That’s why marketers love using email as an effective communication tool.
If you’re an online blogger, you shouldn’t underestimate the power of email marketing. Taking advantage of the email funnel can be the fastest way to engage with your readers.
Email serves different purposes: educate users about products, offer promotions, share blog updates, etc.
In this article, we’ll walk you through the benefits of sending emails to your audience to notify them of your new blogs. And most importantly, we’ll show you how to automatically send blog posts to emails from scratch.
Let’s find out together!
- Why Notifying Readers of New Blog Posts via Emails
- 2 Methods to Send Blog Posts to Email
- How to Send Blog Posts to Emails Automatically Using RSS
- Step 1: Set Up a MailChimp Account
- Step 2: Add Audience Contacts
- Step 3: Establish RSS Campaign
- Step 4: Review and Run Your Campaign
- Step 5: Track the Success of Your Email Campaign
- Bonus Step: Automate Sending Passwords after Subscription
Why Notifying Readers of New Blog Posts via Emails
It’s evident that there are now over 4 billion email users worldwide, which is more than half of the world’s population. And that number tends to rise sharply in the future. In other words, we can approach a huge number of potential customers just by using emails.
What’s more, email generates $42 for every $1 spent on average. It means that the Return on Investment (ROI) of email marketing reaches 4,200%, which is such an incredibly enormous number. In fact, emails deliver the best ROI among marketing channels, making them the most effective option available.
Email marketing can be beneficial in numerous ways. And the most common and useful way to communicate with customers is to notify your readers of new blog updates.
That way, as an online business owner, you can seize the opportunity to grow your site. This could be because it can:
Boost Website Traffic: You might have written a fantastic blog post and felt satisfied when you hit the publish button. But your job isn’t done yet. Just because you publish your article online, doesn’t mean it will be seen. People won’t know about your post if you don’t share it.
Plus, it takes time for Google to index and rank it on search engine result pages (SERPs). More importantly, no one can ensure your article will rank high on SERPs.
Email is a great way to deal with these problems. You can share snippets of the recent articles and take subscribers to read your blogs’ full versions. That way, your website traffic will be naturally improved.
Increase Brand Awareness: Emails allow you to easily spread the word about your blogs and brand with subscribers. So when introducing new blogs, you should align your email content and design with your brand identity to enhance brand awareness.
Keep Customers Engaged: You will be able to communicate and keep your subscribers informed about new updates on your site via emails. As a result, it helps you stay on top of their minds.
Gain Valuable Data: Emails support collecting customer data and learning more about their behavior. For example, you can apply an analytics tool to track clicks on your blogs, thereby knowing which one performs better.
2 Methods to Send Blog Posts to Email
There are 2 major ways to send new posts to emails: handcrafted newsletters and automated Really Simple Syndication (RSS) feed.
Handcrafted Newsletters: Creating handmade newsletters gives you a helping hand in building and maintaining close relationships with your readers. By personalizing your emails, each subscriber will be treated differently based on their individual identities and needs. Also, you will have more flexibility with design and content.
Frankly, it takes a lot of time and effort to manually design and send newsletters one by one. If you have a large number of subscribers, this technique shouldn’t be your priority.
Automated RSS Feed: This is a perfect choice if you want to save time and need a quick set-and-forget method. Instead of having to check your blog regularly to see if there are any updates, your readers will be automatically notified. RSS will deliver new blogs straight to your subscribers’ inboxes.
We highly recommend using this method to send blogs to emails. Formulating a manual newsletter to inform your readers of every new article is unnecessary.
How to Send Blog Posts to Emails Automatically Using RSS
MailChimp comes as a great option to run an RSS campaign. It assists you in gathering customer data, sending emails, creating marketing campaigns, and tracking their performance. Now it’s time to learn how to set up your emails with MailChimp.
Step 1: Set Up a MailChimp Account
If you already have a MailChimp account, sign in to your account and skip this step. Otherwise, follow the guide below to register:
- Navigate to MailChimp’s signup page.
- Enter your Email, Username, and Password, and then click Sign Up.
- Open the account activation email and press the Activate Account button.
- On the Confirm Humanity screen, click I’m Not A Robot to log in to MailChimp.
- The first time you log in to your account, MailChimp will ask for some information as follows:
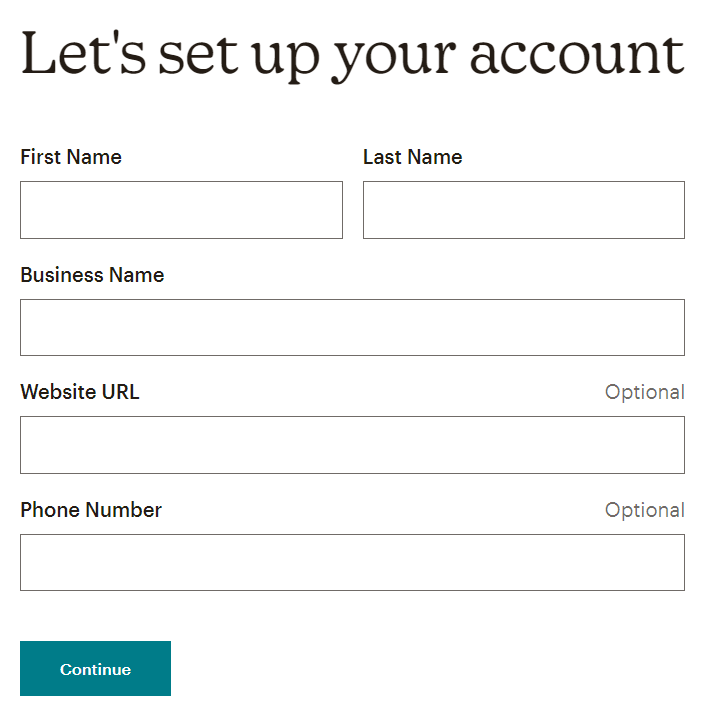
6. After filling out all the information needed, hit the Continue button to switch to your account management page.
You may be interested in how to add MailChimp to WordPress.
Step 2: Add Audience Contacts
After signing in to your account, the next thing is to collect customers’ emails. In case you already have audience contacts, simply add or import them to MailChimp:
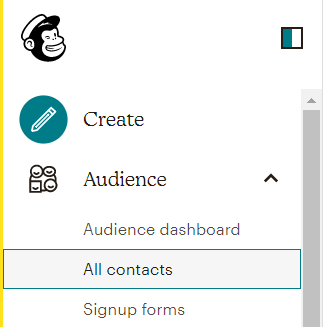
- Head over to your MailChimp admin left-hand menu.
- Click Audience → All contacts and select the Add contacts tab.
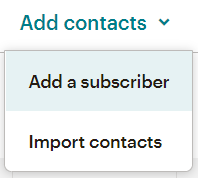
Now you have 2 options: manually add every audience contact or import their contacts to a MailChimp list. To add the contact of a single subscriber:
- In the Add contacts dropdown menu, click Add a subscriber.
2. Enter your audience’s contact information.
3. Hit the Subscribe button.
4. Replicate the steps above to add more contacts.
You can also import your subscribers’ contacts:
- In the Add contacts dropdown menu, select Import contacts.
- Choose 1 out of 3 options: add contacts from other tools you use; upload a Comma-Separated Value file (CSV); or copy and paste contacts from a spreadsheet like Microsoft Excel and Google Sheets.
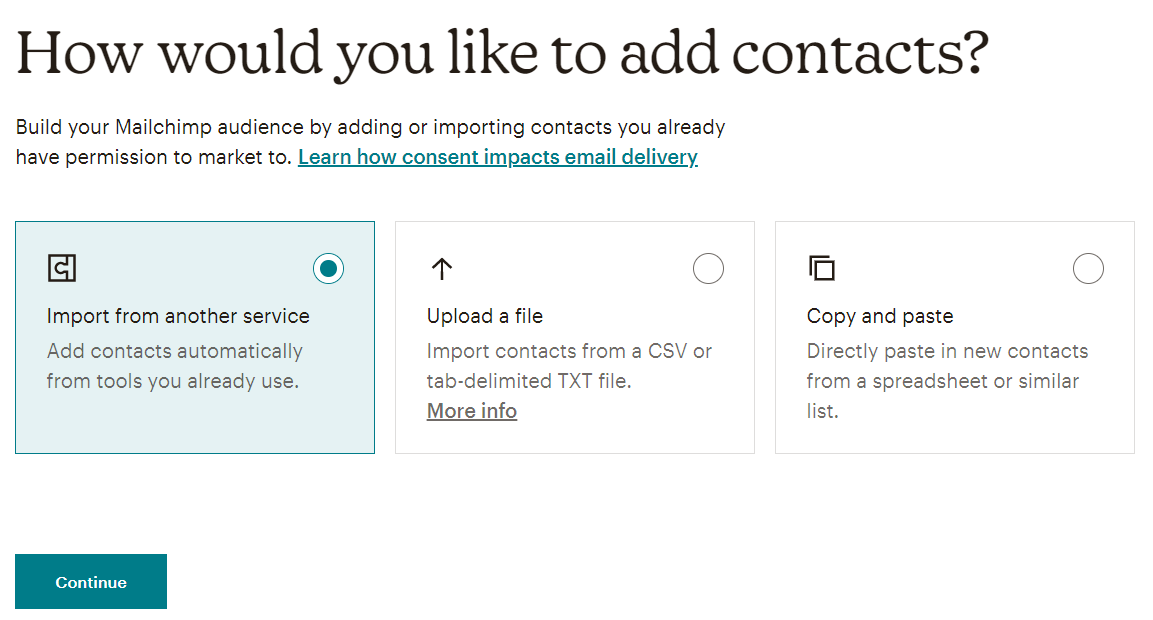
3. Press the Continue button to add contacts to your MailChimp list.
If you don’t have any contacts, don’t worry, you can create a signup form to gather customers’ emails:
- Go to Audience → Signup forms in your admin menu.
- Select Embedded forms to formulate a signup form embedded in your site.
- Design the signup form according to your preference, including form fields, layout, CSS settings, background, etc.
- Once you finish designing, click Continue. MailChimp will generate a form code for you, simply select Copy Code.
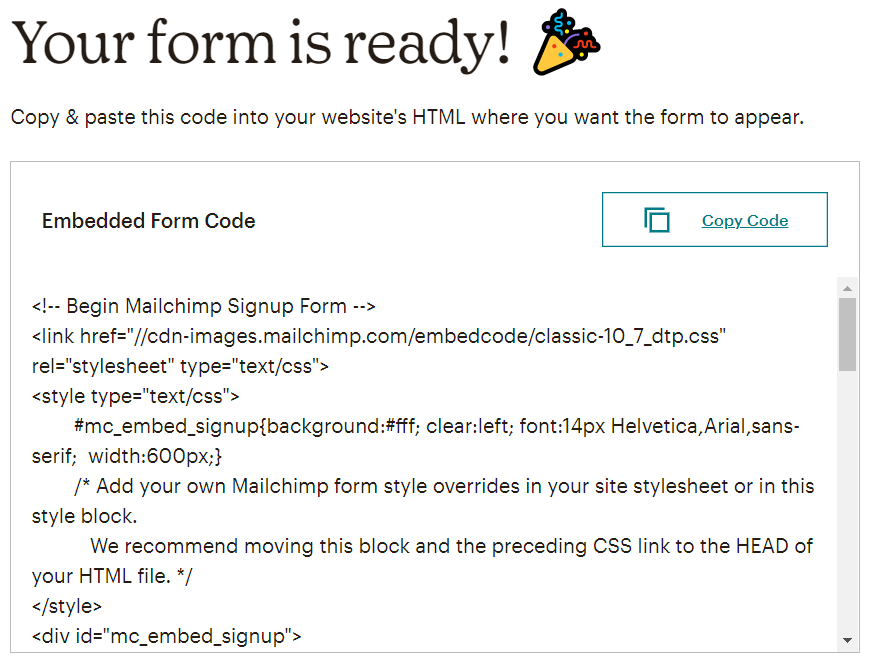
5. Paste the code you’ve copied into your website’s HTML where you want the form to appear.
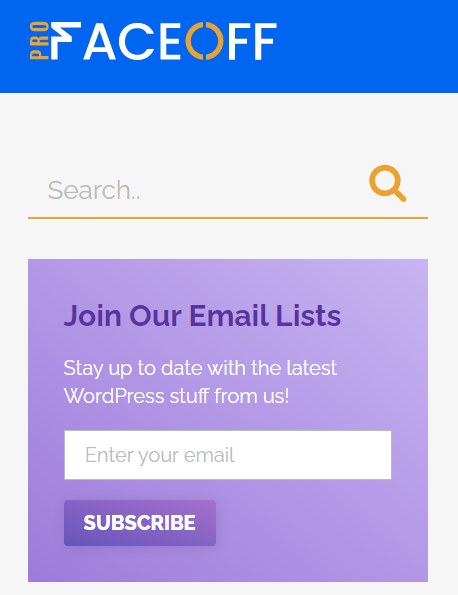
Now, when people visit your site, they will see a subscription form. Once they fill out the form, their emails will be sent to your MailChimp list.
Step 3: Establish RSS Campaign
To set up a new RSS campaign, you need to:
- Navigate to MailChimp’s RSS-to-Email page and click Turn On RSS-to-Email.
- Type your campaign name, choose your audience, and press Begin.
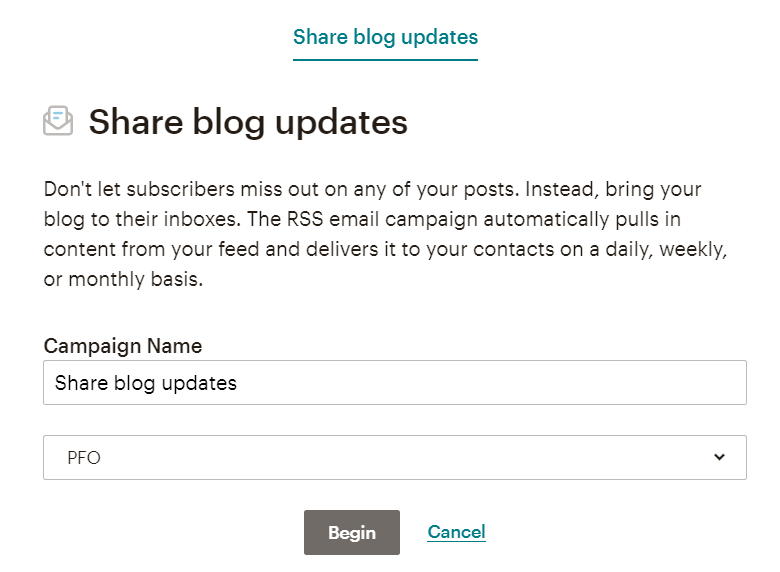
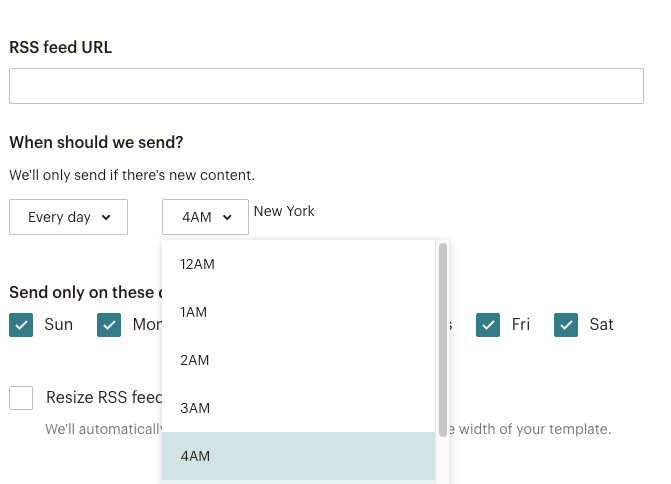
3. Enter your blog’s URL in the RSS feed URL field.
4. Choose your send time and other options, and hit the Next button.
5. Click Entire audience to notify all your subscribers → Next.

6. Enter your campaign information → Next. Please pay attention to the Tracking section. Enable the checkbox Track opens and Track clicks so that you can monitor your campaign performance.

![]()
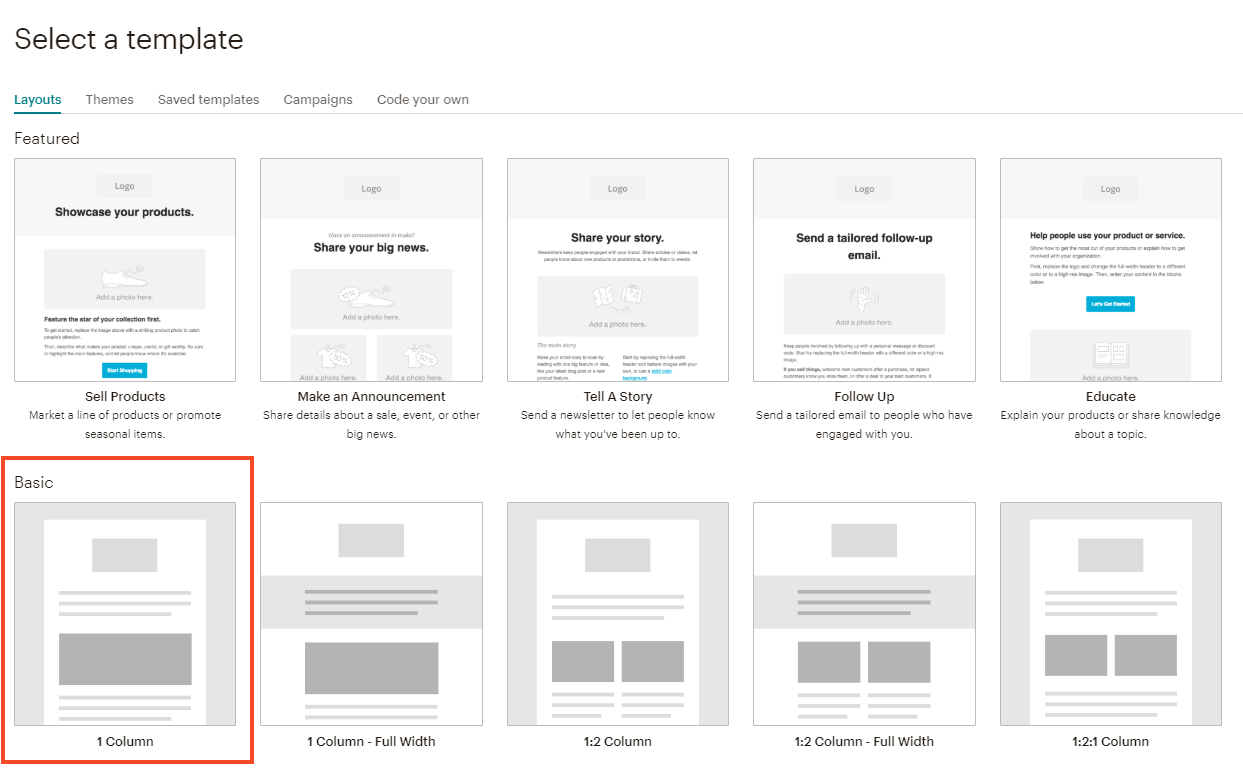
7. Determine your email template → Next. If you’re not sure what template to select, stick with the Basic 1 Column template. You can always change it later if needed.
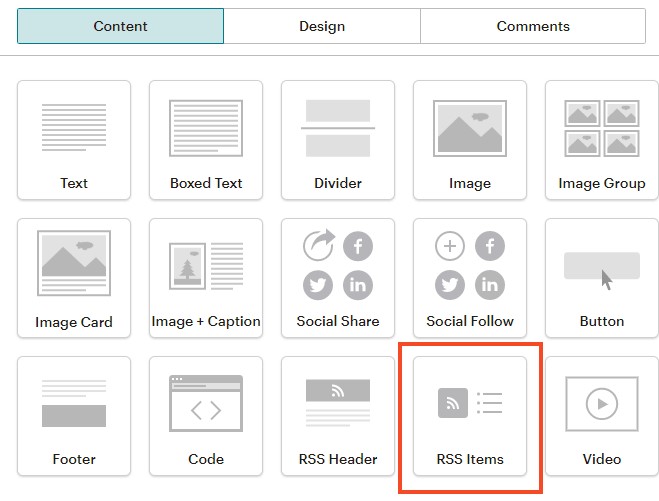
8. Design the email regarding your requirements → Next. Remember to drag in the RSS Items block to your email underneath the text. This will ensure your newest posts appear in the email.
Step 4: Review and Run Your Campaign
Once your email is all set up, you can check your campaign details. MailChimp will detect and tell you if there are any problems. Your job then is to simply click the Resolve button to fix the issues.

If everything is alright, press Start RSS in the bottom right-hand corner of the page to run the campaign. Whenever you publish something new on your feed, MailChimp will automatically send notification emails to your subscribers.
In case you don’t want to start immediately, hit Save and Exit in the top right-hand corner of the page. You can come back to it later at any time. Go to Campaigns on your account management page, and you’ll see your draft there.
Step 5: Track the Success of Your Email Campaign
Last but not least, the best thing about MailChimp is that you can continuously track and improve your email campaigns’ performance. It gives in-depth analytics to help you understand whether your emails are having the desired results.
Here are 3 key metrics you should check for your MailChimp email campaign:
Open Rate: This shows the average number of subscribers who open your emails. Open rates are in charge of analyzing the effectiveness of your email subject lines, sender name, and preheader text.
Click-Through Rate: This provides you with the average number of times subscribers who click on the links to your blogs. Looking at the click-through rate, you’ll be able to understand your email engagement, thereby taking measures to enhance it.
Bounce Rate: This figure illustrates the percentage of your subscribers who didn’t receive the email. A high bounce rate indicates that your email list is full of inactive, fake, or outdated contacts.
Other email metrics comprise unsubscription rate, conversion rate, most visited pages, best-performing links, mobile open rates, revenue per email, etc. But to use these functions, you must upgrade MailChimp to an advanced version or apply other analytics tools.
To check your campaign effectiveness:
- Go to Campaigns → Reports in your admin dashboard.

2. On the Campaigns tab, find the email you want to work with and select View Report.
When opening the report, you’ll see an overview of your results along with additional tabs and menus that show more details about the campaign activity.

Bonus Step: Automate Sending Passwords after Subscription
Sometimes you might want to grant access to password-protected content to those who have joined your email list.
Simply put, your posts or pages are password protected. You desire to send the passwords to your visitors after they’ve subscribed to your site. Then you should check out our step-by-step guide on how to automate sending passwords with MailChimp after subscription.
Final Thoughts on How to Send Blog Posts to Emails
It goes without denying that emails are the most effective way to communicate with customers. If you’re not getting the most of it, you’re definitely missing out on a lot of potential opportunities.
Following the 5 steps mentioned to set up an automated RSS campaign, you’ll be able to easily share blog updates with your subscribers.
We know it may be confusing when you’re just getting started. But don’t worry. Take it step by step, and sooner or later great results will come out.
Let’s crush it now!