
Despite the development of various social marketing platforms, email still remains an effective way to raise brand awareness, attract new customers, and retain the existing ones.
That’s why many business owners are striving to look for the best email marketing platforms. If you’re in their shoes, you’ve come to the right place.
Thanks to the ability to integrate with a bunch of popular contact forms, membership, and eCommerce plugins, MailChimp is a good choice for many businesses.
In this post, we’ll walk you through our instructions on how to add MailChimp to WordPress and create an email list to manage your marketing strategies better.
Let’s jump in!
- Why You Need to Add MailChimp to WordPress
- How to Add MailChimp to WordPress
- How to Create An Email List after Adding Mailchimp to WordPress
Why You Need to Add MailChimp to WordPress
In 2001, MailChimp was born to help businesses with email and online marketing. Over the past 20 years, MailChimp has increasingly affirmed its position as the leading email service provider in the world.
There are many advantages of adding MailChimp to WordPress including:
User-friendly interface
It’s ideal for everyone to add MailChimp to WordPress due to its easy-to-use interface.
You can modify the email by adding your brand image or logo easily with this email marketing platform.
Users are also given free training sessions and videos on how to get started with MailChimp, so they can familiarize themselves with this platform to create attractive emails quickly.
The segmentation feature
This feature helps you classify the different kinds of audiences according to their gender, age ranges, purchase behaviors, and more. From that, you can build more targeted, precise, and relevant campaigns.
Multiple tests
MailChimp provides you with multiple content tests in the higher plans compared to other email services providers.
After testing different combinations of headlines, images, you will receive a complete analysis of each performance. After seeing which combination is working best, you’ll be able to select the best email version.
Let’s move onto our step-by-step guide on how to add MailChimp to WordPress!
How to Add MailChimp to WordPress
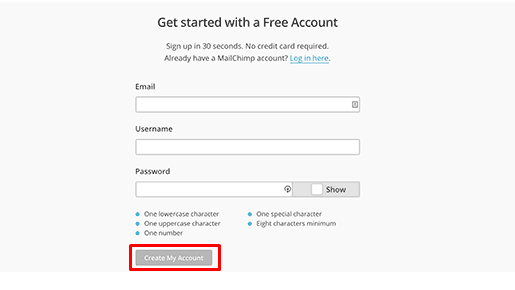
First, you need to create an account on the MailChimp website.
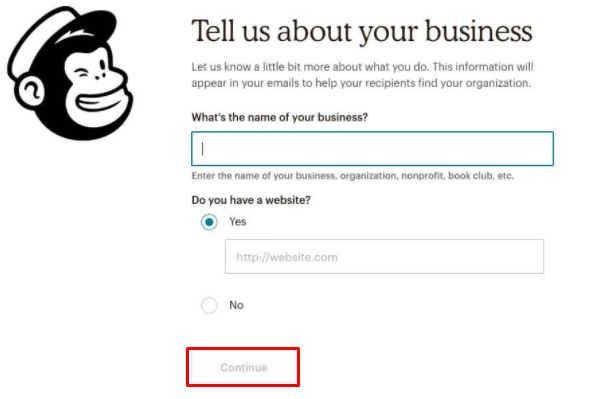
Once done, you need to fill out a short form related to your business information.
The next step is selecting a MailChimp plan that suits your business budget. If you’re running a new and small business, a Free plan would be a wise choice to start.
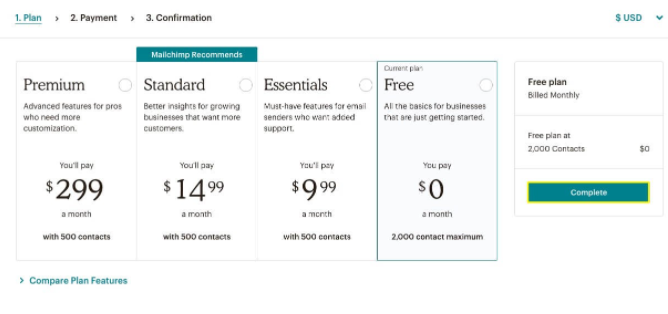
Click on the Complete button once you’re done.
After creating your MailChimp account, it’s time to add MailChimp to WordPress.
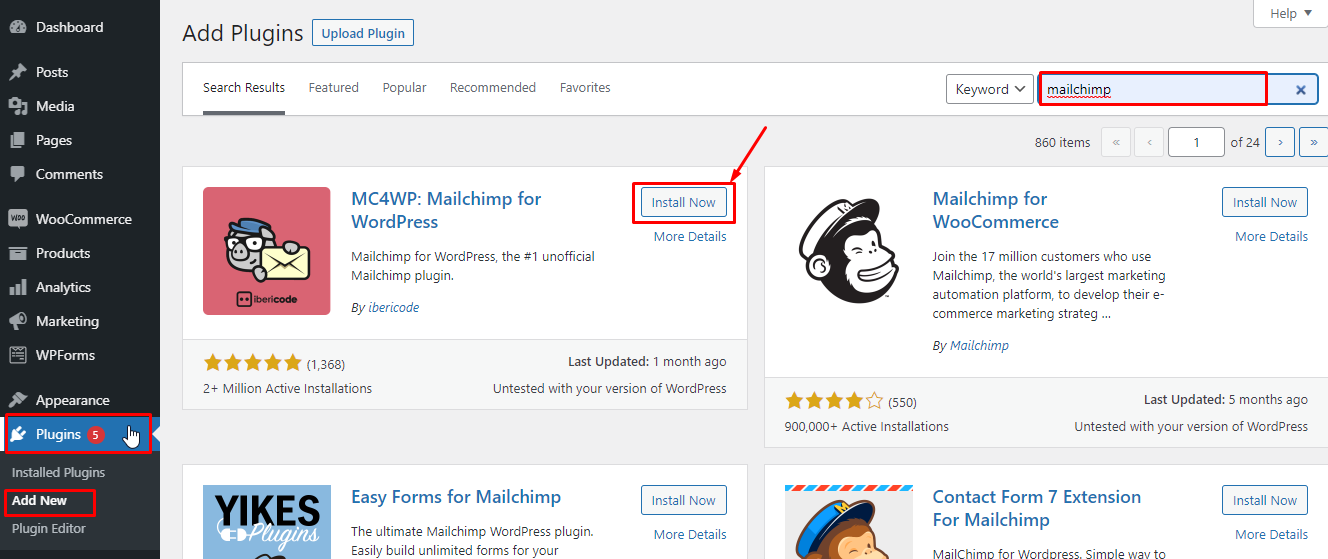
In your WordPress dashboard, go to Plugins > Add New, enter “MailChimp” in the search box and click “Install now” from the search results page.
After installing MailChimp to WordPress, let’s connect this plugin with your MailChimp account using an API key.
The process of entering your Mailchimp API key in the plugin’s settings page goes through 2 steps.
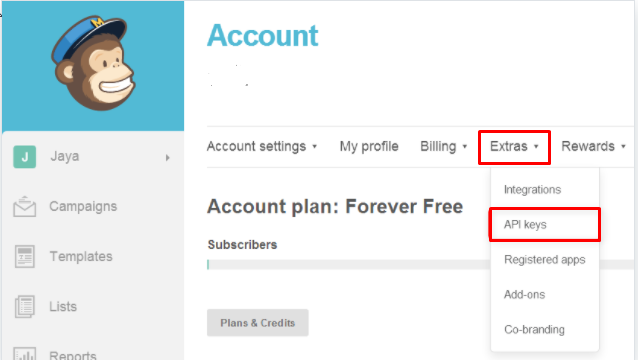
- Step 1: Get your Mailchimp API key
You can get the MailChimp API key by simply logging into your Mailchimp account and heading to Account > Extras > API Keys.
- Step 2: Enter your API key in the settings
Head to MC4WP > Mailchimp in your WordPress admin area and enter your API key in the input field to let MailChimp for WordPress know what API key to use.
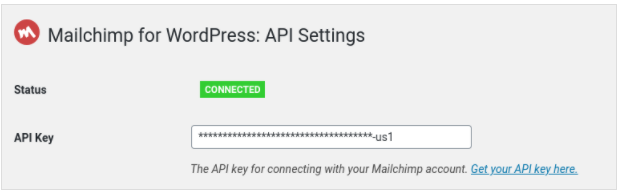
A green box saying “Connected” in the status means you’re now ready to start subscribing visitors to your Mailchimp lists.
How to Create An Email List after Adding Mailchimp to WordPress
Once you activate MailChimp in your WordPress admin area, it’s time to build an email list. It will help you monitor the number of subscribers to your website.
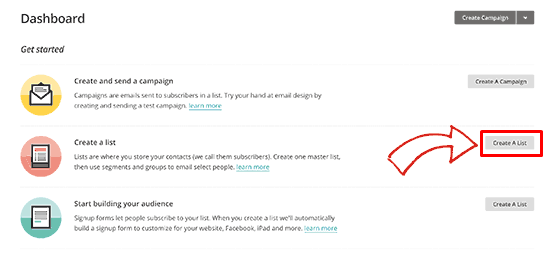
In the MailChimp dashboard, click on the Create A List button.
Then, MailChimp requires you to fill the form to provide information including your email list’s name, your email address where users can reply to, etc. Once you’ve done, don’t forget to click on the Save button.
That’s all, you have successfully created your first email list.
Shape Effective Email Marketing Strategies with MailChimp
MailChimp proves a good choice for you to conduct email marketing strategies. You can start off with a free MailChimp account and upgrade to a premium plan when your business grows.
We’ve walked you through simple ways to add MailChimp to WordPress, so you can easily follow and manage your email marketing campaign.
If you have any questions on how to add MailChimp to WordPress, feel free to let us know in the comment below!
Looking for newsletter sign-up forms? Check out 11 Effective Newsletter Sign-up Form Ideas to Grow Your Email List.