Gravity Forms proves the most flexible tool to create WordPress extract forms and collect data from users. However, sorting this huge amount of data within the WordPress dashboard can be challenging and time-wasting. That’s why learning how to send data from Gravity Forms to Google sheets comes in handy!
In this article, we’ll show you the benefits and a step-by-step rundown of sending data from Gravity Forms to Google Sheets. This way can help to shorten your process of analyzing data in Google sheet.
- Why You Need to Send Data from Gravity Forms to Google Sheets
- 7 Steps to Send Data from Gravity Forms to Google Sheets
Why You Need to Send Data from Gravity Forms to Google Sheets
There are a variety of reasons why you need to share data from Gravity Forms to Google Sheets.
A Large Number of Data to Sort
When collecting a high volume of submissions with a large number of fields, sorting data within the WordPress admin dashboard can be frustrating. Then, exporting data from Gravity Forms to Google Sheets will help you avoid wasting time and effort.
An Easy Way to Analyze Data
With this spreadsheet tool, it’s possible to view form entries in a single directory and drill down to analyze specific forms. To be more clear, you can create graphs and charts to demonstrate a large amount of data with ease. Google Sheets makes it easy to track orders and edit applications as well.
Data Sharing within an Organization
Through Google Sheets, you will be able to share data within your organization. That said, it allows your team to get form entries without needing to access the website dashboard.
7 Steps to Send Data from Gravity Forms to Google Sheets
Firstly, you need to install and activate the Gravity Forms plugin on your WordPress site. Then, we’ll show you how to send data from Gravity Forms to Google Sheets in 5 minutes:
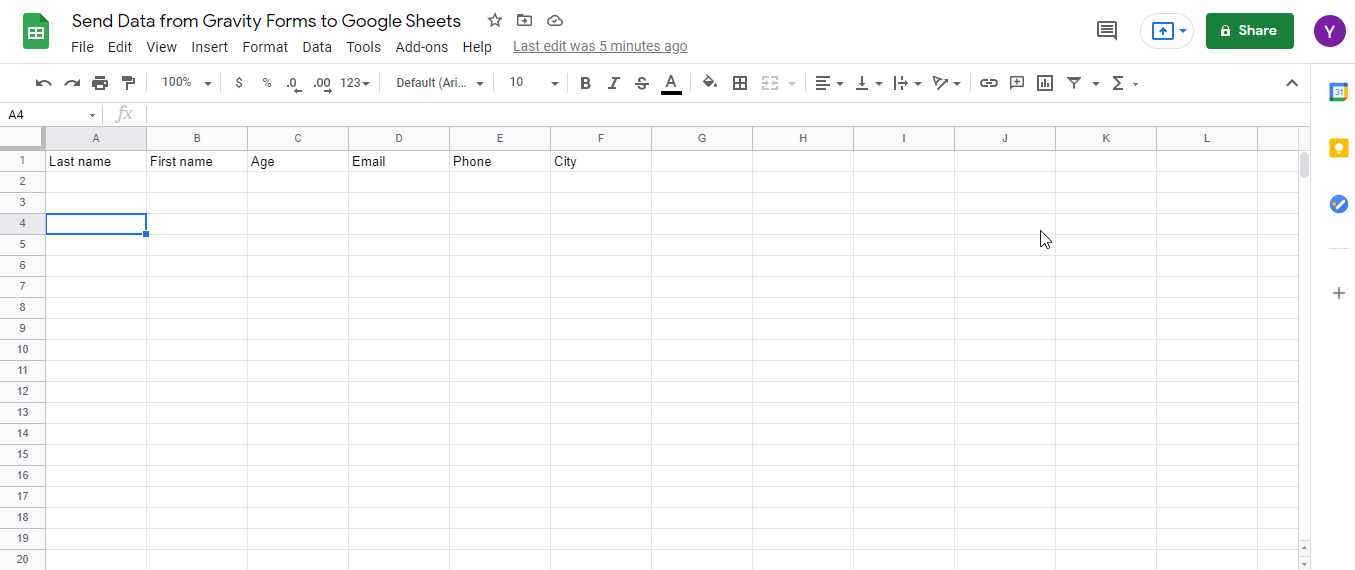
Step 1: Create your Google spreadsheet
Add your header row to the Google Sheets and remember not to change the header row at any point afterward.
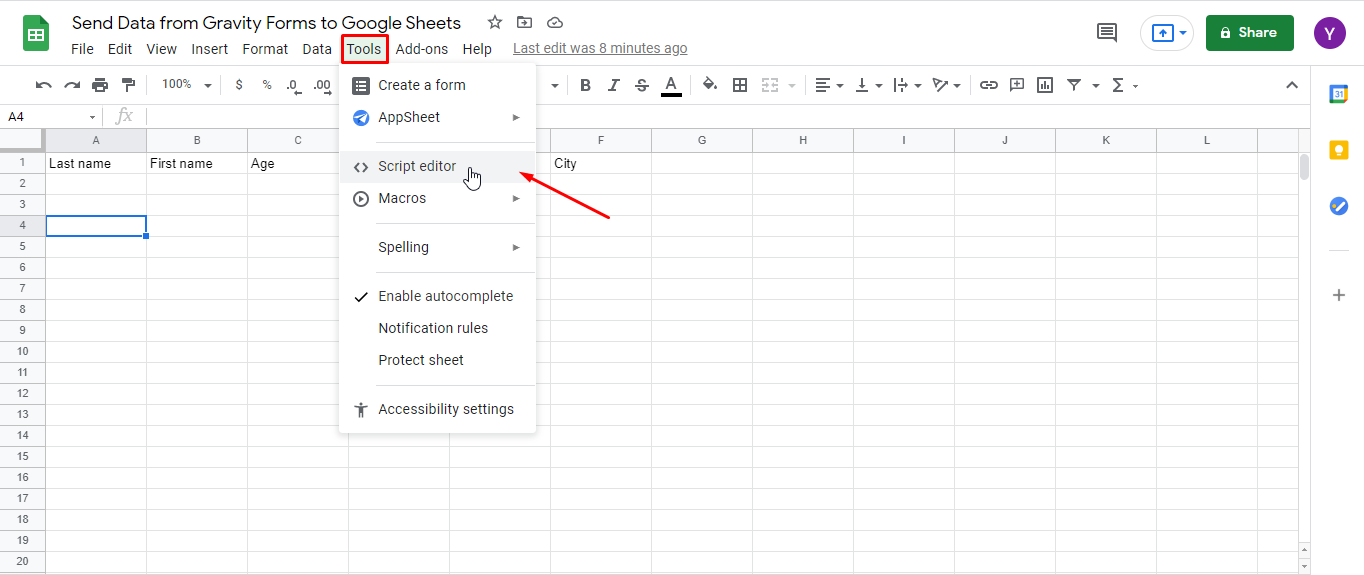
Step 2: Create a new script
Go to Tools and click on Script editor to add a new Google script
Step 3: Add a script
There is a default code in the editor. You need to remove it and insert the following code instead.
function doPost(e) {
if (!e) return;
var sheetID = "GOOGLE_SPREADSHEET_ID";  // Replace this with the Google Spreadsheet ID
var sheetName = "Sheet1";       // Replace this with the sheet name inside the Spreadsheet
var status = {};
// Code based on Martin Hawksey (@mhawksey)'s snippet
var lock = LockService.getScriptLock();
lock.waitLock(30000);
try {
var sheet = SpreadsheetApp.openById(sheetID).getSheetByName(sheetName);
var headers = sheet.getRange(1, 1, 1, sheet.getLastColumn()).getValues()[0];
// Add the data and time when the Gravity Form was submitted
var column, row = [],
input = {
"timestamp": new Date()
};
for (var keys in e.parameter) {
input[normalize_(keys)] = e.parameter[keys];
}
for (i in headers) {
column = normalize_(headers[i])
row.push(input[column] || "");
}
if (row.length) {
sheet.appendRow(row);
status = {
result: "success",
message: "Row added at position " + sheet.getLastRow()
};
} else {
status = {
result: "error",
message: "No data was entered"
};
}
} catch (e) {
status = {
result: "error",
message: e.toString()
};
} finally {
lock.releaseLock();
}
return ContentService
.createTextOutput(JSON.stringify(status))
.setMimeType(ContentService.MimeType.JSON);
}
function normalize_(str) {
return str.replace(/[^\w]/g, "").toLowerCase();
}
Please make sure to replace the sheet ID and the sheet name with your actual ones.

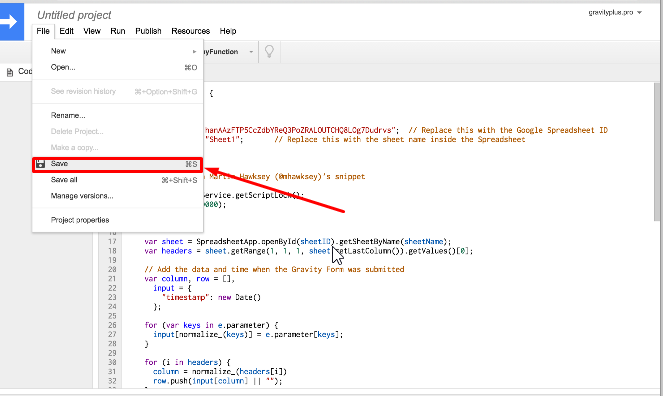
Step 4: Save the script
Save your script by clicking File -> Save, and give your script a name.
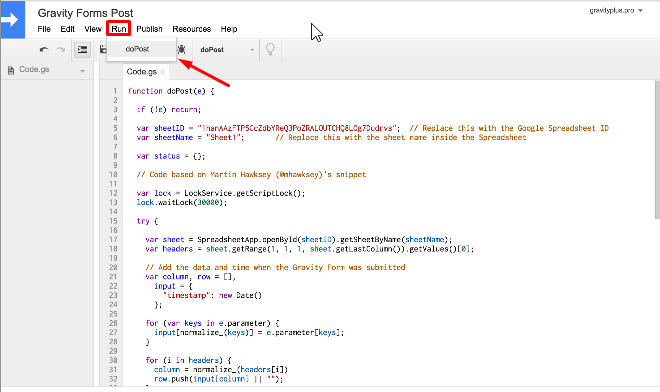
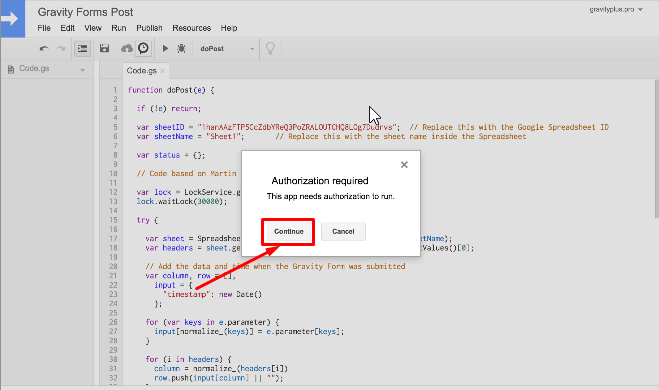
Step 5: Run the script
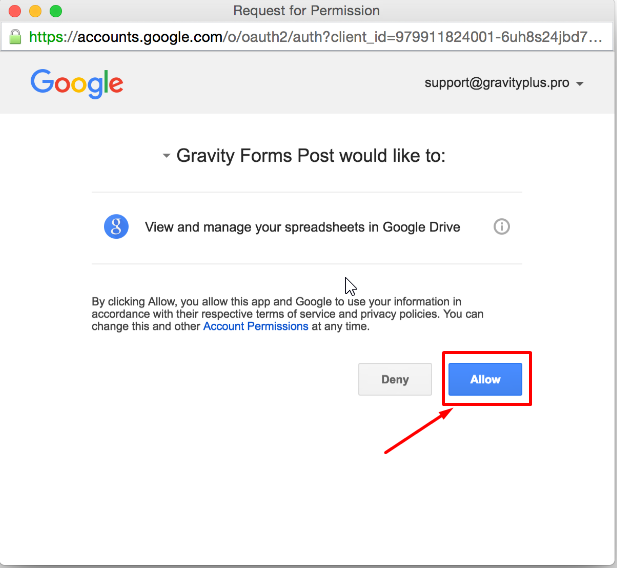
Run the script by going to Run -> doPost in the menu. A permission box will pop up, click Continue, and then Allow.
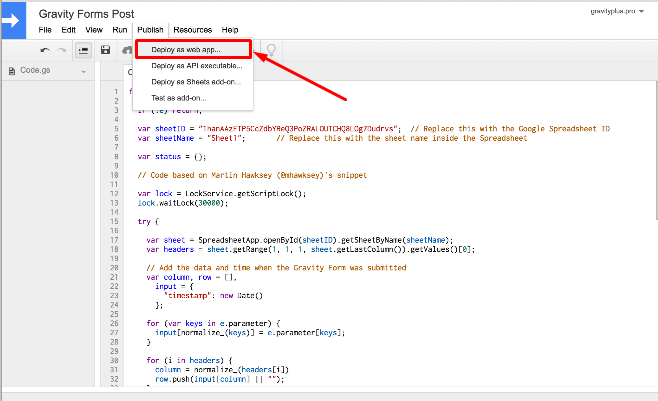
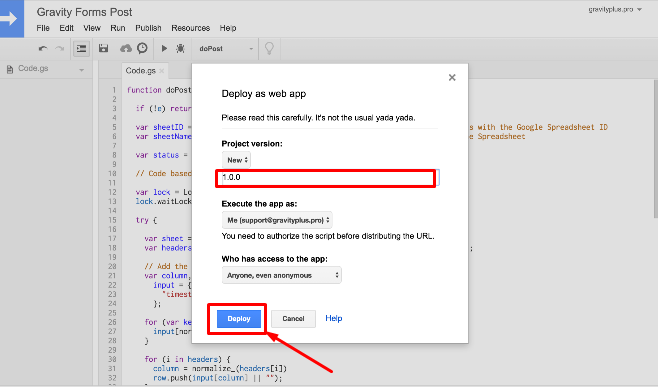
Step 6: Deploy the script
Simply click on Publish -> Deploy as web app
You then fill in some details as follows:
- Project Version: Leave default or enter 1.0.0
- Execute the app as: Me
- Who has access to the app: Anyone, even anonymous
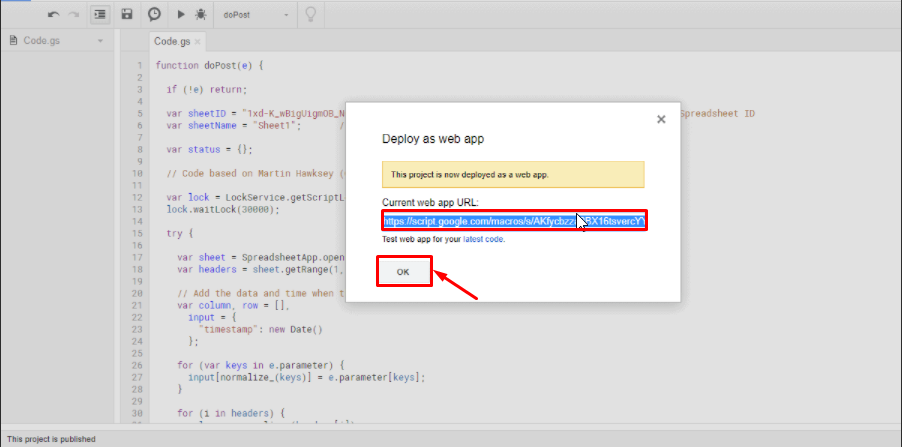
And then copy the current web app URL from the confirmation screen.
Step 7: Create and set new Gravity
In your WordPress dashboard, go to Forms -> Settings > Send to Third Party. Then, a new “Send to Third Party” feed for your Gravity Forms will be presented on your screen.
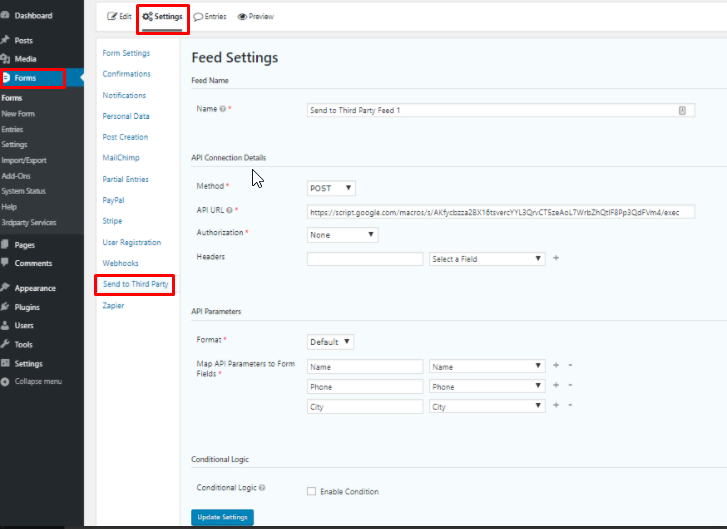
Here is how to adjust your settings:
- Name: Any name you choose
- Method: POST
- API URL: Paste the URL that you copied from the Google Script Web App
- Authorization: None
- Headers: Leave Blank
- Format: Default
- Map API Parameters to Form Fields: Enter the column titles from your Google Sheet. Select which form field you want to be mapped to that column in your Google Sheet via the dropdown.
- Conditional Logic: Optional – you can add conditional logic to this connection to limit which form entries get sent to your Google Sheet.
Finally, save the feed and submit a test form. After submitting, data will appear in your spreadsheet.
You’ve gone through all steps to export data from Gravity Forms to Google Sheets.
Manage Your Gravity Form Data Using Google Spreadsheets
The form will collect the responses that are valuable to you. To analyze them, you should export this data from Gravity Forms to a spreadsheet tool, such as Google Sheets. Storing data in Google Sheets will free you from worrying about any loss of information.
If you get stuck in any step of how to send data from Gravity Forms to Google sheets, let us know by dropping a comment below! Don’t forget to share this article with your friends and colleagues if you find it informative.