Whether you’re a WordPress site owner or eCommerce store manager, striving to boost conversion rates and encourage user engagement plays the top priority.
Among various methods, implementing social login usually contributes to lifting overall conversion rates by 40%. It’s become the most effective way widely used in almost all WordPress sites nowadays.
Believing it or not, around 20% of people would prefer social login to the traditional one.
So, what makes social login powerful and useful for WordPress? How can you make use of social login for your sites?
This article centers on highlighting outstanding social login benefits driving it popular. Plus, 2 easy steps to add social login to WordPress are brought to the table.
Let’s dive in!
Why Social Login is a Must for WordPress Site?
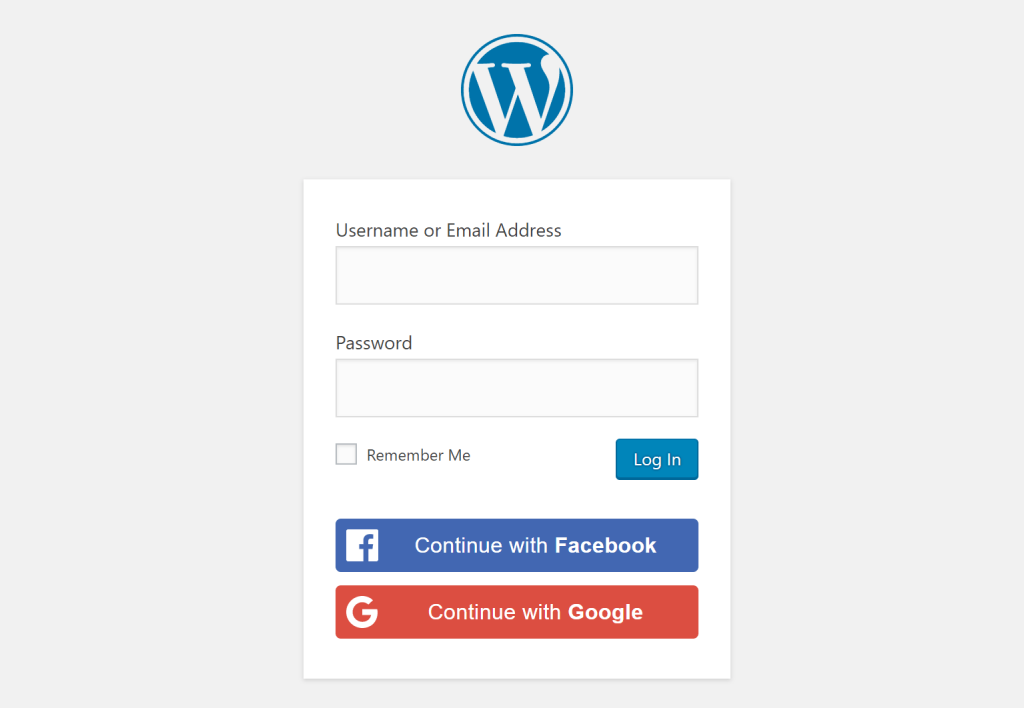
Social login, aka social sign-in, refers to a registration method allowing users to utilize the credentials already created in social networks, i.e Facebook, Twitter, or Google+, and log into your sites.
Social login appears to be a win-win deal for everyone.
From the user’s point of view, it’s absolutely out of this world. This approach streamlines the login process with just one click. Users don’t need to waste time remembering usernames and inputting their passwords. Using social login helps significantly minimize both password fatigue and login failures.
More than that, letting users log in via social platforms benefits you from getting accurate user data.
Due to data breach concerns, users tend to provide false data to get access to the websites requiring separate identities. This ends up no good expanding your WordPress sites or growing your business. Social login, thankfully helps you get rid of this scenario since all the data used to create social accounts must be verified indeed.
For e-commerce brand owners, social login assists in speeding up the checkout process and ensuring smooth shopping experiences for customers. This leads to a lower percentage of bounce rate, fewer abandoned carts, and more sales targets to reach.
“After social login implementation, conversion rates increase up to 40% and shopping cart abandonment can be down by as much as 10%.” quoted LogonLabs.
On top of that, once you add social login to WordPress, you get more chances to collect infinite user data from various sources. Names, email addresses, genders, ages, or even user registered locations and hobbies are instantly stored in your WordPress database. This is, without a doubt, a real gold mine enabling you to segment and target your audiences for different marketing campaigns.
Are these benefits enough to excite you? If yes, keep reading on the next part covering how to add social login to WordPress sites.
2 Steps to Add Social Login to WordPress
There is a wide range of WordPress social login options for you to choose from. In this tutorial, we’ll be using Super Socializer.

With over 60,000 active installations and hundreds of 5-star reviews, Super Socializer proves a trustworthy solution to add social login to WordPress. It gives the green light to numerous social media platforms, such as Facebook, Google, Linkedin, Twitter, etc.
The plugin allows you to add social login to WordPress login, register pages, and comment forms. Once users register on your sites, their profile data will be stored in your WordPress database right off the bat. Plus, you own the right to enable/disable login icons on any pages, posts, or custom post types.
Following are the 2 easy steps to add social login to WordPress sites using Super Socializer.
Step 1: Install and Set up Social Superlizer
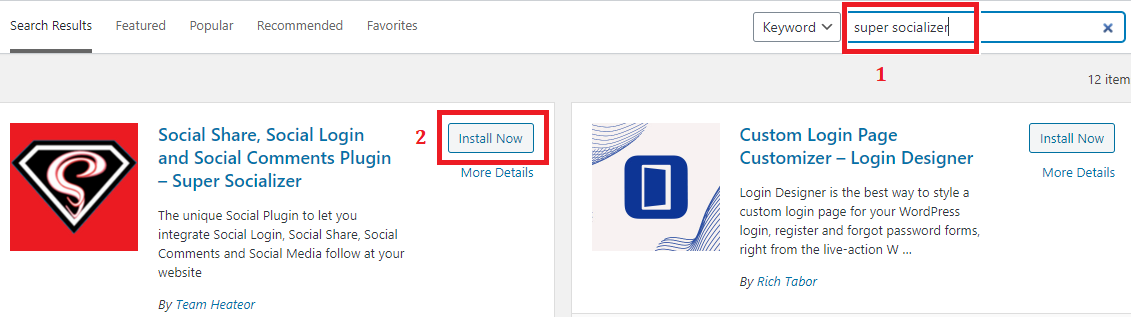
- In your WordPress dashboard, go to Plugins > Add New.
- Search for “Super Socializer” in the plugin search bar. Click “Install Now” and activate the plugin.
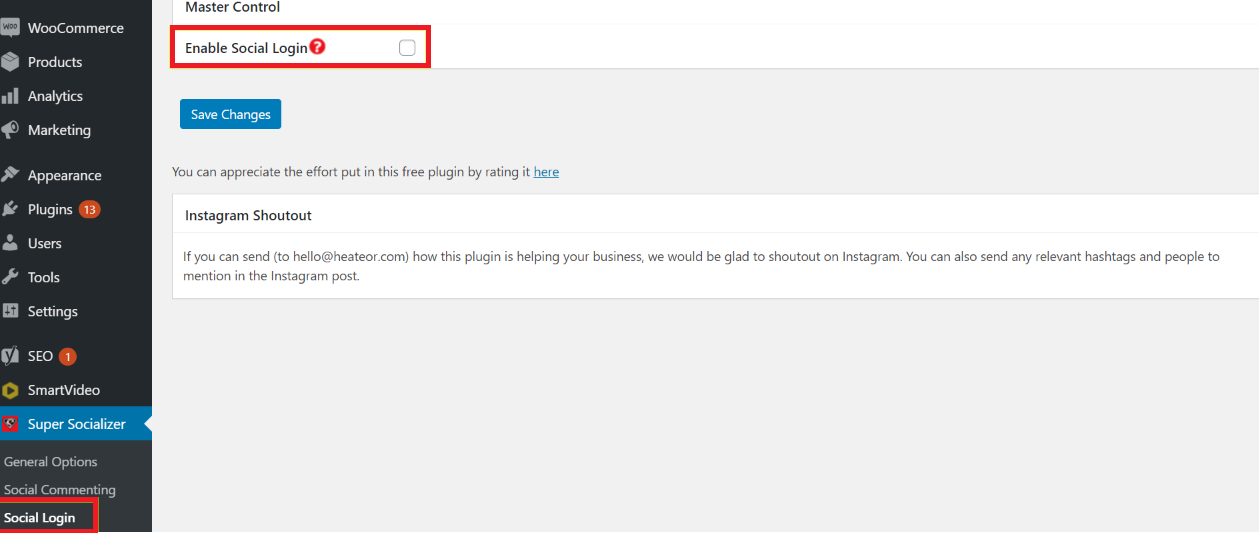
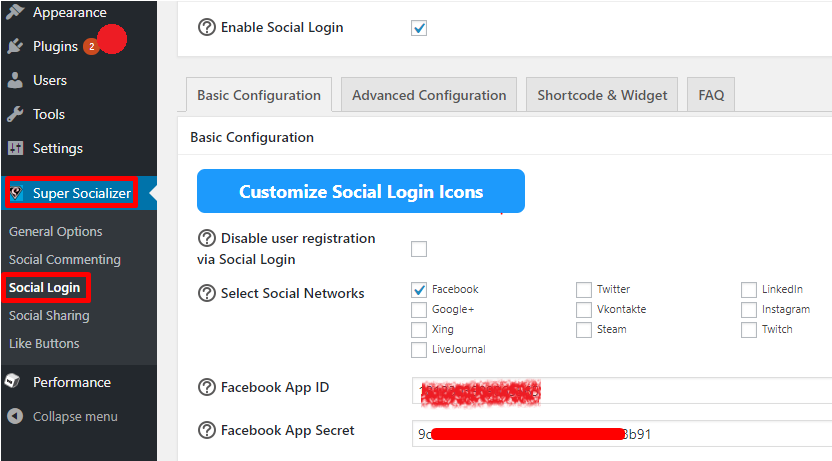
- Head over to the side menu, select Super Socializer > Social Login, then tick on the Enable Social Login checkbox.
- You should see a list of social media platforms, including Facebook, Twitter, LinkedIn, and many others.

Step 2: Enable Social Login
We’ll show you how to enable social login on Facebook, Gmail, and Twitter. Getting started with Facebook first!
- In the “Select Social Networks” section, check on the “Facebook” option.
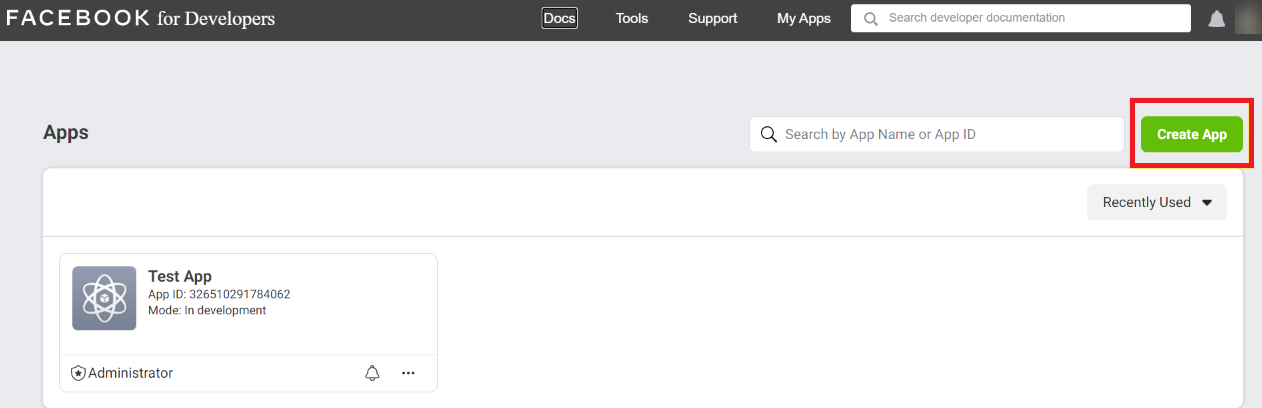
- Next, you need to fill out the Facebook App ID and Facebook App Secret form fields. To do so, go to the Facebook developer portal and create a new app.
Note:
- Clicking on the question mark will show you more info about Application ID and Application Secret Key.
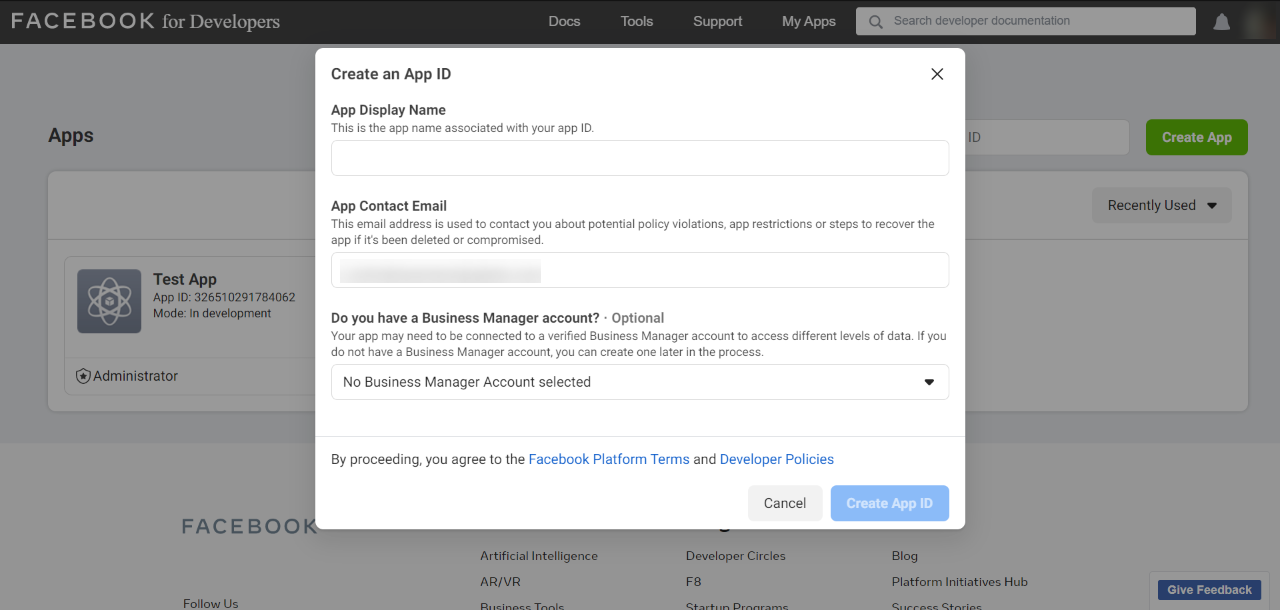
- If you’re completely new to the Facebook developer section, hit Get Started on the home page to get the ball rolling. After that, you’re asked to provide some basic information to get your app ID created.
- For example:
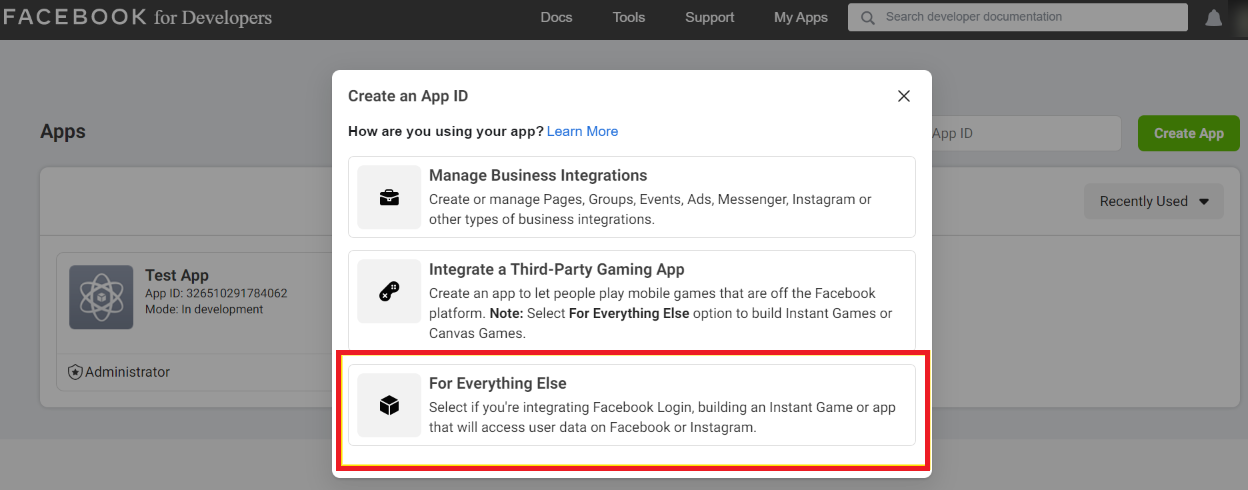
- Click on “For Everything Else” for the “How are you using your app?” question.
- Enter a display name for your app, a contact email, etc.
- Click on “For Everything Else” for the “How are you using your app?” question.
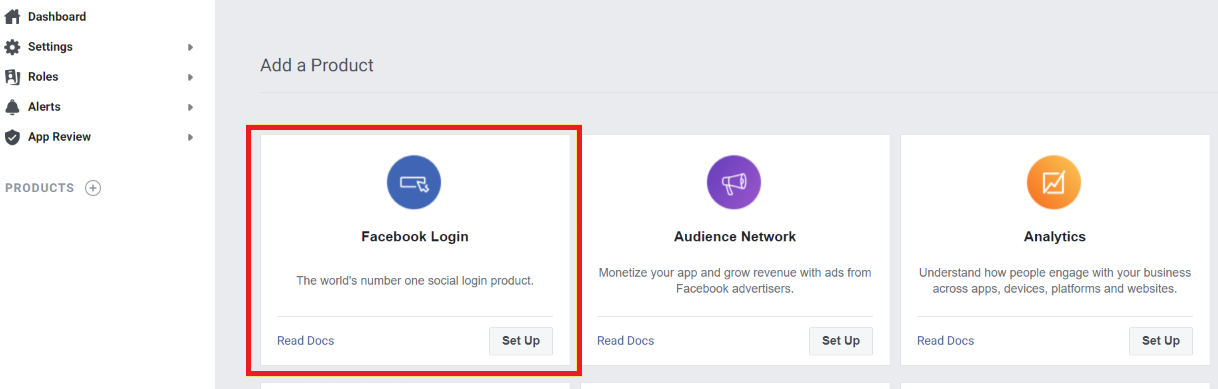
3. Once your app is created, head to set up Facebook integration. In the “Add a product” section, choose Facebook Login.
 4. Next, select “Web” as your platform

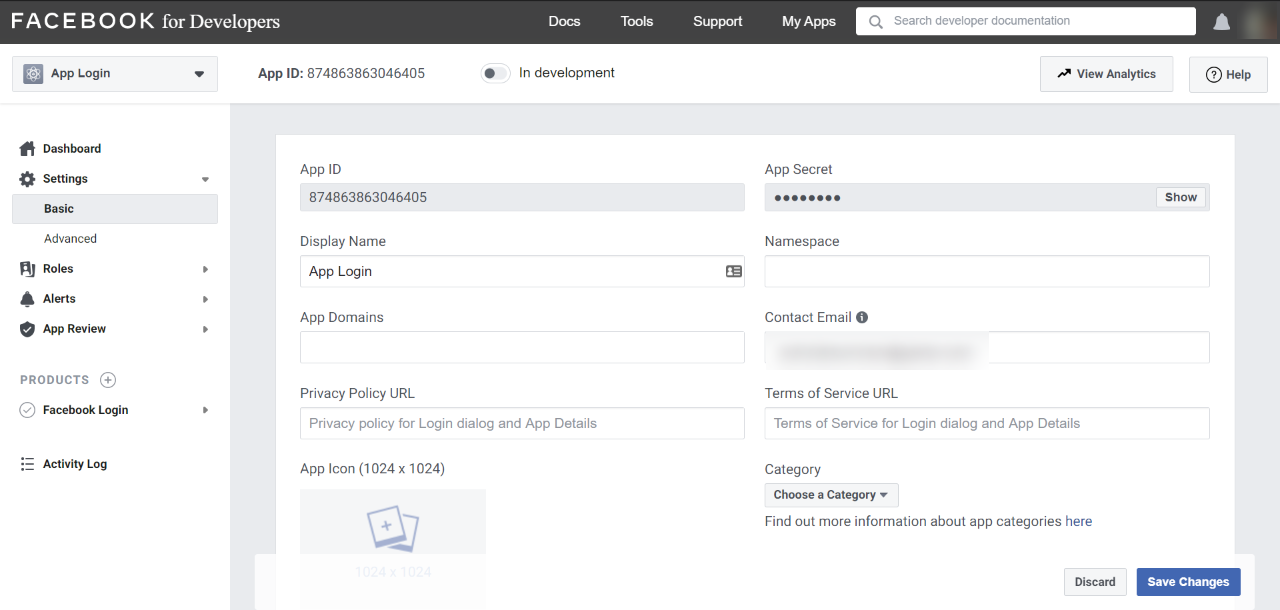
5. Input your site’s URL and hit “Save.” Navigate to Settings > Basic and you can view your App ID and Secret.
6. Copy your App ID and Secret, go back to your WordPress dashboard and paste them to your plugin.
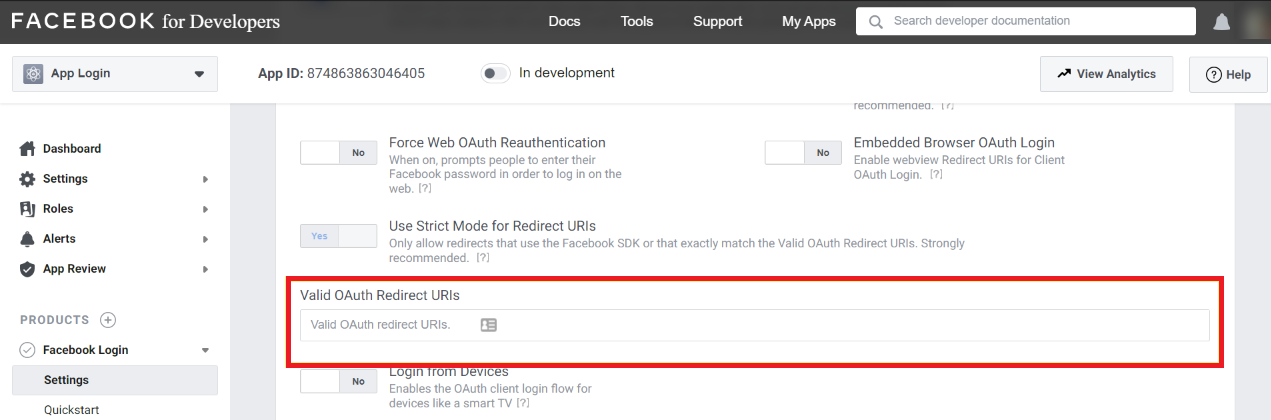
7. A message containing an URL shows up. Add that URL to your Facebook app settings by navigating to Facebook Login > Settings in the Facebook developer page.
8. Paste the URL displayed above into the Valid OAuth Redirect URIs field. Make sure to save your changes.
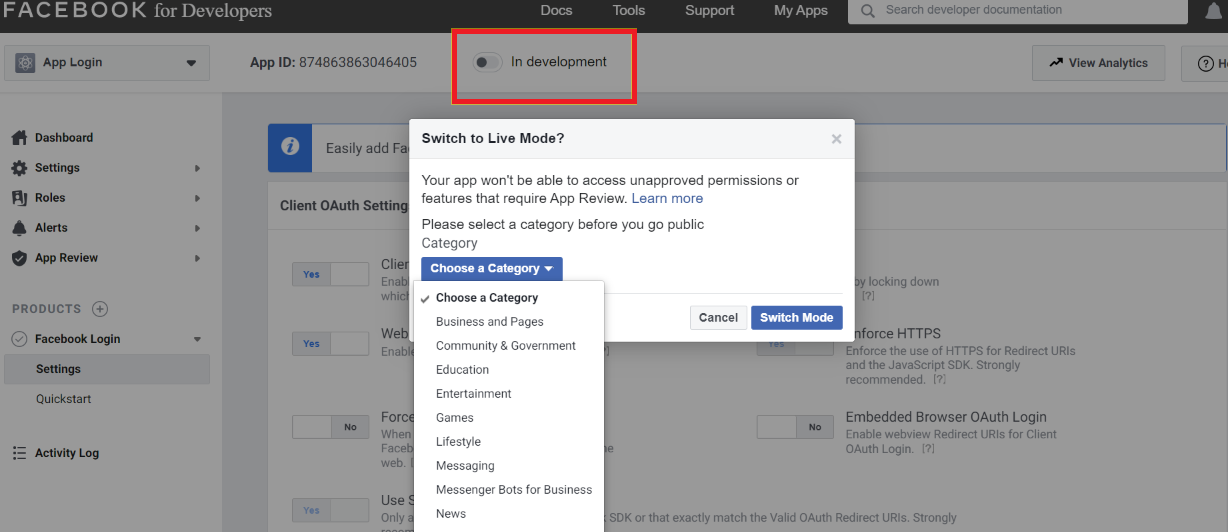
9. It’s time to activate the Facebook login integration on your WordPress site. At the top of the screen labeled “In development” switch, toggle it, choose a category for your app, and then click on Switch Mode.
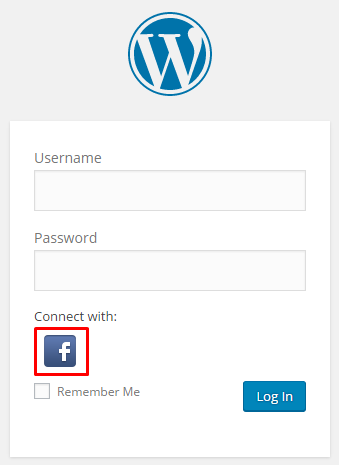
10. Log out to your WordPress site to see the final result. Click on the Facebook icon to test the log-in via your Facebook account.
Notes: For Gmail and Twitter, click on “?” and follow onscreen instructions to get “Application ID” and “Application Secret.”
That’s it! The process of adding social login to WordPress comes to an end.
Create Social Login for Your Site Now!
This article has showcased numerous benefits social login brings to your WordPress sites and eCommerce stores. Not only does it offer easy login, speed up the checkout process, smoothen shopping experiences but it also permits you to gather unlimited accurate user data.
What’s more, we’ve spelled out the 2 hassle-free steps to add social login to WordPress using Super Socializer.
If you get stuck on any step above or have a better way to add social login to WordPress, feel free to mention them in the comment section below!