If you’re looking for ways to create electronic signatures on Mac, this article will hit the spot!
Mac comes with a built-in Preview app to let you electronically sign your document without any fuss. You don’t even need a scanner to scan your signature and upload it to your Mac.
Besides the Preview app, it’s easy to sign documents in Mac using Microsoft Word too.
In this post, we’ll focus on how to create electronic signatures on Mac using both the Preview app and Microsoft Word. All the guides are broken down below to make them as easy to understand as possible!
- How to Insert Electronic Signatures in Preview Mac
- Create Electronic Signatures on Mac Using Microsoft Word
How to Insert Electronic Signatures in Preview Mac
Creating electronic signatures on Mac is just a breeze thanks to its built-in Preview app. The whole process just takes place in 2 steps:
- Step 1: Save your electronic signature on Mac
- Step 2: Insert it into the document that needs to be signed
We’ll spell each step out in detail below.
Save Your Electronic Signatures on Mac
- On your Mac, open the document you need to sign in Preview.
- Click on the Pen icon to open the Markup toolbar. If it’s already showing, just select the Sign icon directly.
- Choose Create Signature > Click Here to Begin. You have three ways to create electronic signatures on Mac:
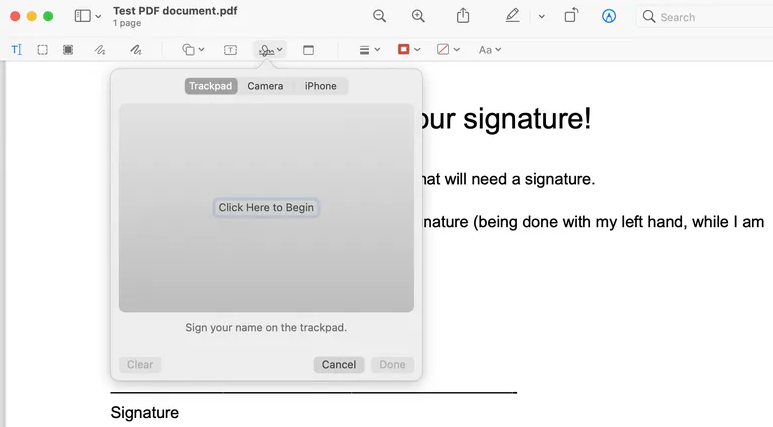
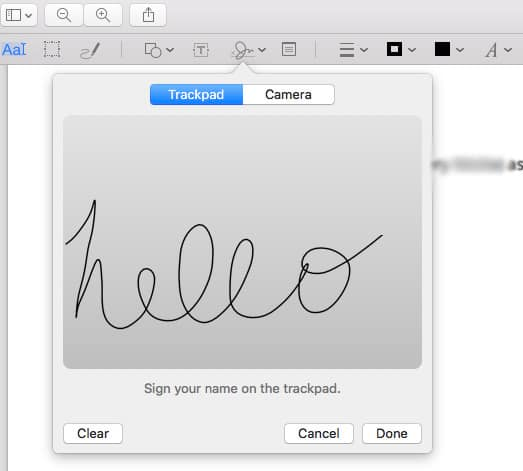
Sign with Trackpad
This option lets you write down your signature on Mac’s trackpad with your fingers.
- Simply hit Trackpad, click the text as showed up, sign your name, press any key, then click Done.
- Click Clear when you want to delete the signature and try again.
Create Electronic Signatures on Mac by Camera
You need to sign on white paper and then show it to your camera.
- Click Camera.
- Hold the white paper containing your signature in front of the webcam. Your signature and the blue line in the window should be leveled with each other.
- Hit Done once your signature shows up in the window. Click Clear if you want to remove the signature and try again.

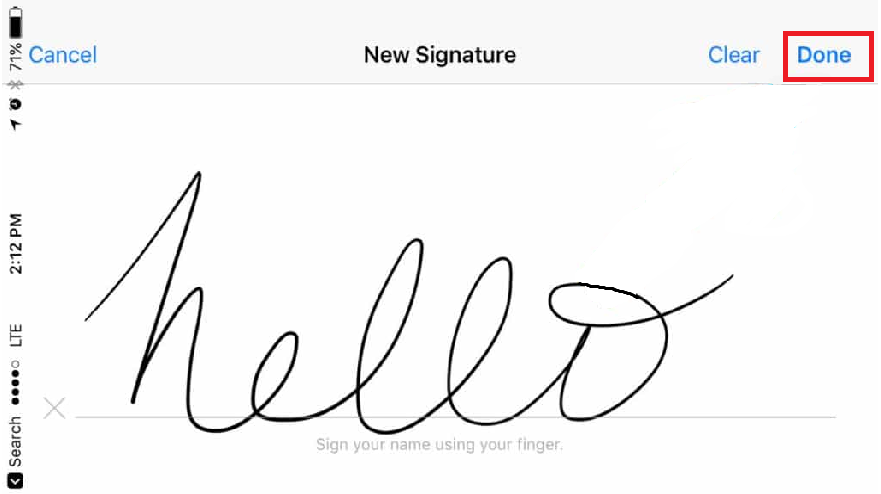
Sign with Ipad or iPhone
- Click on Select Device and choose your desired devices (if more than one is available).
- Use your finger to sign on iPhone (or Apple Pencil on Ipad), then click Done.
- Click Clear and try again in case you plan to create a new signature.
Once done, your signature will be in sync with your iCloud account. Later, no matter what Mac you sign into, as long as you use your Apple ID, your signature will always be available in Preview.
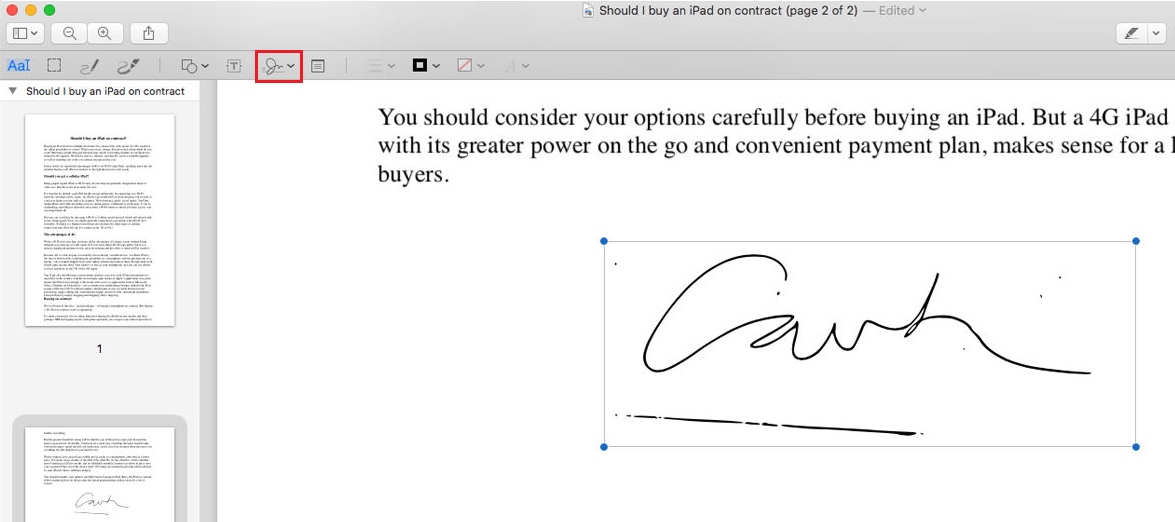
Insert your Signature into PDF files
Click on the Sign icon again, after that choose the signature you’ve created from the dropdown, and then drag it into the document. You can use the adjustment handles to resize your signature.
How to Delete Digital Signatures in Mac
While Preview keeps your signature copies saved by default, you can still delete them without hassle. This comes in handy in case you borrow or share a Mac with others and don’t want your signatures to be leaked out.
After you’ve done with your signatures, just head to the Markup Toolbox, click the Sign icon and hover your cursor over the one you want to delete. An X sign will display for you to click on to remove the signature from Preview.
Create Electronic Signatures on Mac Using Microsoft Word
Microsoft Word isn’t native to Mac. That’s why it doesn’t support generating electronic signatures or any digital certificates on this device like on a PC.
However, users find it common to use Word to sign documents in Mac by adding signatures as an image to your document. Seem confusing?
The step-by-step guide below will shed light on how to create electronic signatures on Mac using Microsoft Word.
- Open any document in Preview. Make sure it has a large space of the white background.
- Insert your existing signature in the white space of the document using the steps in Preview above.
- Screenshot the signature using the shortcuts Shift+Command+4. Hold and press the crosshairs around your signature and crop it. Save that screenshot.
- Open the document you intend to sign in Microsoft Word.
- In your taskbar, click Insert > Pictures > Picture from File. Select the signature screenshot you’ve just saved and upload it to your Word document.
- Click on the picture to open the Picture Format tab in the ribbon. Click Crop in that tab to resize your signature, then drag it to the right position.
- Back to the Insert menu, click Auto text > New to type the text under the picture. Remember to choose both texts and images.
- Enter the name of your signature in the popup. Click OK once done.
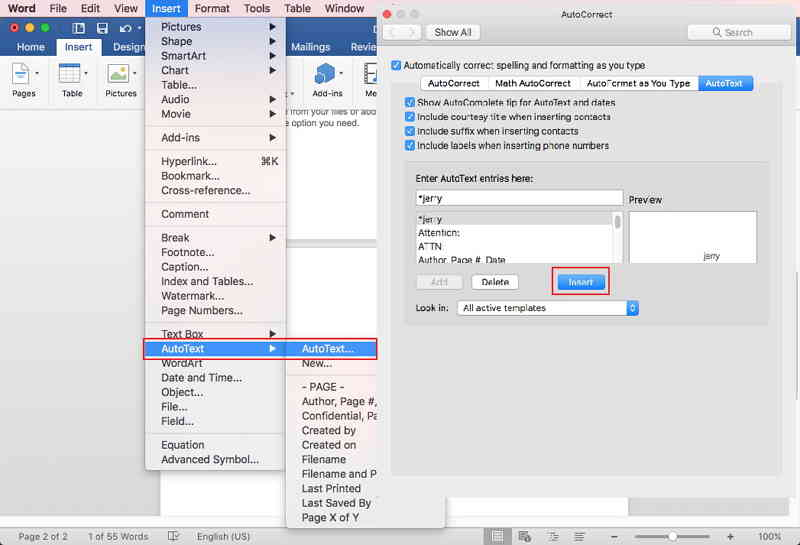
Image Source: wondershare
Final Words
This article has walked you through 2 ways to create electronic signatures on Mac, either using Preview or Word.
In case you share a Mac with others and wish to prevent your signatures from abuse, you’d better delete those that are saved in Preview by default.
If you get stuck in any steps above, let us know by commenting below and we’ll reach out to you as soon as possible.
For anyone using Adobe Reader, check out how to sign in Adobe Reader here!