The release of Office 365 has significantly assisted millions of businesses in simplifying and streamlining their workflow. With cloud computing technology, people can work anywhere at any time with Internet connecting devices. You can access and share files through multiple devices, including PC, laptops, tablets, and mobiles.
Coming as a default experience for Office 365, Outlook 365 allows you to make use of cloud mailboxes to optimize your work processes. You can freely create and change signatures in Outlook online, then send emails to your partners right off the bat.
The topic for discussion today centers on how to change signatures in Outlook online. Users making use of the classic version of Outlook can leverage this post to add and edit signatures as well.
- How to Create and Edit Signatures in Outlook Online
- How to Change Signatures in Outlook Online (The Old Version)
How to Create and Edit Signatures in Outlook Online
Anyone who is using Office for business, Office 365 Small Business, Outlook on the web for Exchange Server 2016 can refer to this guide to create and edit signatures on Outlook online.
If you find all the instructions here unfamiliar with your Outlook, it’s likely that you’re using its old version. No worry, we’ll show you the process of adding signatures to classic Outlook on the web in the next section.
To change signatures in Outlook online, all you need to do include:
- Sign in to your Office 365 account on the web and go to Outlook.
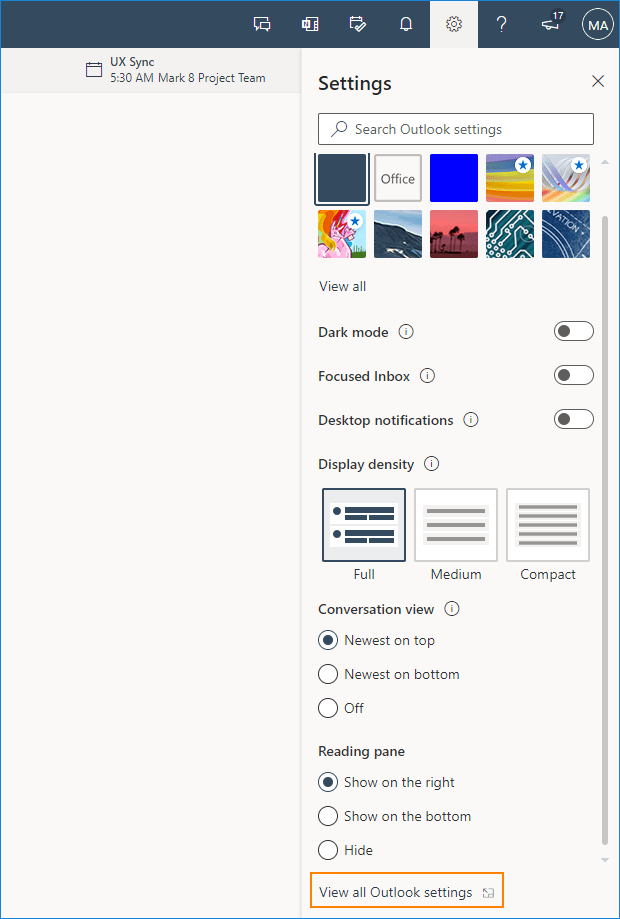
- Click on the gear icon at the top-right corner of your screen to open the Settings. Scroll down to the bottom of your screen and choose View all Outlook settings.
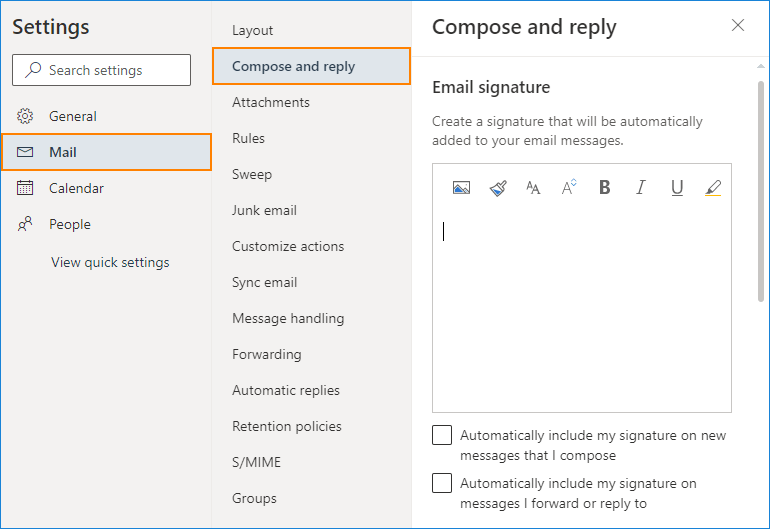
- Select Mail > Compose and reply.
- Enter your signatures in the Email Signature box. Check all the boxes if you want to automatically include your signature on newly composed messages or forwarded messages. If you don’t choose any options, you’ll have to manually re-create signatures when composing emails.
- When you’re satisfied with your signature, hit Save.
Note:
- One account can have one signature only.
- You can always come back to the Compose and reply page, select or deselect the check box to auto-include your signatures.
Manually Add Your Signatures to a New Message
In case you don’t select any checkboxes in step 4 above, you have to manually add your signatures to a new message.
- Open your mailbox and select New message.
- Fill in your message then choose More actions > Insert signature at the bottom of the compose pane.
- When your email message is ready, hit Send.
How to Change Signatures in Outlook Online (The Old Version)
The process of creating a signature in the classic Outlook is quite simple. It involves 3 steps.
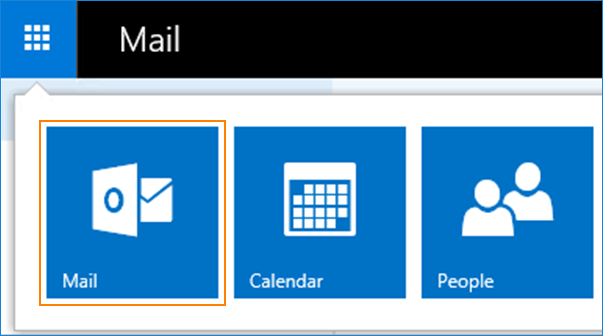
- Sign in to your Outlook account, click on Mail.
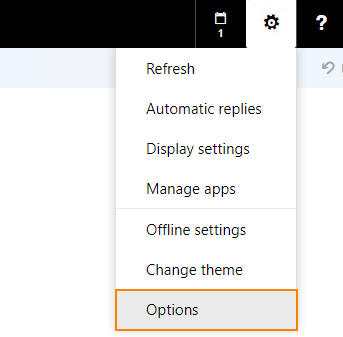
- On the top navigation bar, select Settings > Options.
- Right on your left pane, go to Mail > Layout and select Email signature.
- Enter your signature in the Email signature box. Check on the Automatically include my signature on new messages I compose to make sure your signature will be added to every new message. If you don’t, you can manually add your signature to a selected message, which we’ll mention in the bonus section.
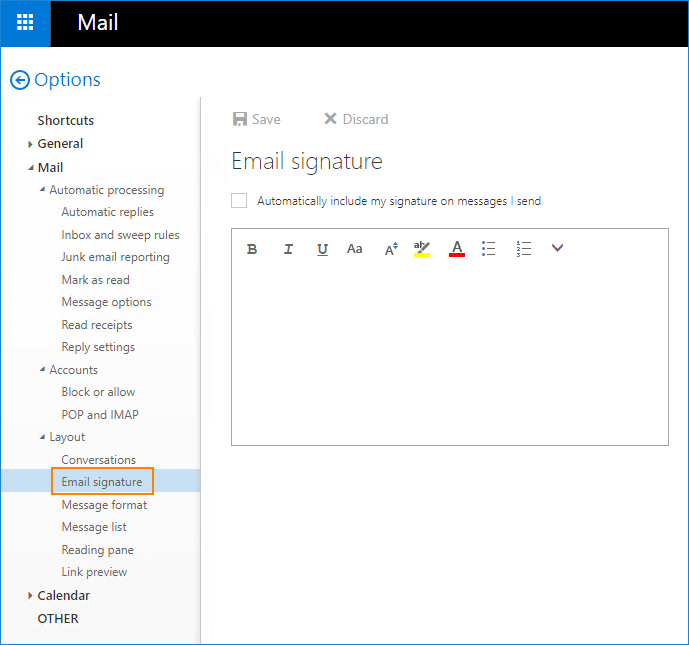
- Hit Save when you’re done. Head back to your inbox in Outlook on the web, you should see your signature at the bottom of your email when you create a new message.
Note:
- The tools lack support on uploading an image file (in a .gif or .jpg format for instance) for signatures. However, you can copy an image from a webpage and paste it into the signature box.
- You can return to the Email signature page anytime to check/uncheck the Automatically include my signature on new messages I compose option.
Bonus: Insert Signature into a New Messages in Classic Outlook
In case you didn’t select the mentioned checkbox above, which auto-add signatures to all outgoing messages, you can add them later when writing email messages.
- Navigate to your mailbox and choose the New icon to create a new email message.
- Type your message, and then choose More > Insert signature on the toolbar.
- When your email message is ready, hit Send.
Conclusion
Outlook 365 allows you to create and edit signatures without any fuss.
We’ve guided you through how to change signatures in Outlook online.
Anyone using Office for business, Office 365 Small Business, Outlook on the web for Exchange Server 2016, or even the old version of Outlook can refer to this article to easily edit signatures in Outlook on the web, send emails instantly, and streamline your workflow.
In case you get stuck on any step above and need our help, drop us a line in the comment section below and we’ll get back to you as soon as possible. In the meantime, spend 2 seconds to join our Facebook group for better support!
You may be also interested in adding digital signatures to Excel or creating digital signatures in Word.